Admin Editing
This page provides guidance to Change-HI administrators on how to help maintain the Change-HI/EDU site.
Motivation
The Change-HI project maintains several public-facing sites: the Hawaii Data Science Institute site, the Change-HI EPSCoR site, and the Change-HI/EDU site. The first two sites are implemented using WordPress, but Change-HI/EDU is implemented using Morea, and so the process for maintaining the site is quite different.
To make changes to a WordPress site, an administrator can:
- Log into the WordPress admin panel associated with the site,
- Make changes to pages (or creates new pages) using a WYSIWYG editor,
- Press a "Preview" button to review the changes, and finally
- Press a "Publish" button to make the changes "live" on the public site.
To make changes to the Change-HI/EDU site, an administrator can:
- Log into GitHub, and traverse to the Change-HI/EDU github repository.
- Edit one or more Markdown files using a browser-based editor.
- Commit those files after making changes to save them to the repository.
- Step (3) automatically kicks off a build of the site. If no mistakes were made during editing, then the changes will be live on the public site within a couple of minutes. If not, then the site stays the way it was before.
At first glance, changing the Change-HI/EDU site seems much more humbug. First, the files are in a weird format called "Markdown". Second, it seems like you can't "preview" your work before publishing it. Third, what happens if there are mistakes? How do you even know?
All of these problems can be addressed, but requires a certain amount of tool installation and training (which the Data Fellows are receiving as part of their workshop development).
To simplify things for Change-HI administrators, let's try the following process to start:
- Drafts of documents to be posted on the Change-HI/EDU site are developed initially as Google Docs and circulated for review.
- When ready for publication, Philip will create a new page in the Change-HI/EDU site that contains the document, translated into Markdown format.
- If minor changes need to be made, then a Change-HI administrator can use the following process to make the edits.
Edit a document
Later, you will learn how to create and add new documents. For now, let's just learn how to make changes to an existing document, which is thankfully pretty easy.
Login to GitHub
Sign up for an account on GitHub here: https://github.com/join
Once you have signed up, email Philip with your GitHub username so he can give you privileges to edit the Change-HI/EDU files. GitHub will email you an "invitation" to join the Change-HI GitHub organization which you will need to accept.
Find the file of interest
The Change-HI source files are at: https://github.com/change-hi/change-hi.github.io:
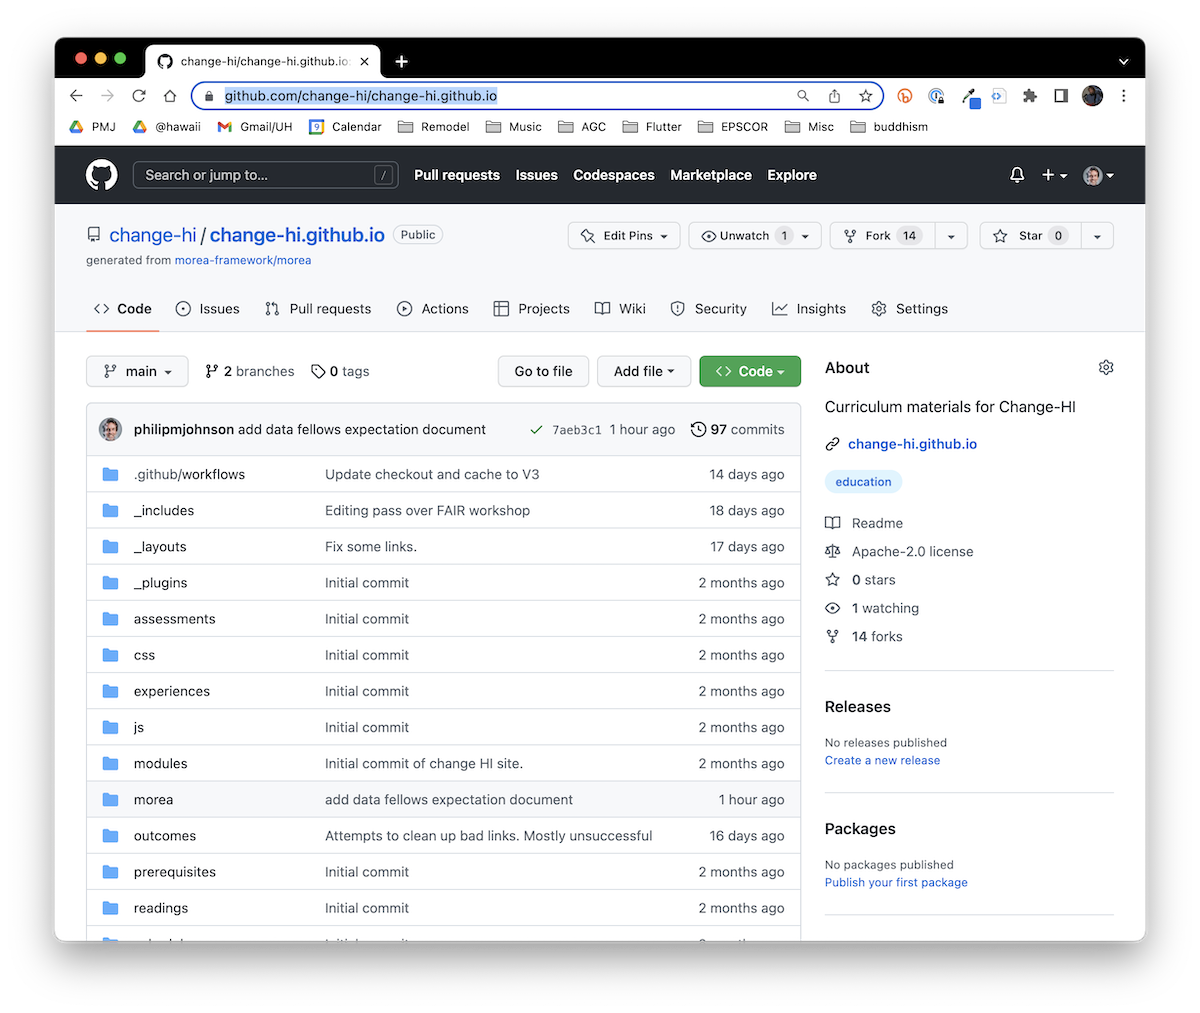
This is a public repo, so anyone can see it, but only GitHub users who have "write" access can actually make changes.
Make sure you are logged in to GitHub (check the upper right corner) and that Philip has given you "write" permission before proceeding.
The Change-HI source files are in the morea/ directory. Click on the "morea" link at the top level to navigate into that directory:
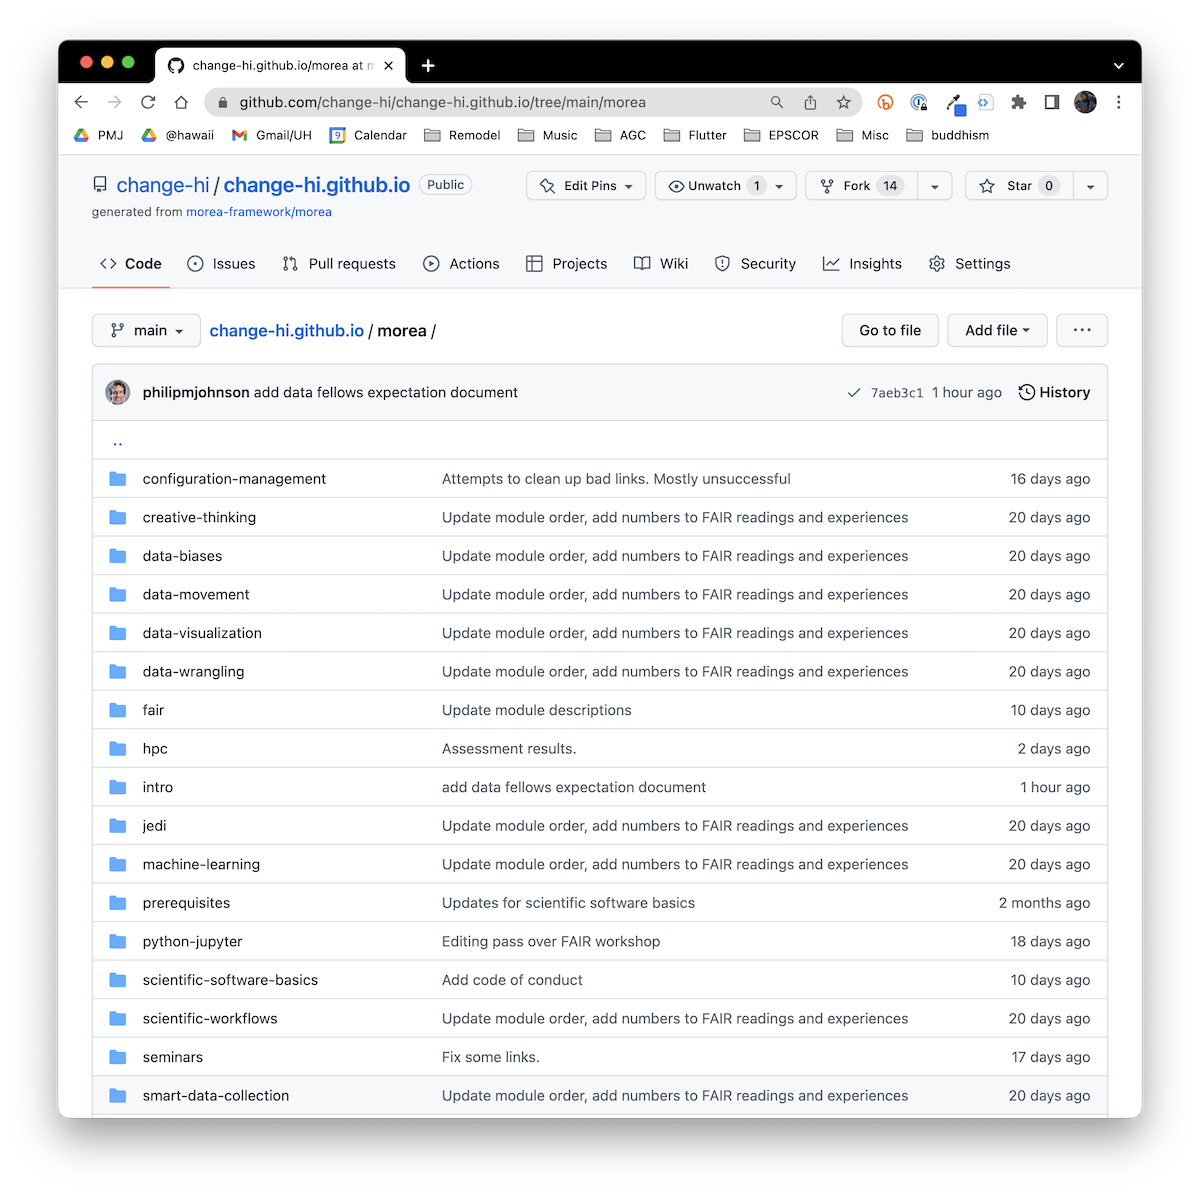
You can see that the morea/ directory itself contains of a bunch of directories. Each of these directories contains files that implement a single module in the published site.
Let's say we want to edit the page regarding Data Fellows expectations. That's in the Introduction module, so click on the "intro" link to see all of the files in that directory:
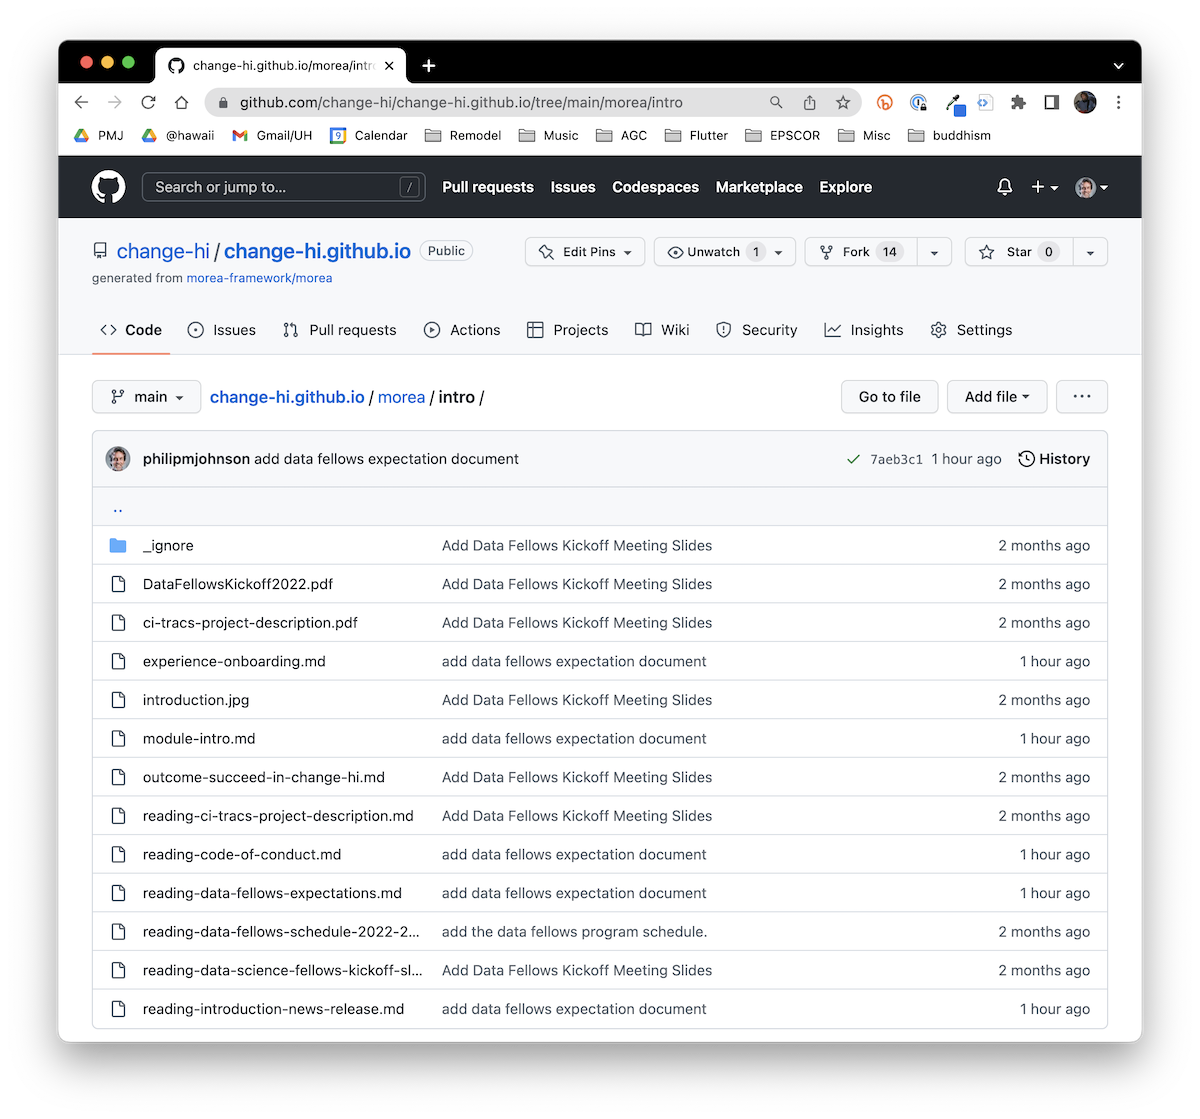
Finally, click on the "reading-data-fellows-expectations.md" link to see the source for the file:

This might look a bit strange, but don't worry.
Edit the file
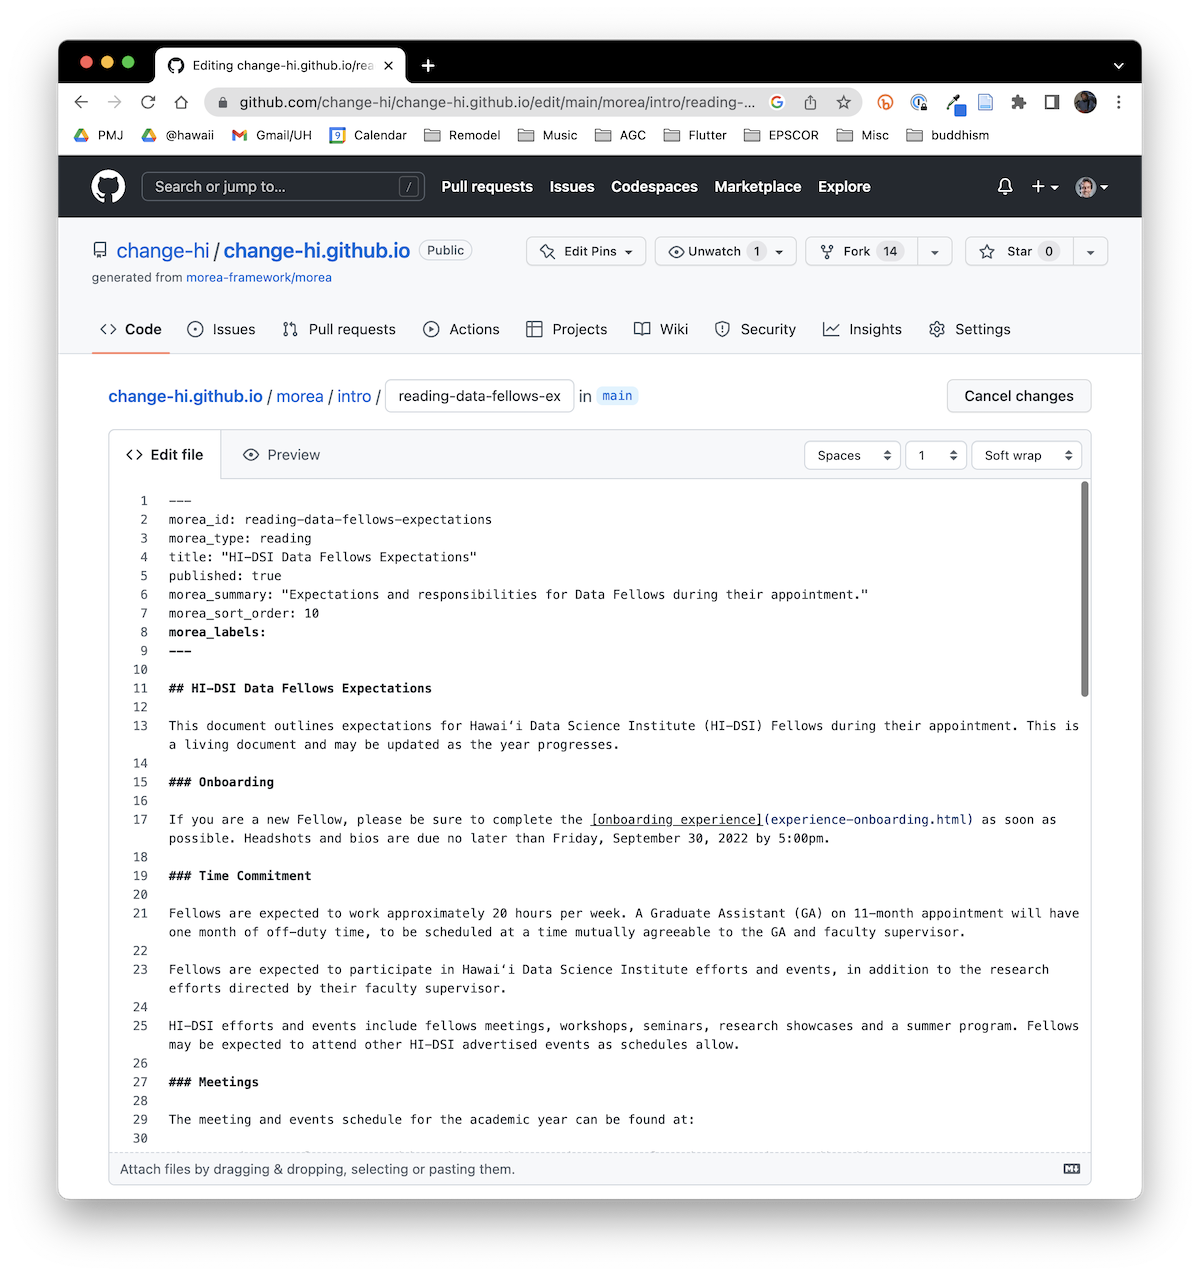
GitHub allows you to edit any page using your browser. To access the browser editor, locate the pencil icon (right hand side, about a third of the way down the page), click the down arrow, and select "Edit this file". Or, just type "E". Either way, you will get the following screen:

Notice that the text in this file is written using a format called "Markdown". If you want, you can stop now and read this simple tutorial on Markdown.
Let's say you just want to change the date listed in the Onboarding section of this page from Friday, September 23 to the following Friday, September 30.
Just edit that text like you would any document:
Now scroll to the bottom of the page. Type in a short comment describing the change (in my case, I wrote "Changed due date for onboarding"):
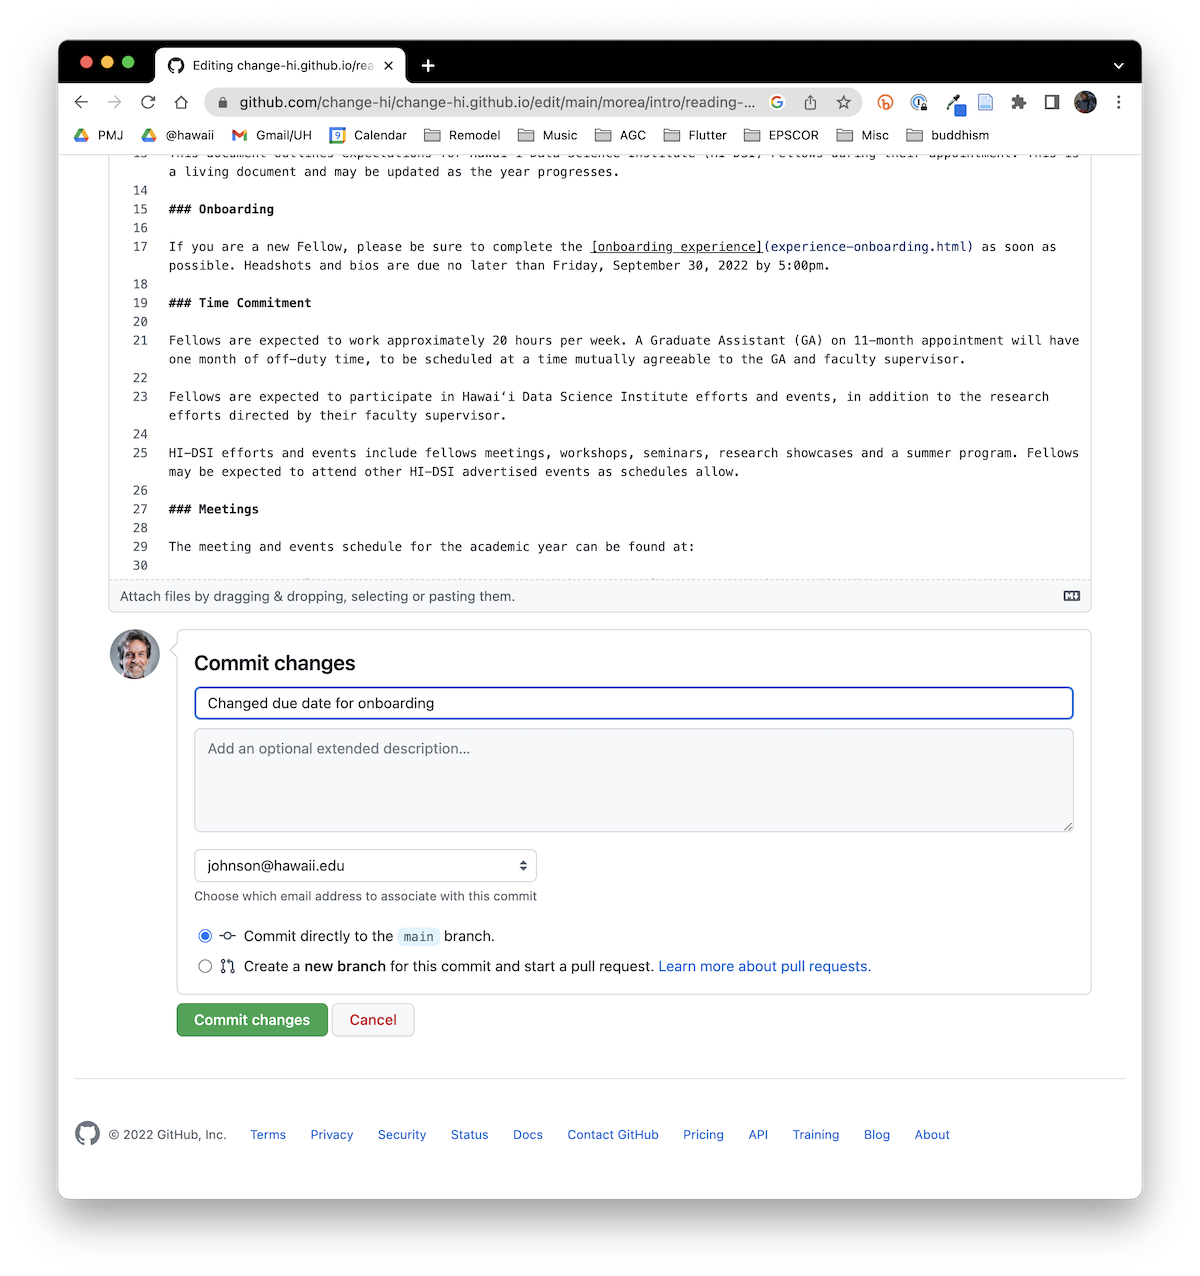
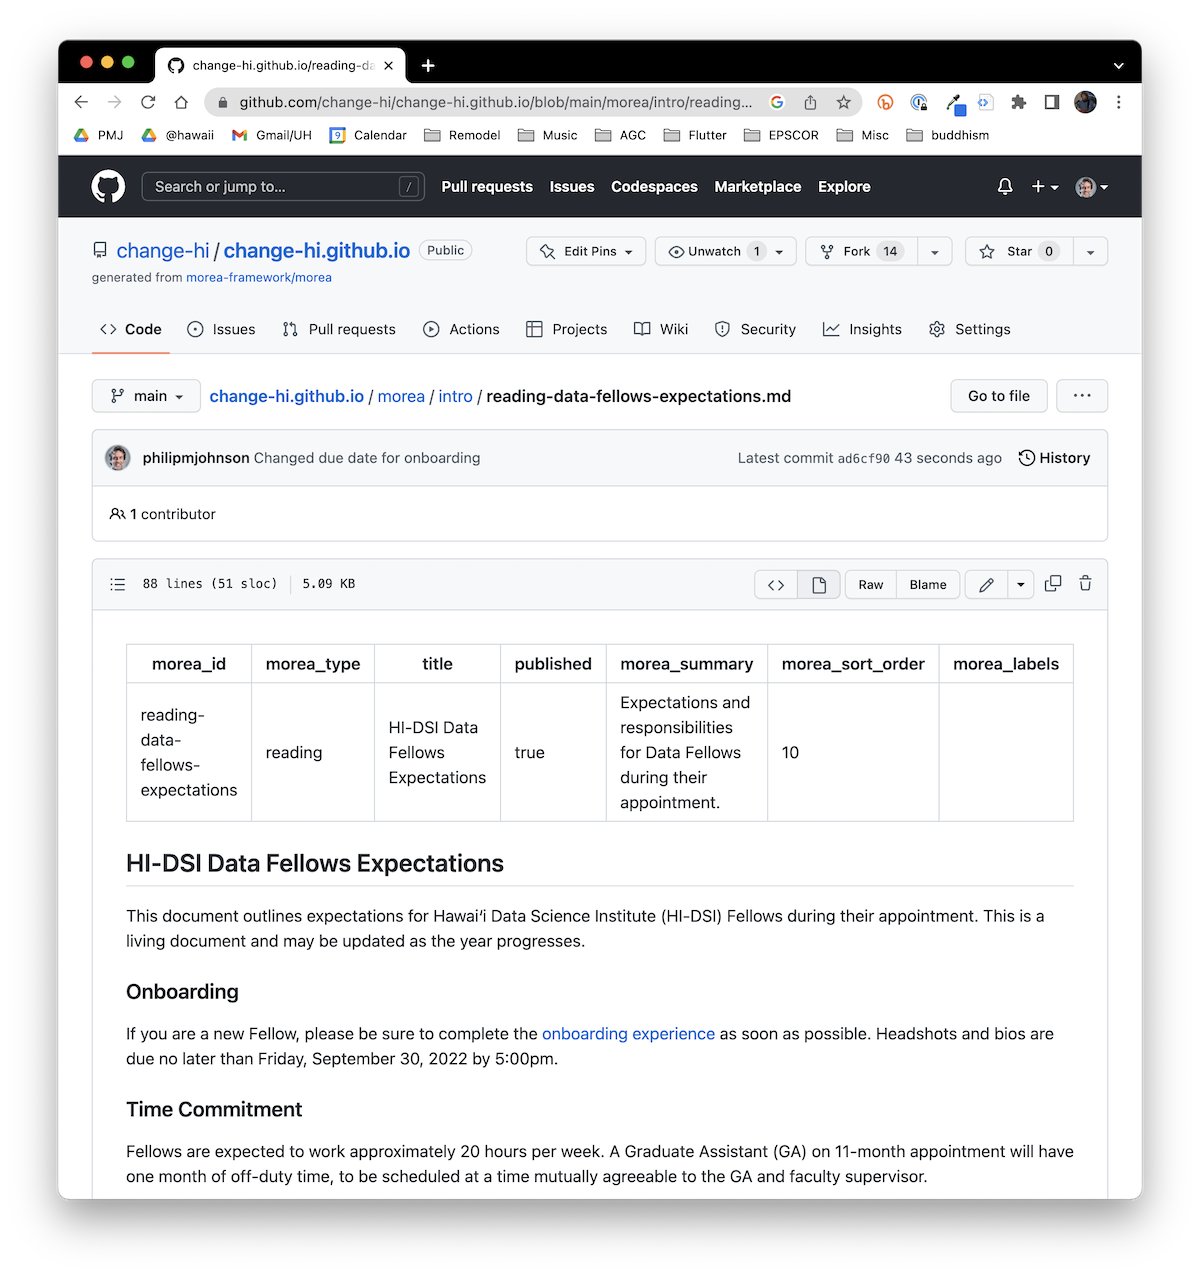
Finally, click the green "Commit changes" button. That will save your changes at the site, and take you back to the display of the page. Notice that this change is now visible:
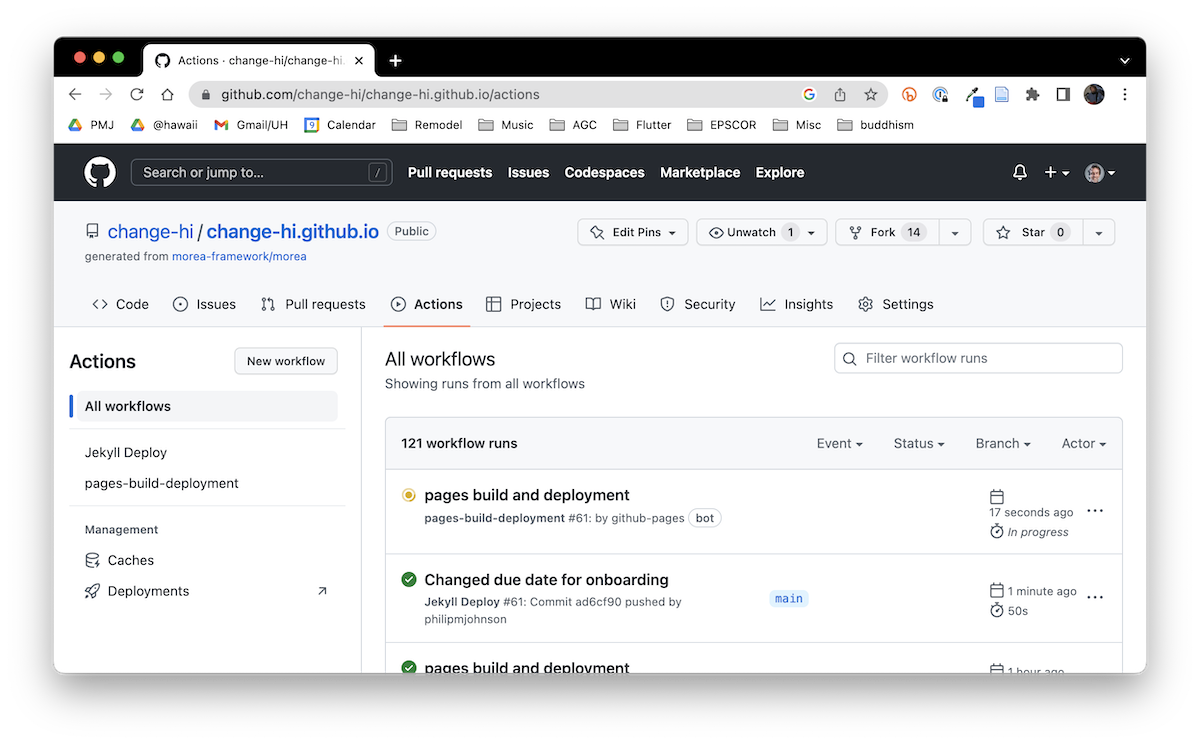
At this point, GitHub will start rebuilding the site. If you want, you can click on the "Actions" tab to monitor the progress. There are two actions that must run to publish the site: "Jekyll deploy" followed by "Pages build and deployment". Here's an example screenshot after the Jekyll deploy action has completed, but the Pages Build and Deploy action is still in progress:
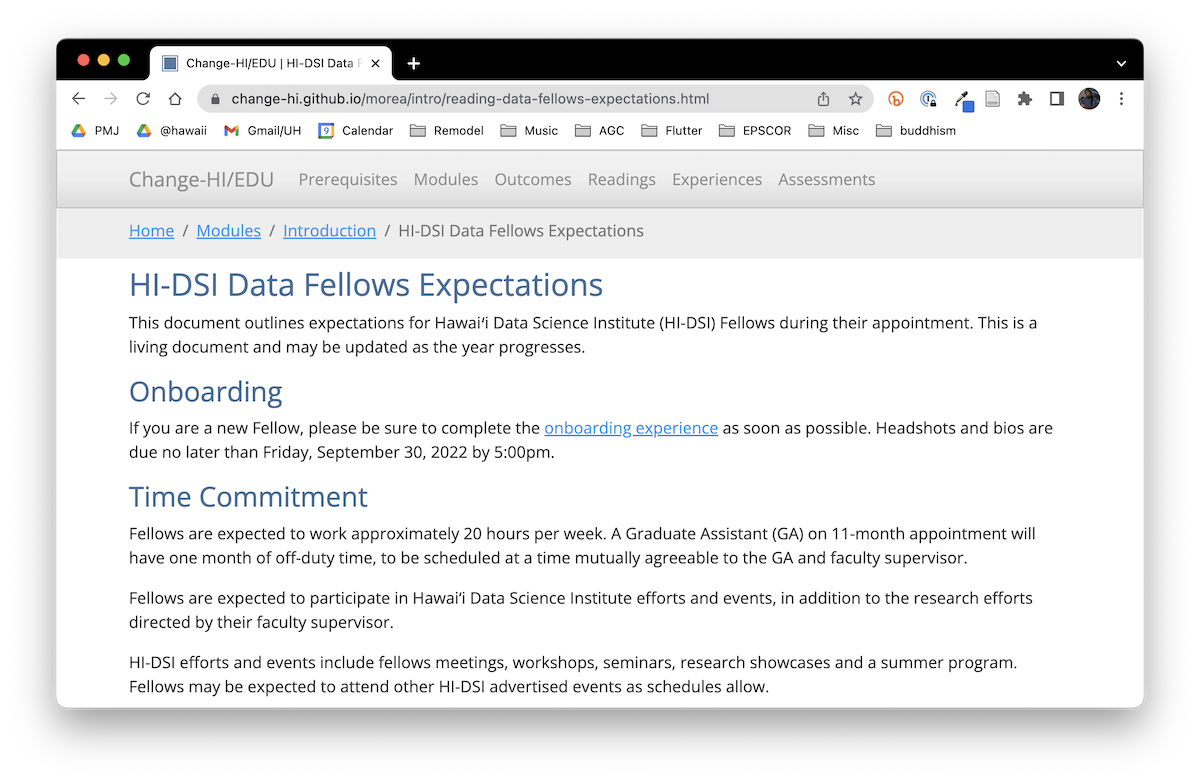
Once both of them are complete, you should be able to see your changes live at the site:
What if things go horribly, horribly wrong?
Fortunately, they can't. There are only two ways things can go wrong, neither of which is horrible:
- You commit a change that breaks the build. In this case, if you go to the Actions page, GitHub will indicate that one of the actions did not complete successfully. If that happens, just contact Philip and he will fix it. Until it's fixed, the site will remain up, but in its previous state.
- You commit a change that doesn't break the build, but when you look at the published page, it's not right. If that happens, just contact Philip and he will fix it. The page will be published in an incorrect way until Philip fixes it, but that will only be for a few minutes or hours.