Workshop design
The previous section documents the mechanics of Change-HI workshop development: how to get the files, make a simple update, and create a pull request so that administrators can merge your changes into the official site.
Let's now discuss how to design the content of a workshop.
Seminars vs. Workshops
We've all been to seminars: you sit down in a room (or login to Zoom), a speaker is introduced, and you sit and listen to the speaker for the next 45 minutes to an hour. Afterwards, there might be a few questions. In the best case, you leave the seminar thinking, "Well, that was interesting", or even "I have a new idea for my research". In other cases, you start reading your email around 15 minutes into the event.
A workshop is different. In a workshop, the goal is more than just experiencing something "interesting" or "having a new idea": the goal is to leave the workshop being able to do something you couldn't do before. Workshops are about skill acquisition.
This means that workshops are intrinsically participatory in a way that seminars are not. It also means that, at a minimum, at least a few of the participants should leave the workshop and begin using the skill that was introduced in the workshop.
Workshops thus have a much higher bar for success than seminars, and thus require more thought regarding their design.
Pre, In, and Post Workshop phases
Unlike designing a seminar, in which you rarely consider the activities of the participants before or after the seminar, you should consider three distinct phases when designing a workshop:
- Pre-workshop. What would you like participants to do prior to attending the workshop?
- In-workshop. What would you like participants to do during the workshop?
- Post-workshop. Assuming at least some of the participants will want to use the skill you introduced in the workshop, how should they continue to develop the skill?
The pre-workshop phase
Let's assume you can contact the participants prior to the workshop. What would you like them to do prior to the workshop in order to make maximal use of the time you are together?
In many cases, the answer might be "nothing", but in some cases, there might be some light introductory reading that can orient the participants to the workshop material. To indicate this, you can create a Morea Reading and add the label "Pre-Workshop" in order to indicate that participants should take a look in advance. You can also add the label "Optional" to indicate that participants should read it if they can, but to not worry if they don't have time.
In some cases, you might want participants to install some software or download some materials in advance of the workshop. This can be crucial when the installation or download might take 15-30 minutes and you only have two hours for the entire workshop. In this case, you can create a Morea Reading with the labels "Pre-Workshop" and "Required" which refers the participant to the relevant installation instructions. Participants who have problems with the installation could arrive at the workshop early in order to receive help completing the installation, or else they simply partner with another participant during the workshop who has successfully installed the software.
In yet other cases, you might want participants to have acquired a skill prior to the workshop. For example, your workshop might involve teaching some intermediate-level skill with Jupyter notebooks, and so you require that participants have basic knowledge of Python and Jupyter. In this case, you could specify a Morea Prerequisite: a separate Module with its own Readings and Experiences that participants should work through prior to the workshop to make sure they have the necessary knowledge for your workshop. For example, the Change-HI HPC Workshop has a prerequisite module.
Note that the Change-HI workshops are supplemental to participants' other educational responsibilities, so it's best to minimize the amount of pre-workshop work if possible.
The in-workshop phase
A workshop can be organized in many different ways. Sometimes, it makes sense to interleave short lectures with activities. Some workshops might not have any "lecture" at all. Instead, the instructor guides the participants interactively through the use of a tool or problem solving scenario. In either case, you should present the in-workshop material as a numbered sequence of Morea Experiences that document what you want the participants to do for each logical section of the material.
If you want to show a video at some point during the workshop, you can either embed the video at the appropriate point in an Experience, or else include it as a Reading.
Your workshop should always conclude by asking participants to evaluate the experience, which is implemented as a Morea Assessment. In most cases, a Change-HI administrator will create a Google Form and provide a link to that form in the Assessment page associated with your workshop. During the last 10 minutes of the workshop, direct the participants to that Assessment page and ask them to spend the final minutes filling out the Google Form.
In order to maximize the response rate, it's best to build this assessment right into the workshop and not ask participants to fill it out later.
The post-workshop phase
A well-designed workshop provides participants with a clear path forward if they want to start using the skill in their work. There are a variety of ways to help participants to move forward:
- Provide Morea Readings to API documentation, more advanced tutorials, videos, or the like. Label these Readings with "Post-workshop".
- Provide Morea Readings that challenge participants to practice the skills in various ways. Label these Readings with "Post-workshop".
- Provide recommendations for future workshops that build upon these skills.
What about Outcomes?
You might think you should begin your workshop design by deciding on the learning outcomes, but I recommend you leave these until last. The reason is that you are often too ambitious in what you think you can accomplish.
So, instead, leave the specification of learning outcomes until you have finished the workshop design. Then think about what you hope participants will be able to do as a result of the material you actually have.
Learning outcomes are generally directly related to the skills you hope the participants will acquire, and so you can ask whether or not each learning outcome was achieved for as part of the assessment.
Naturally, your learning outcomes will be represented as Morea Outcomes.
When designing your outcomes, it's important to take a look at the existing set of Change-HI outcomes. Are there outcomes already associated with other workshops that you also hope participants will acquire in yours? If so, just include that outcome ID in your module definition file (don't make a copy of the outcome file). Having the same learning outcome for multiple workshops helps tie them together, and increases the odds that participants will actually learn the skill!
Start with a sketch
As you can see, designing a workshop with Morea involves the creation of:
- Readings, which can be intended for the pre-workshop or post-workshop phases.
- Experiences, which are intended for the in-workshop phase.
- An Assessment, which are used at the end of the in-workshop phase.
- Outcomes, which are intended to be achieved by the end of the in-workshop phase.
Until you are comfortable with Morea, you might want to start by sketching out your workshop design on a piece of paper or text file: what are the Readings, Experiences, Outcomes, and Assessment to include for each of the three phases?
Feel free to share that sketch with others for feedback. They might have ideas for additional and/or replacement Readings, for example.
Once you have that sketch in hand, then go ahead and implement it as actual Morea constructs.
Determine Experience start times
Staying on track during the workshop can be difficult. To facilitate this, we recommend that each Experience (and the concluding Assessment) be assigned a start time. Here is an example excerpt from the FAIR Data Management Workshop:
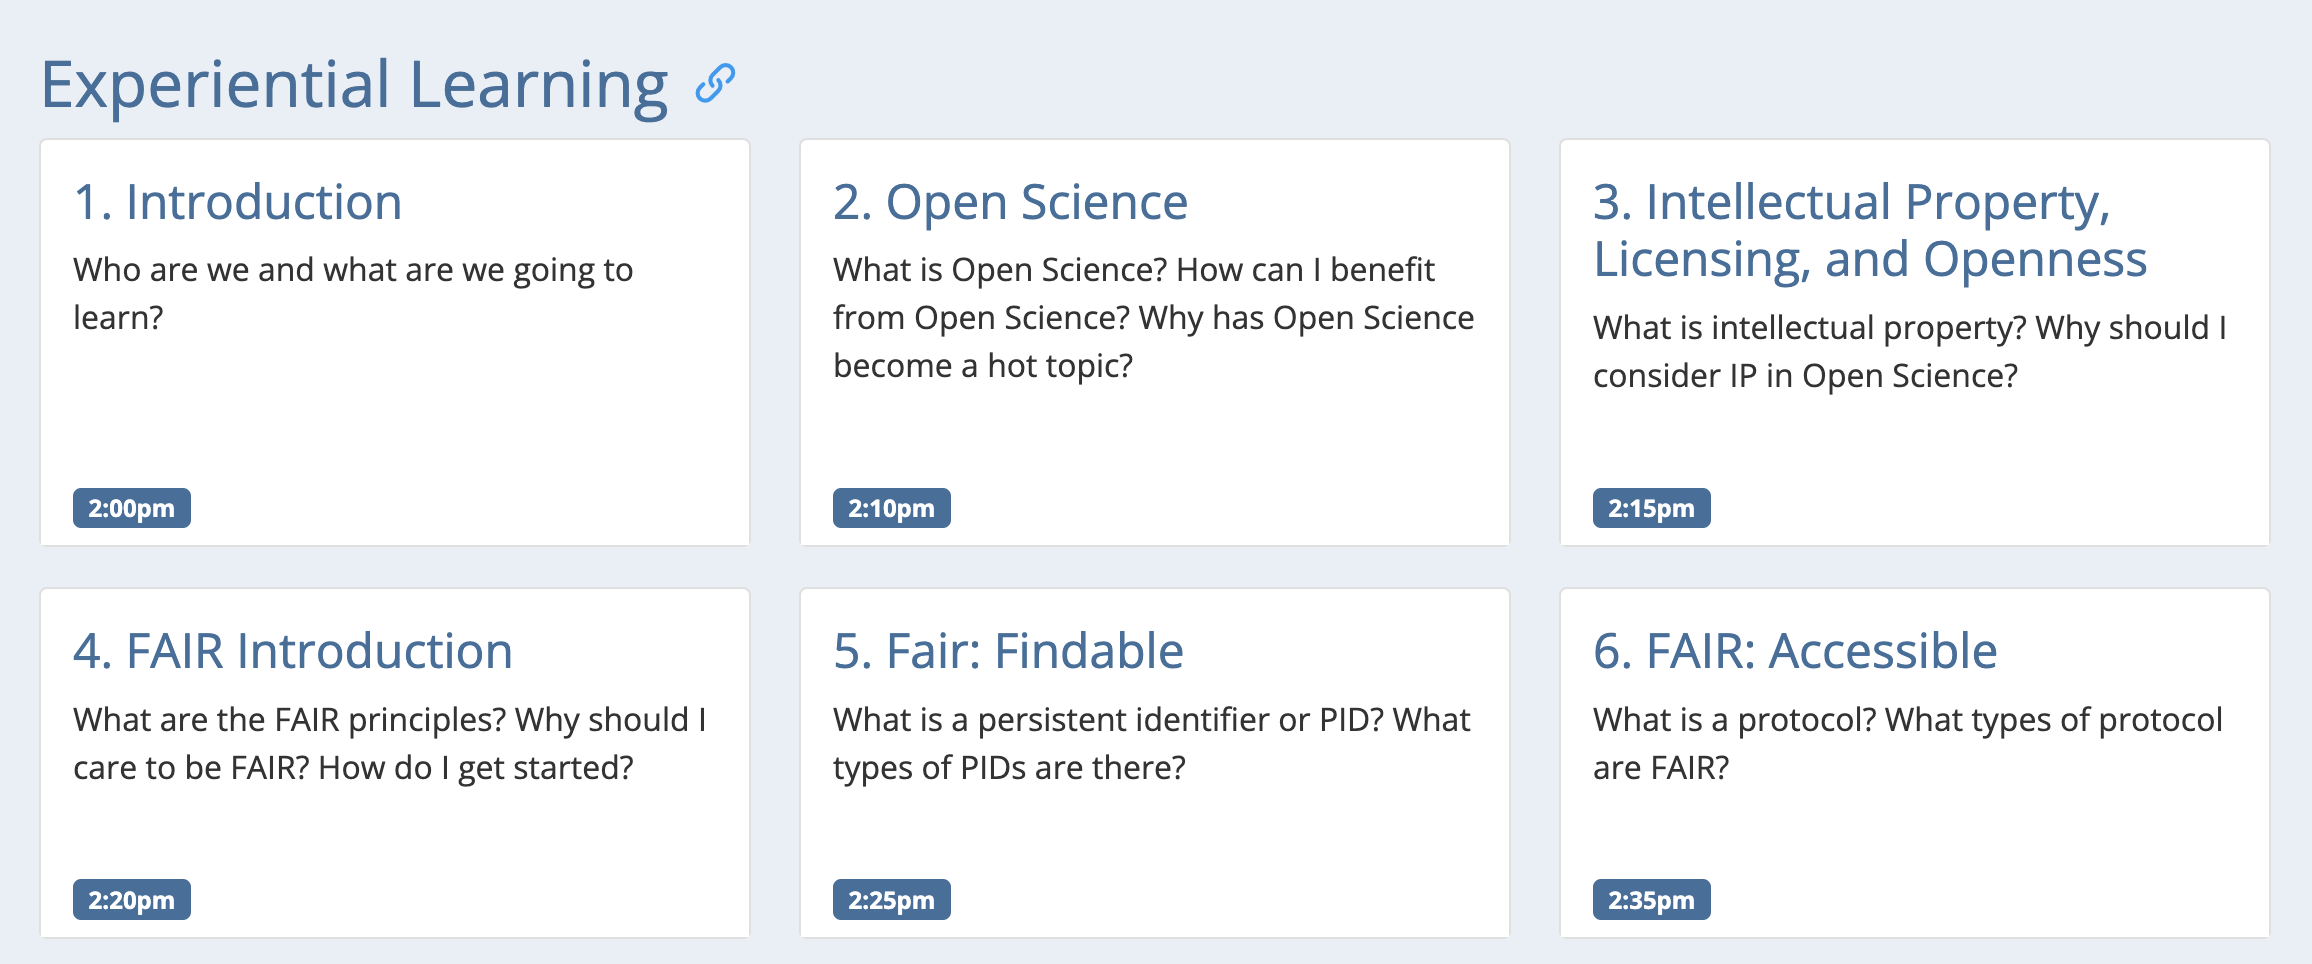
As you can see, there is a label associated with each Experience page that indicates when that Experience should start.
When designing the start times for the workshop, we recommend the following guidelines:
- While the workshop formally starts at 2pm, a few people are often a couple of minutes late. So, allocate maybe 5 extra minutes for the very first Experience.
- It's nice to include a "bio break" around 3pm. For example, in the FAIR Data Management workshop, there is a call-out for a bio break at the end of the FAIR: Reusable Experience, and an extra five minutes is allocated to that Experience for that purpose.
- Always reserve the last ten minutes of the workshop (from 3:50-4:00pm) for the Assessment.
Finally, it's a good idea to limit the time for each Experience to 20 minutes or less, so that your Workshop contains at least a half dozen Experiences. That helps you check your timing periodically so that you can make adjustments if you're falling behind.
Facilitate interdisciplinary collaboration
One goal of the Change-HI workshops, in addition to helping participants learn new skills, is to facilitate new collaborations amongst members of the community. To do this, it's important to design your workshops in such a way that participants get a chance to learn about each other. There are at least a couple of ways you can accomplish this:
Start the workshop with some sort of "ice breaker", where participants break up into small groups and introduce themselves to each other and perhaps perform some simple task. The goal is for them to learn about each other's background and skills.
During the workshop, provide exercises that involve participants working together in small groups. If some of the participants are using Zoom, then you'll need to create breakout rooms. In addition to having the participants work together, design some interaction into the exercise that enables them to learn about each other's background and skills.
Development timeline
As you can see, designing and implementing a workshop for the first time requires some time to determine the components, then implement them as Morea constructs, and finally ensure that the site builds correctly so that you can issue the pull request (as discussed in the previous section).
In most cases, it is sufficient to reserve a week for initial design and implementation. That said, I do not recommend you issue the pull request the night before the workshop is scheduled to take place! For one thing, if you do that, then there's no opportunity for participants to do any pre-workshop readings. For another, it does not allow any time for review and fine-tuning of your workshop materials.
So, it's best to plan to complete your initial implementation and issue your pull request around 7-10 days prior to the workshop date. That leaves a few days for your workshop to be integrated into the site, and circulated for review by other instructors who might have feedback on your approach. Making small changes to a workshop module, once successfully integrated, is typically quick and easy, and so if you follow this schedule, you should be able to send your participants a link to the workshop module page around 5-7 days prior to the workshop date.