Quick start
This quick start takes you through the steps necessary to set up and publish a new Morea course site with "default" content.
The following video provides a walkthrough of the instructions in this page.
Join GitHub
If you haven't already, sign up for GitHub. There are two common types of GitHub accounts:
Free Accounts. You can use a GitHub "Free" account to create Morea sites, but with one important restriction: you cannot make your repository private and publish the site with GitHub Pages. If your Morea source code is in a public GitHub repo, then you should not store private information (such as tests) in your repo. If you are OK with anyone (including students) seeing every file stored in your Morea repo, then a Free Account is fine.
Education Accounts. If you are approved for a GitHub "Educator" account, then you can upgrade the organisation containing your Morea site repo to "Team" status for free. Organizations under the "Team" plan can have private GitHub repos that are published with GitHub Pages. This is quite useful, because it means you can store tests and other confidential information in your repo using Morea's private files mechanism. If you are associated with an educational institution, you can apply for an educator or researcher discount. Once you have been approved for the GitHub Educator Plan, you can go to the Upgrade Organization page to upgrade the organization containing your Morea site repo to the Team plan for free.
Create your course repository
Login to GitHub and go to https://github.com/morea-framework/morea:
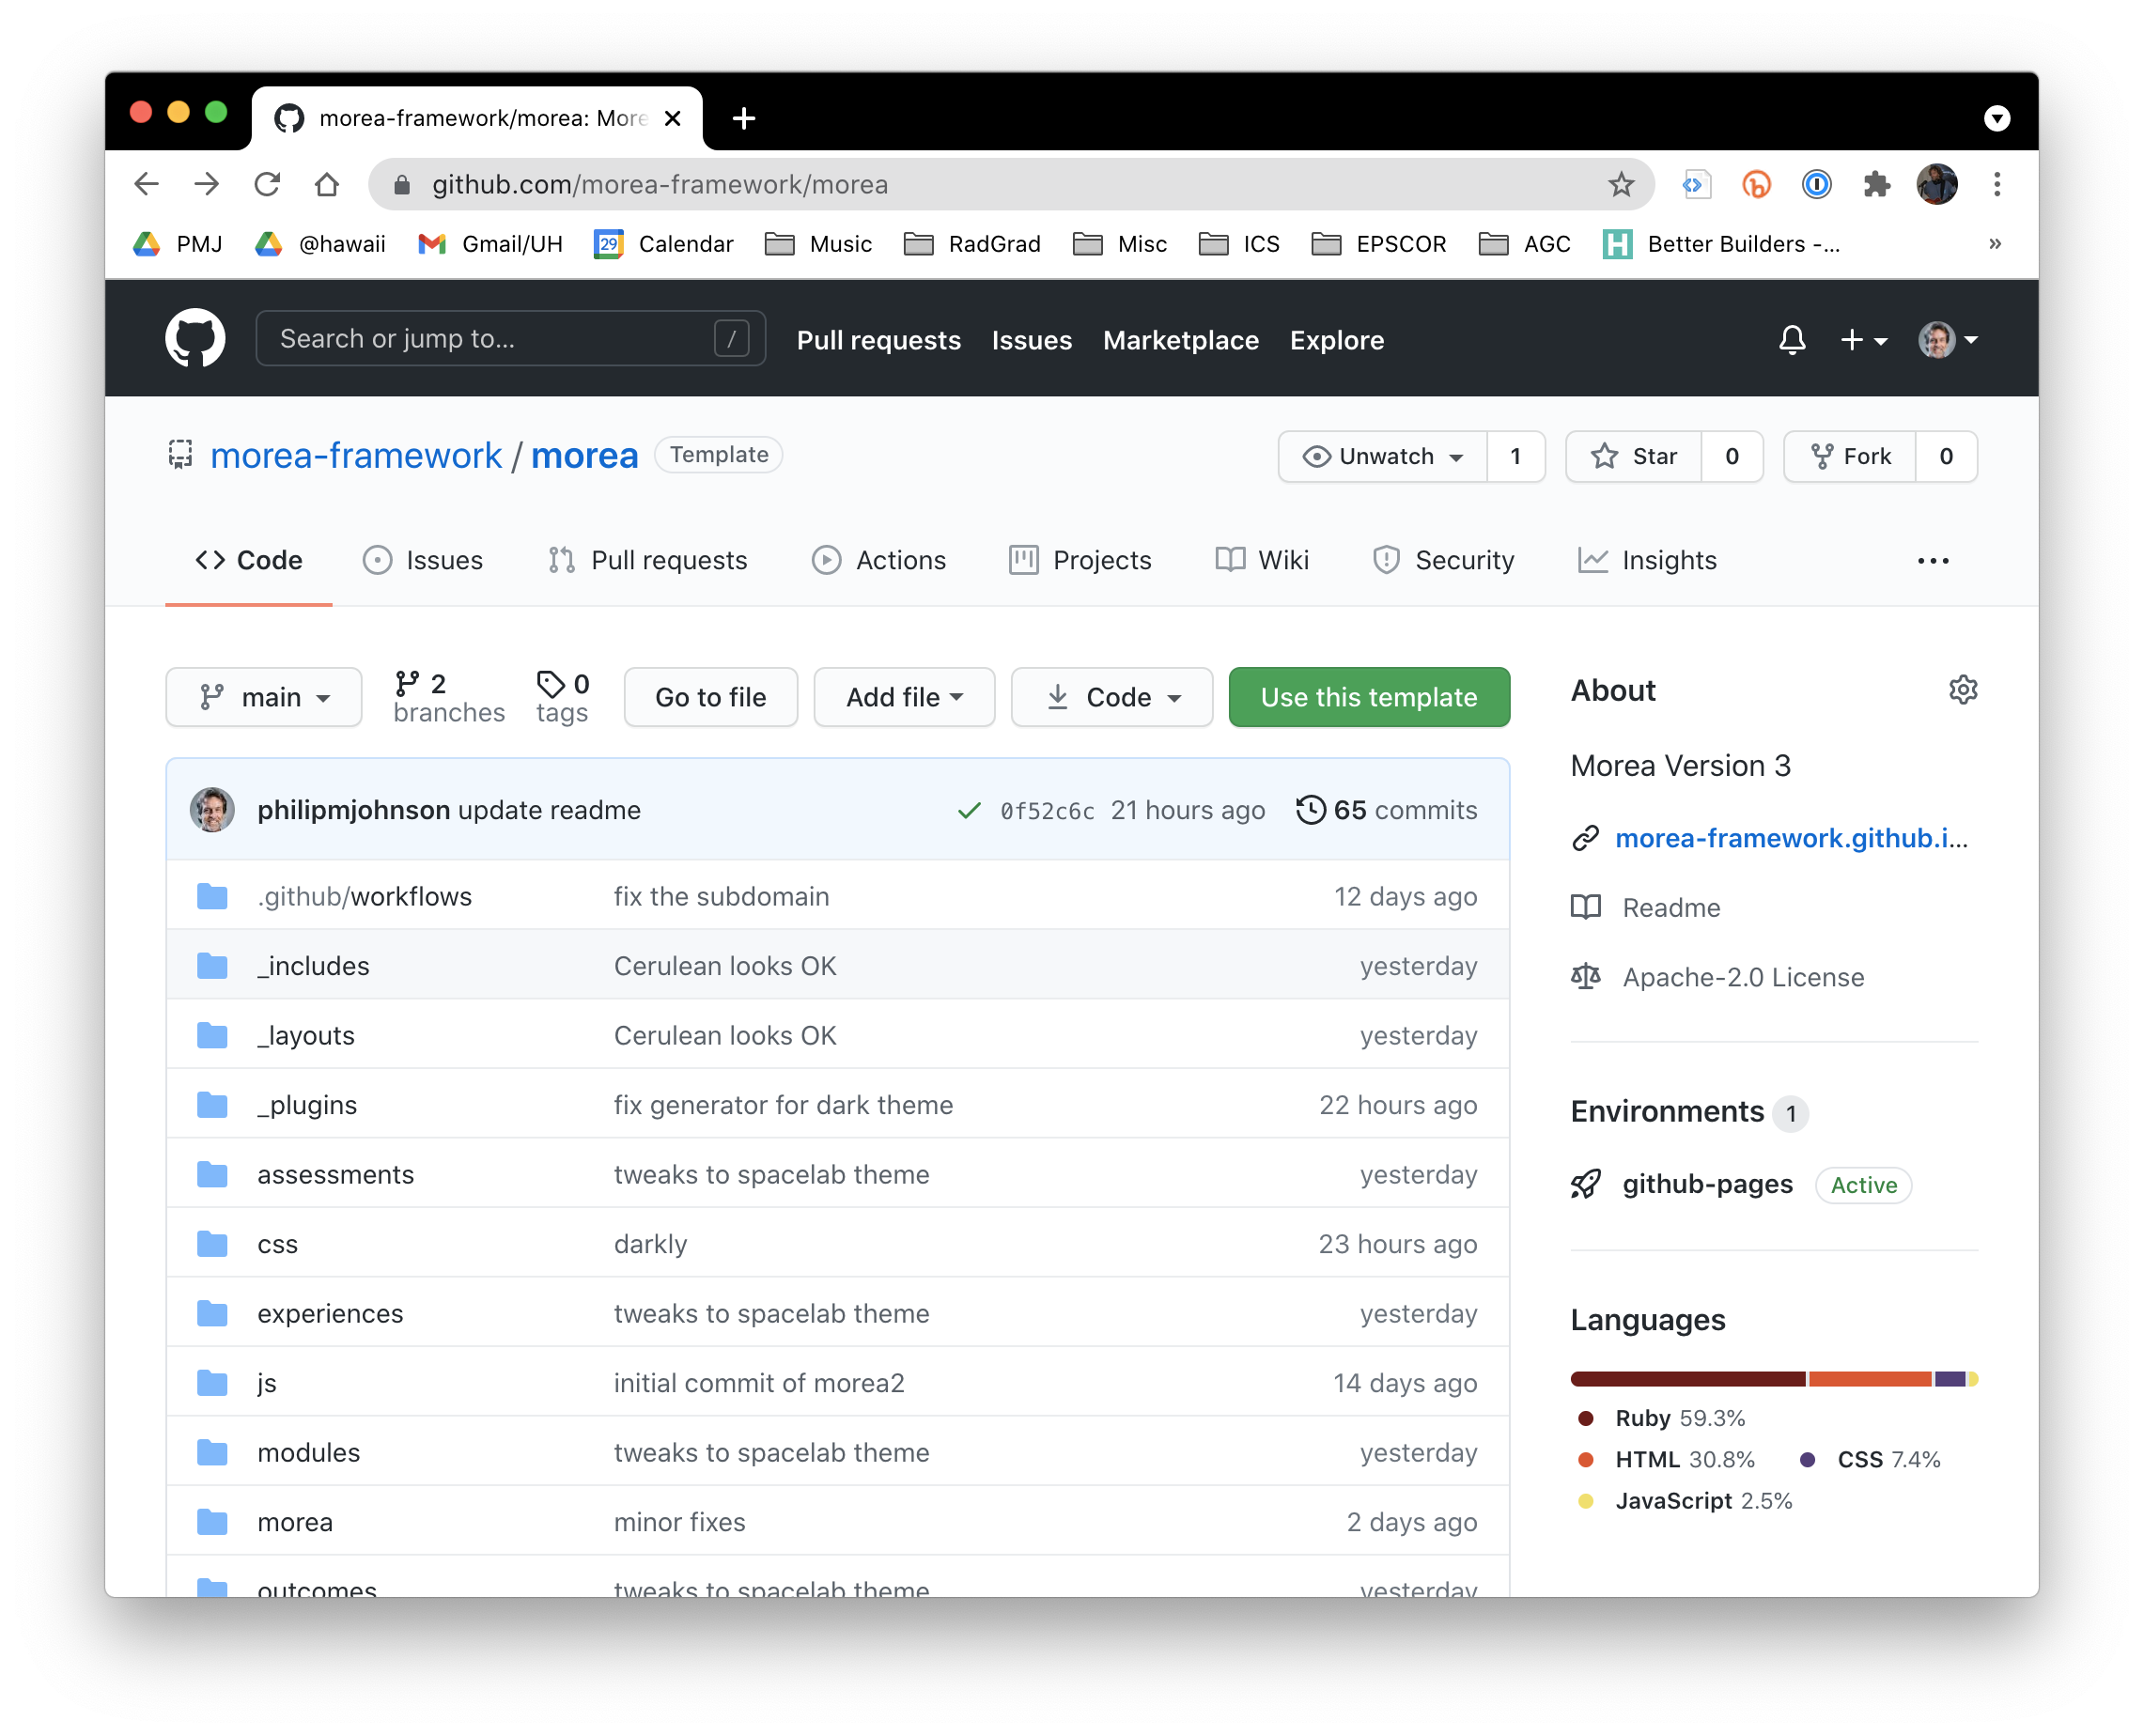
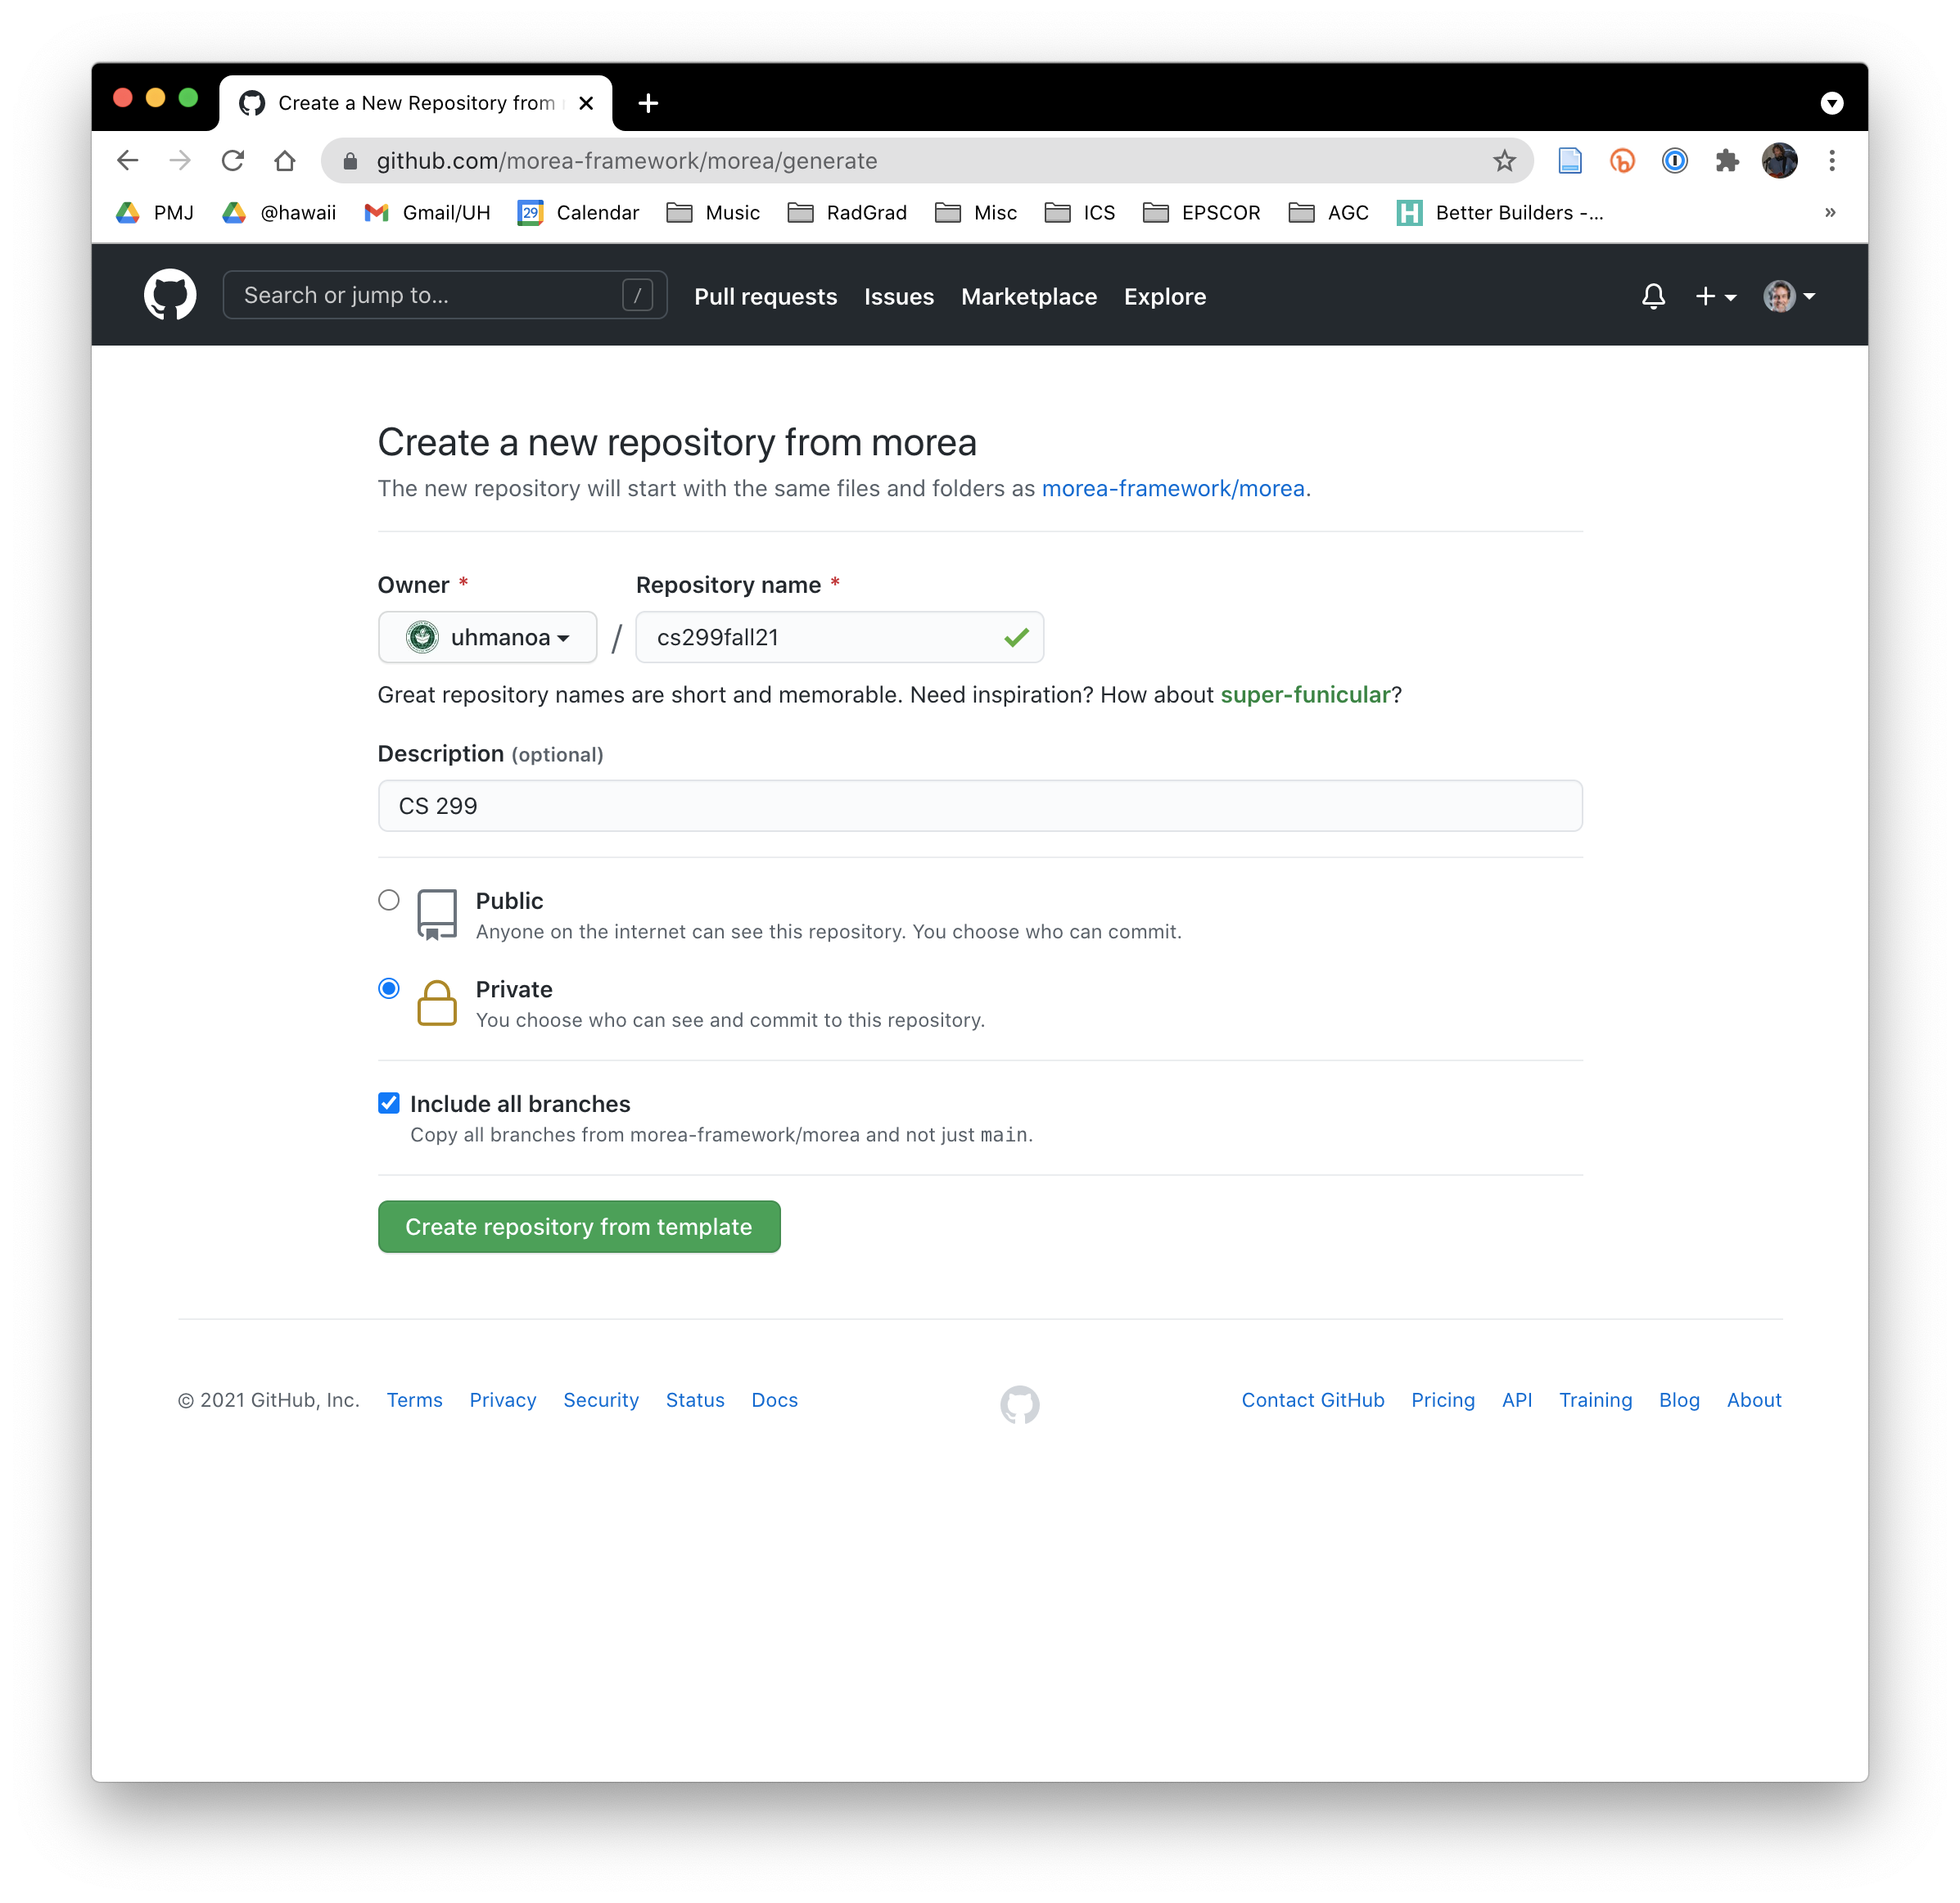
Next, click "Use this template" and fill out the page:
- Select the appropriate owner (either your personal account or an organization)
- Provide a repository name (typically the course number and semester).
- Optionally, make the repo private (if the organization associated with this repo is on the Team plan). Otherwise, you must keep the repo public so that you can publish your site using GitHub Pages.
- Include all branches.
It should look like this:
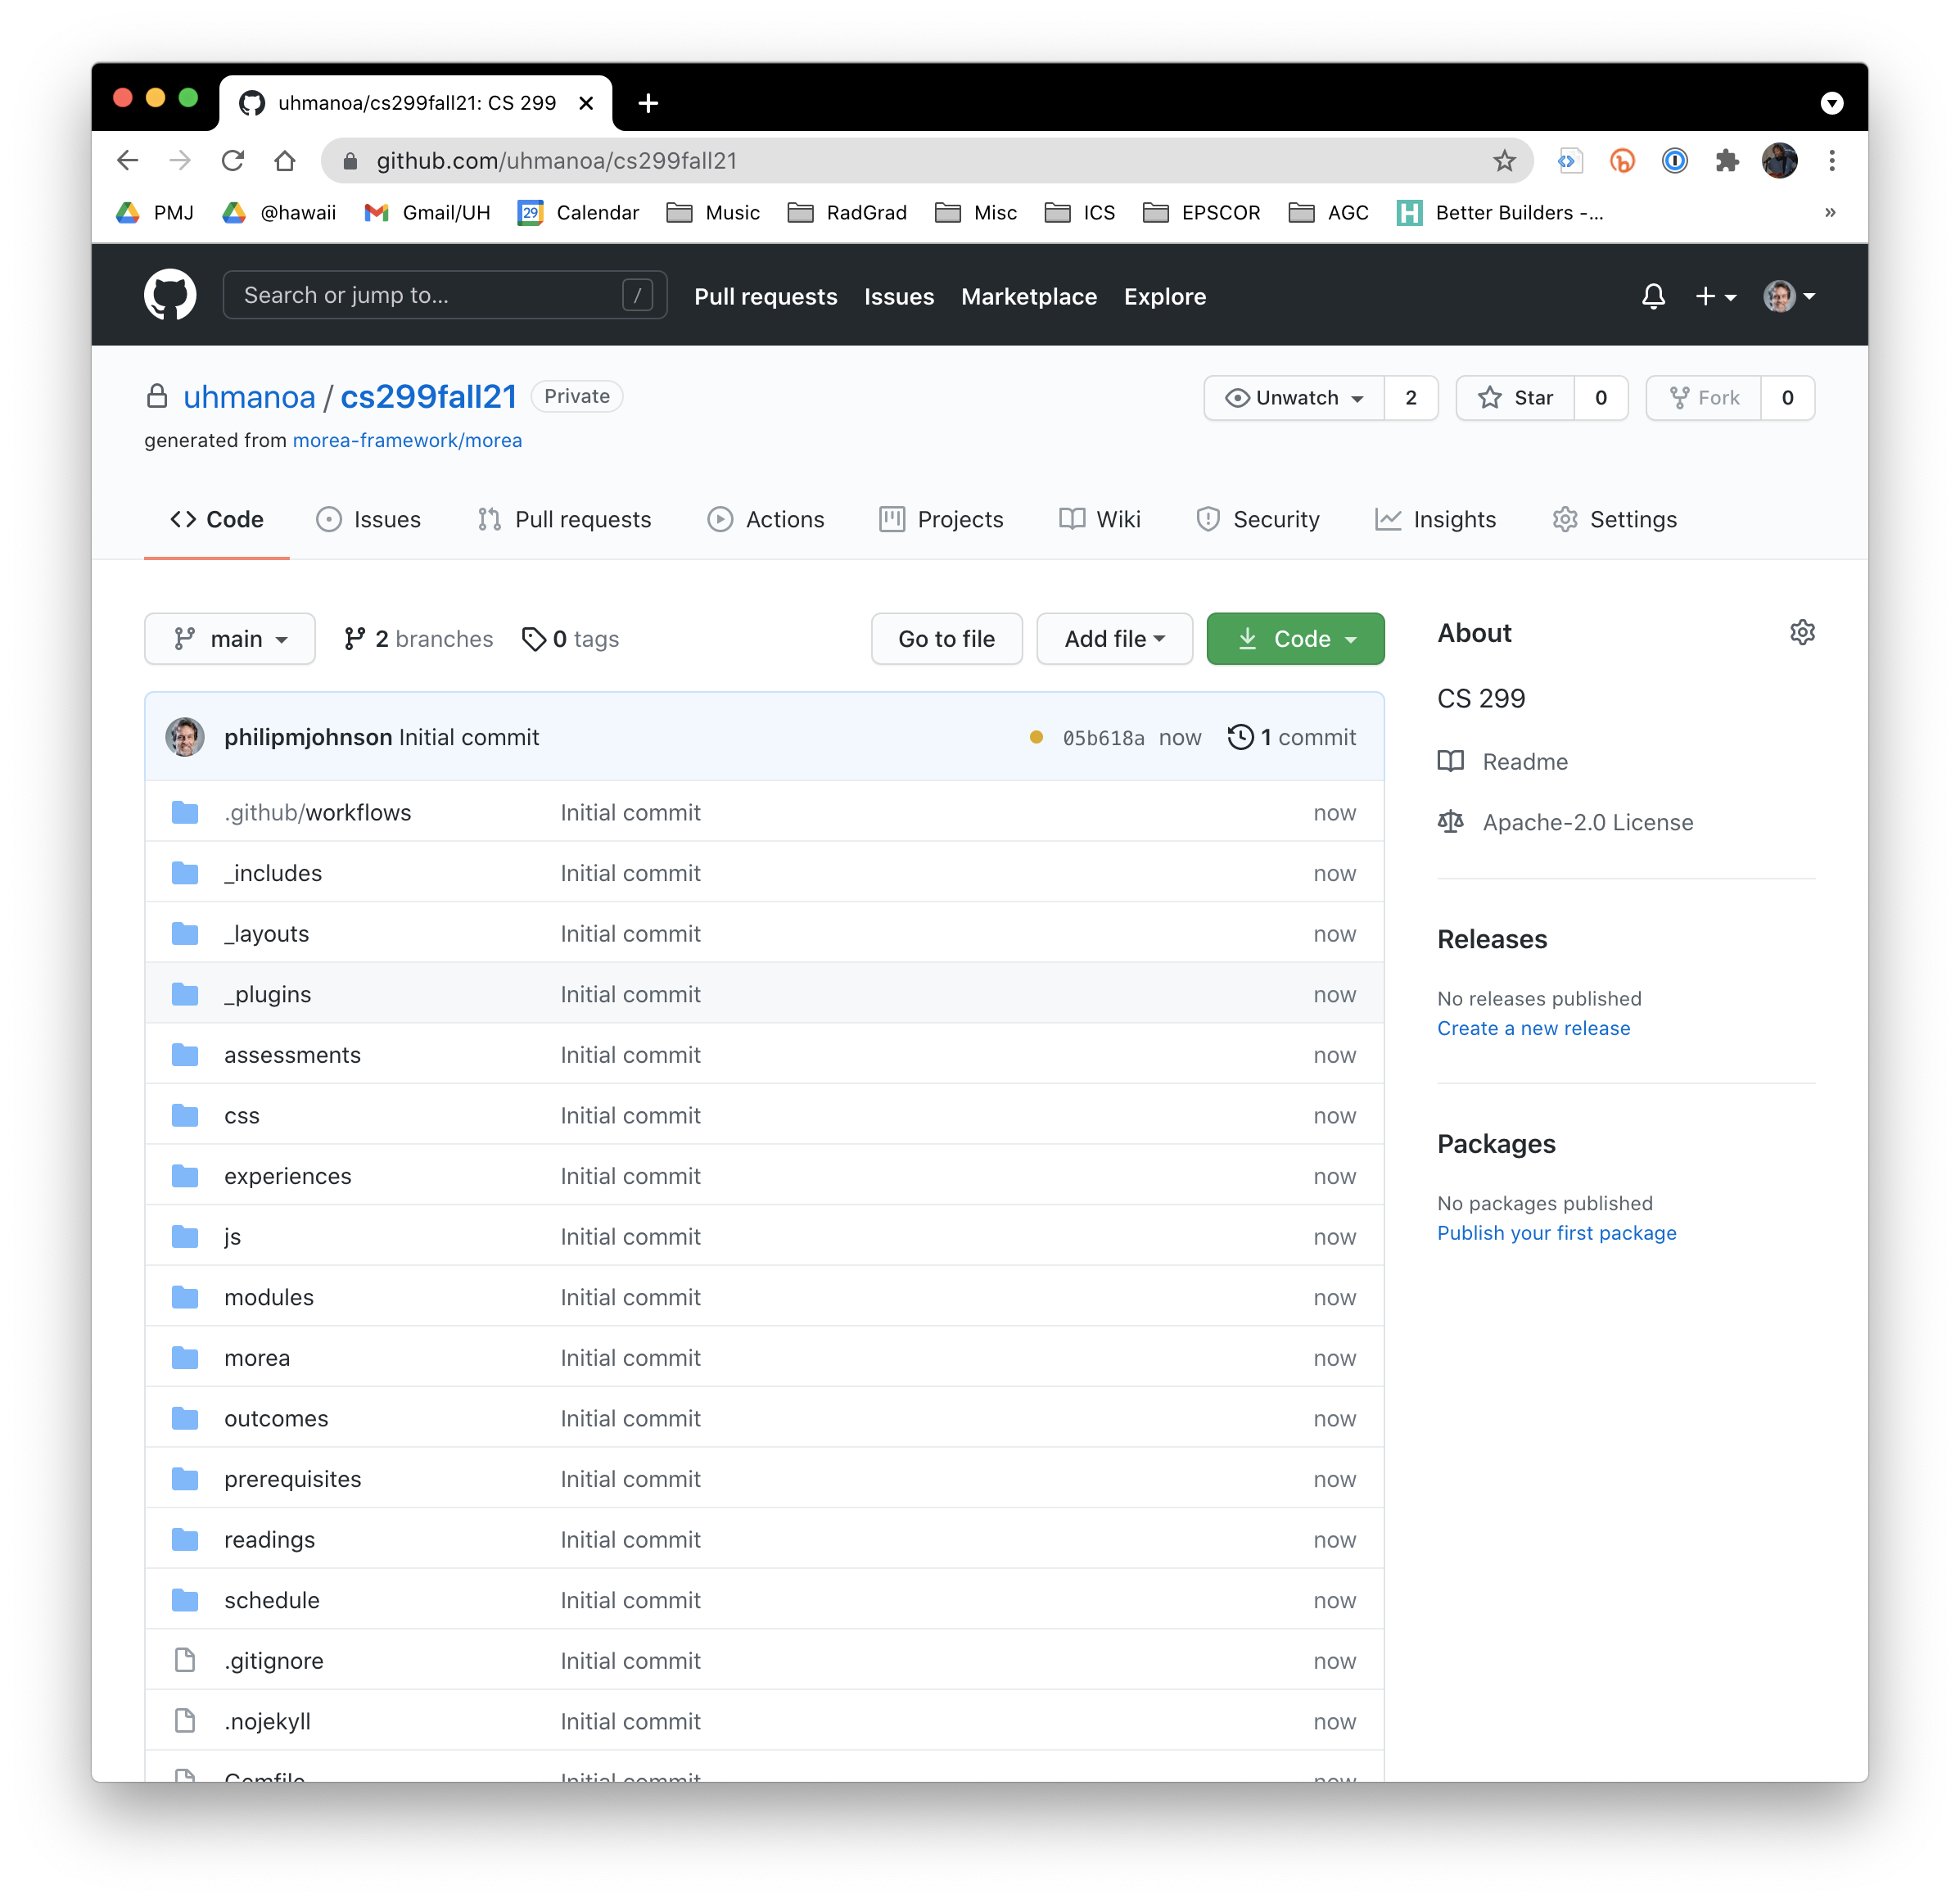
When you are done, click on "Create repository from template". After the repo is created, you should be at a page in your own GitHub account with a copy of the Morea files:
Check workflow permissions
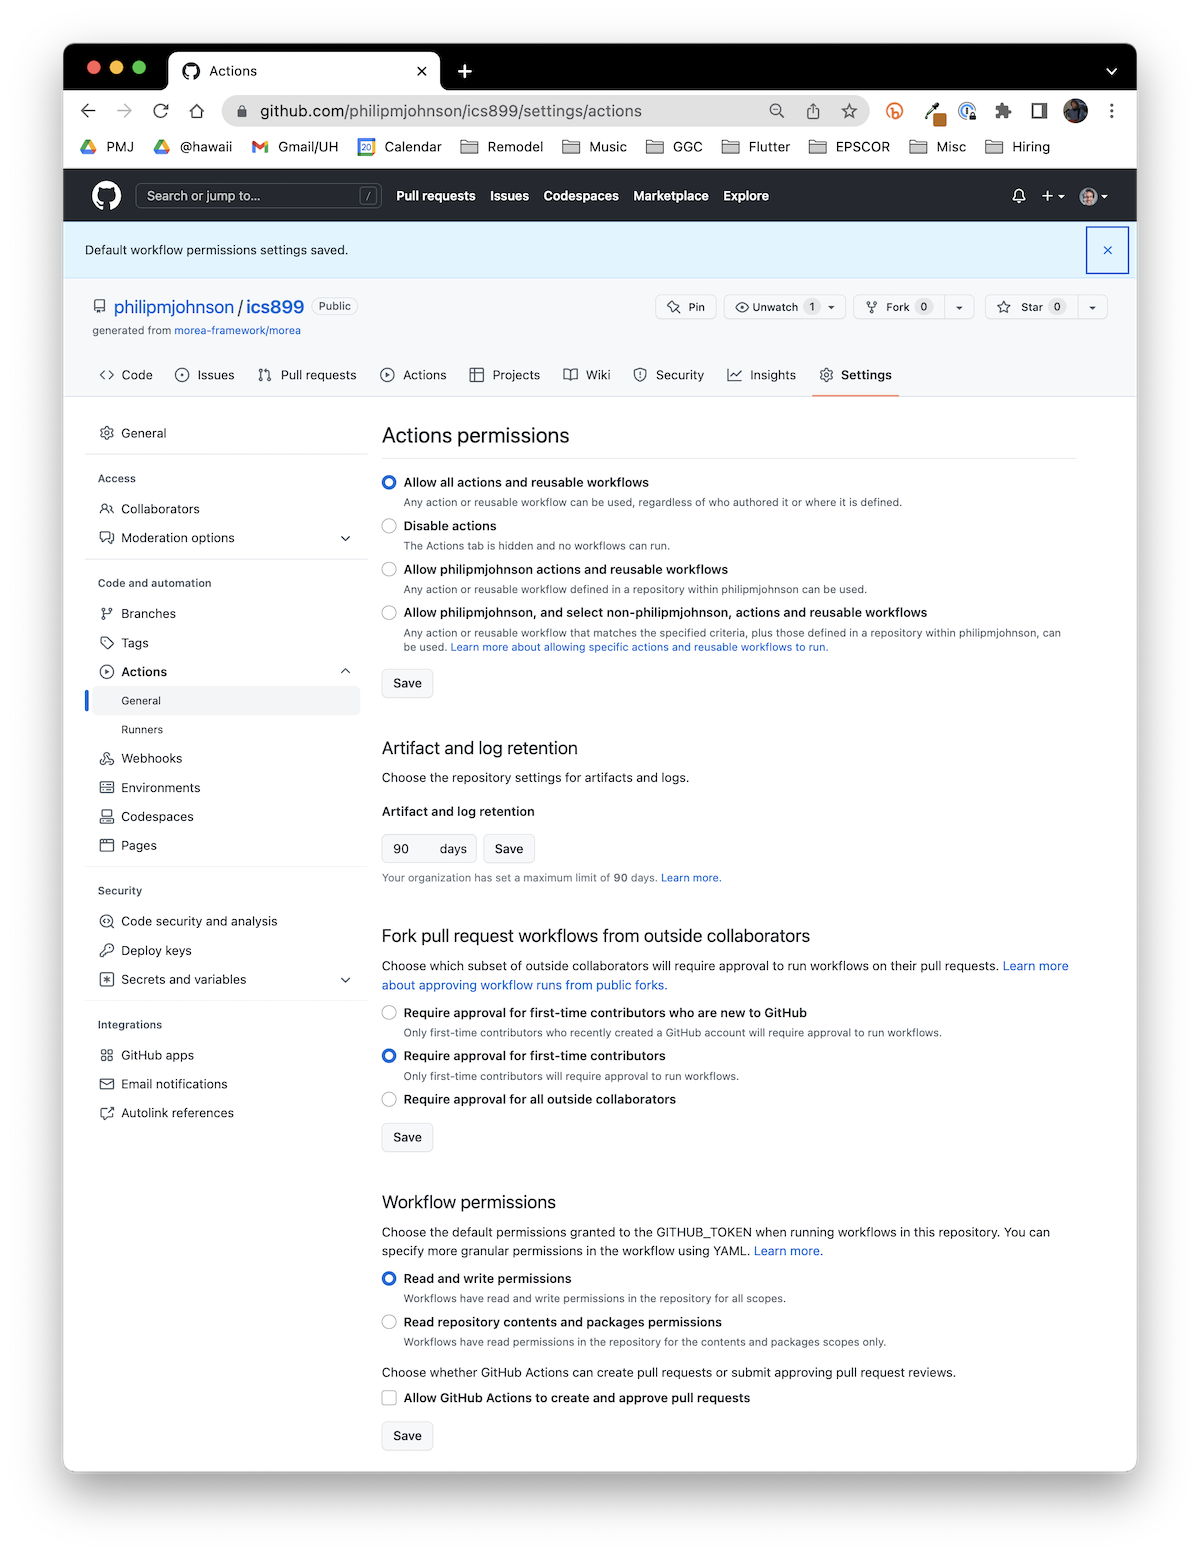
In order for GitHub to build your Morea site automatically whenever you commit a change to the repo, you must ensure that the workflow permissions for the site allow both read and write access. To do this, click on the "Settings" tab at the top of the page for your new repo, then click on the "Actions" tab in the left sidebar, and finally click on the "General" link inside the Actions tab. You should see a page that looks like this:

In this example, the bottom section, "Workflow permissions", indicates that the default permissions are "Read repository contents and package permissions". If this is the case for your repo, you need to click the radio button for "Read and write permissions", then click the "Save" button to save this change. Afterwards, this page should look like this:
Configure "Build and Deployment"
Next, click on the "Pages" link in the left sidebar. A page like this should show up:
Pull down the menu item displaying "Deploy from a branch", and set it to "GitHub Actions" instead:

Edit the config.yml file
Now, click on the "Code" tab at the top of the page to return to the listing of files in this repository. Scroll down the list of files until you see "_config.yml", and click it. You should see the following:
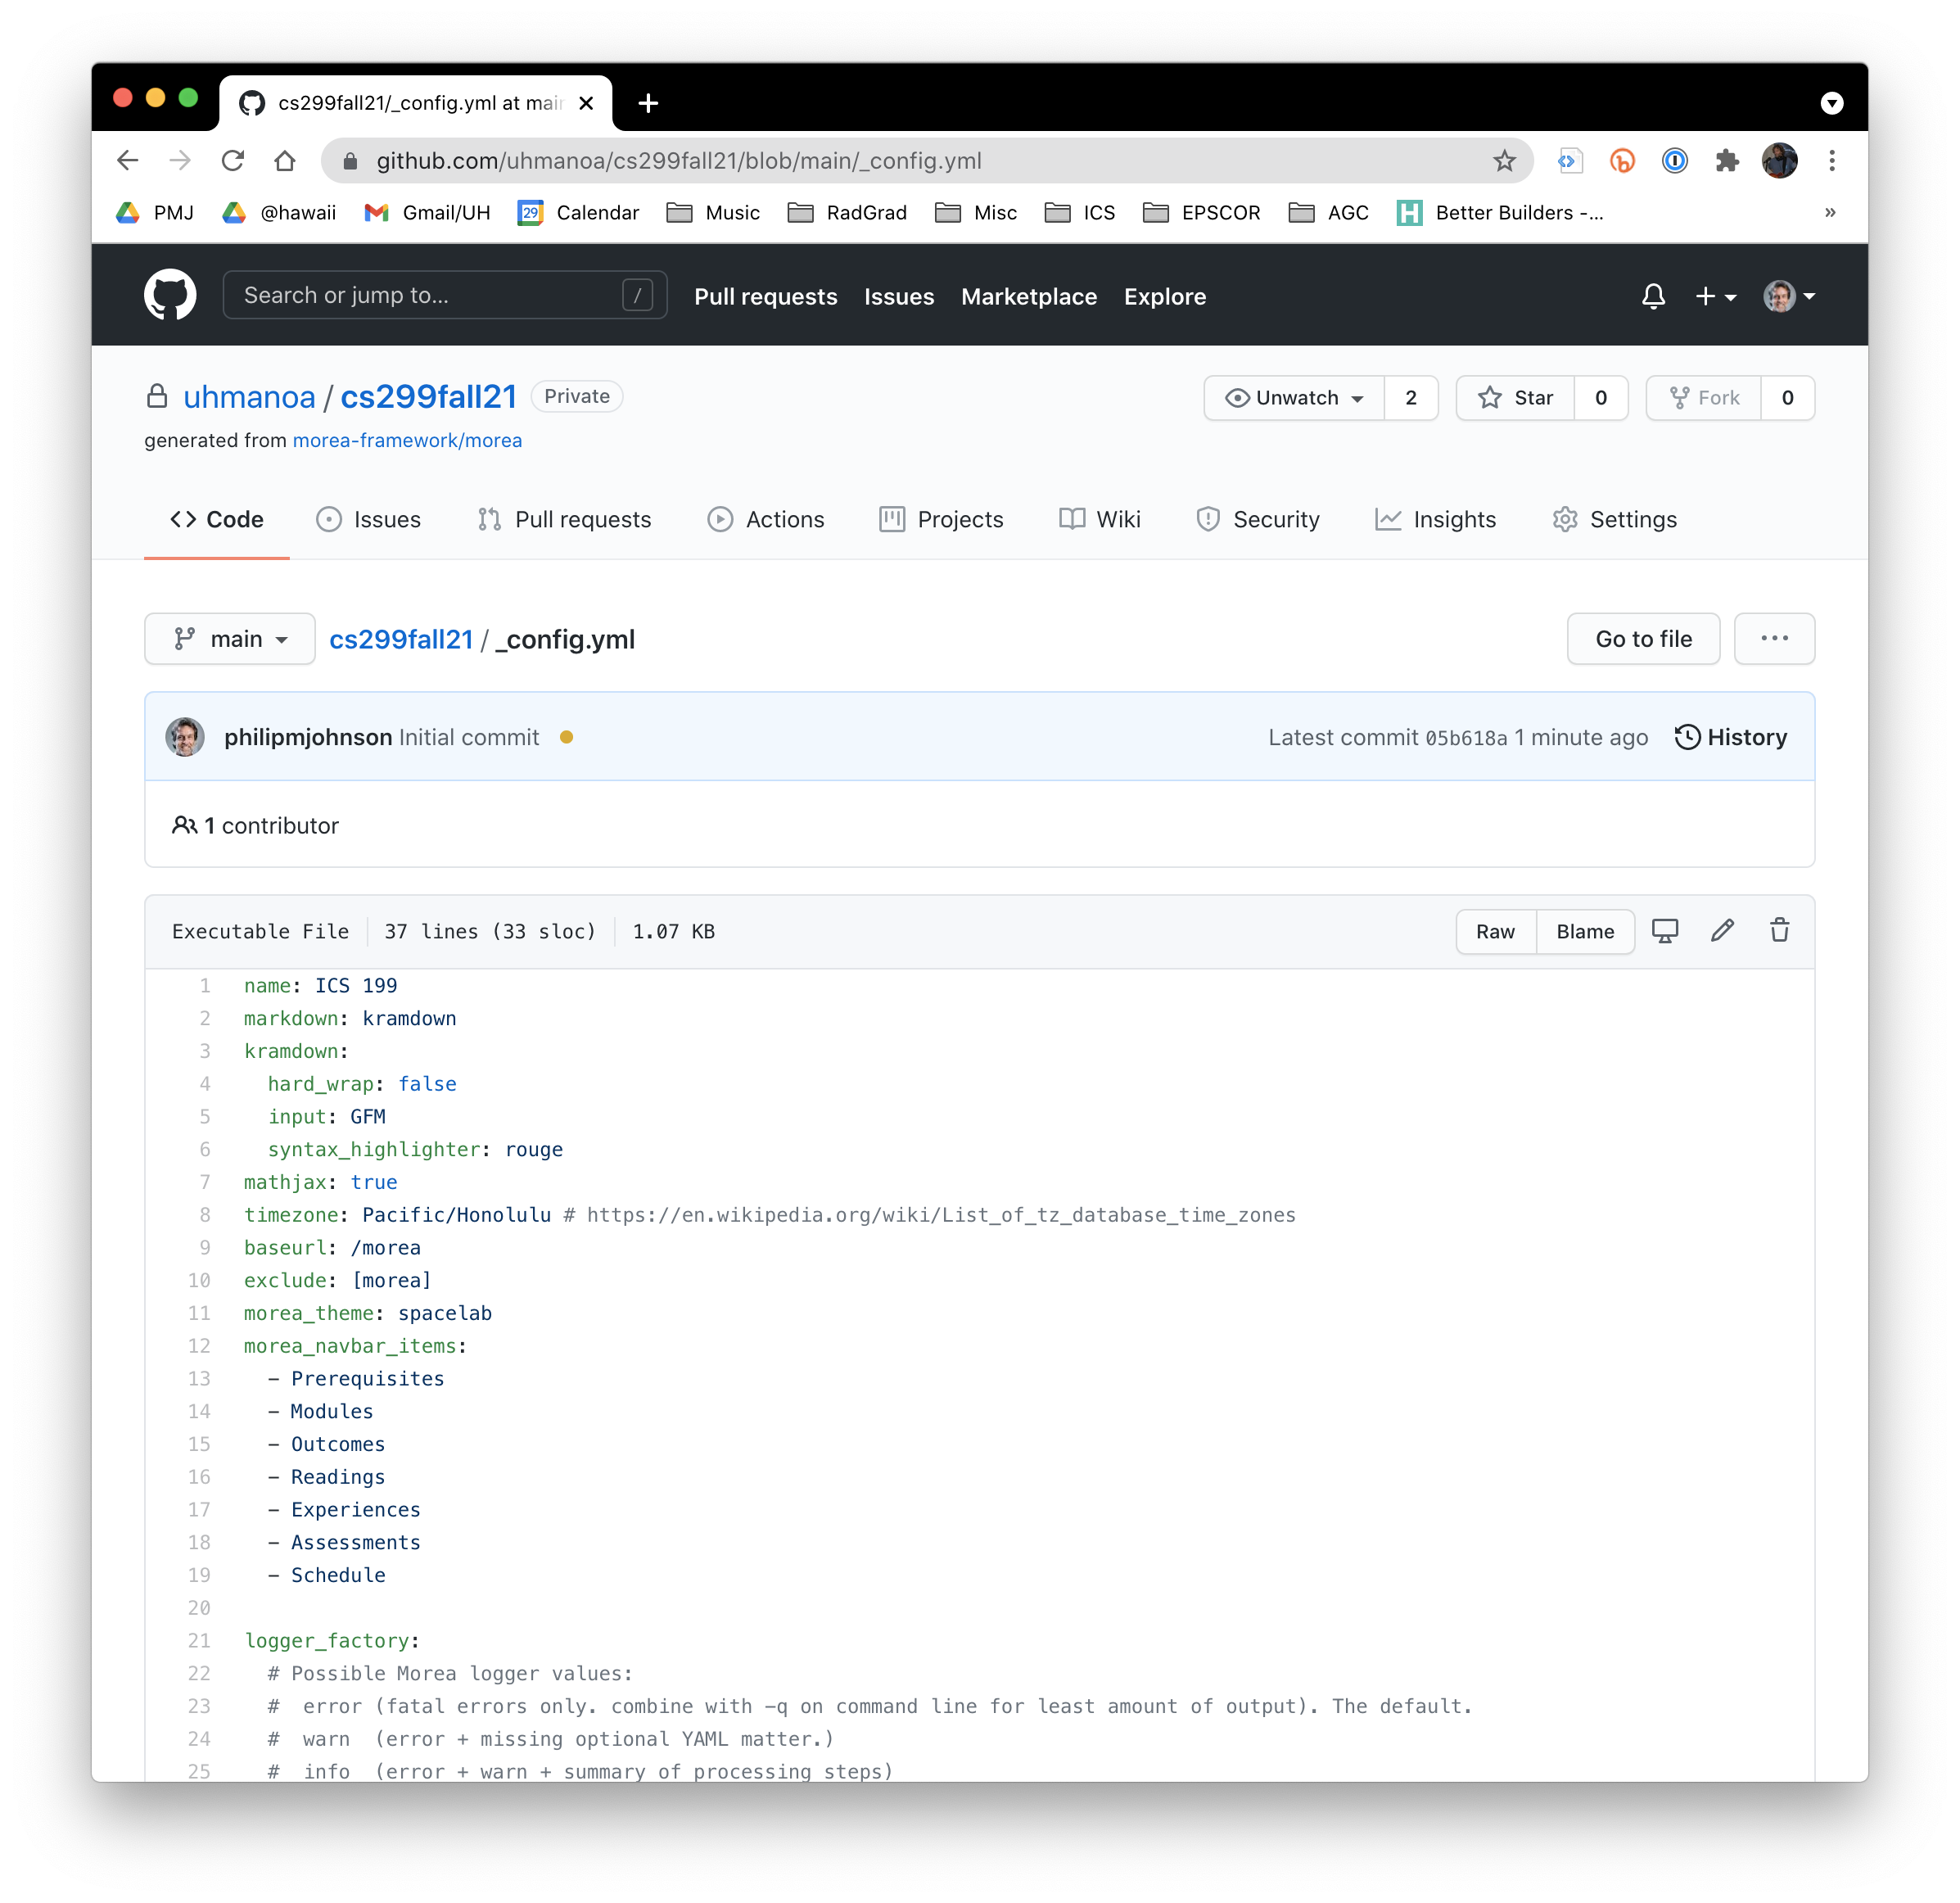
Click on the pencil icon to edit this file within your browser:
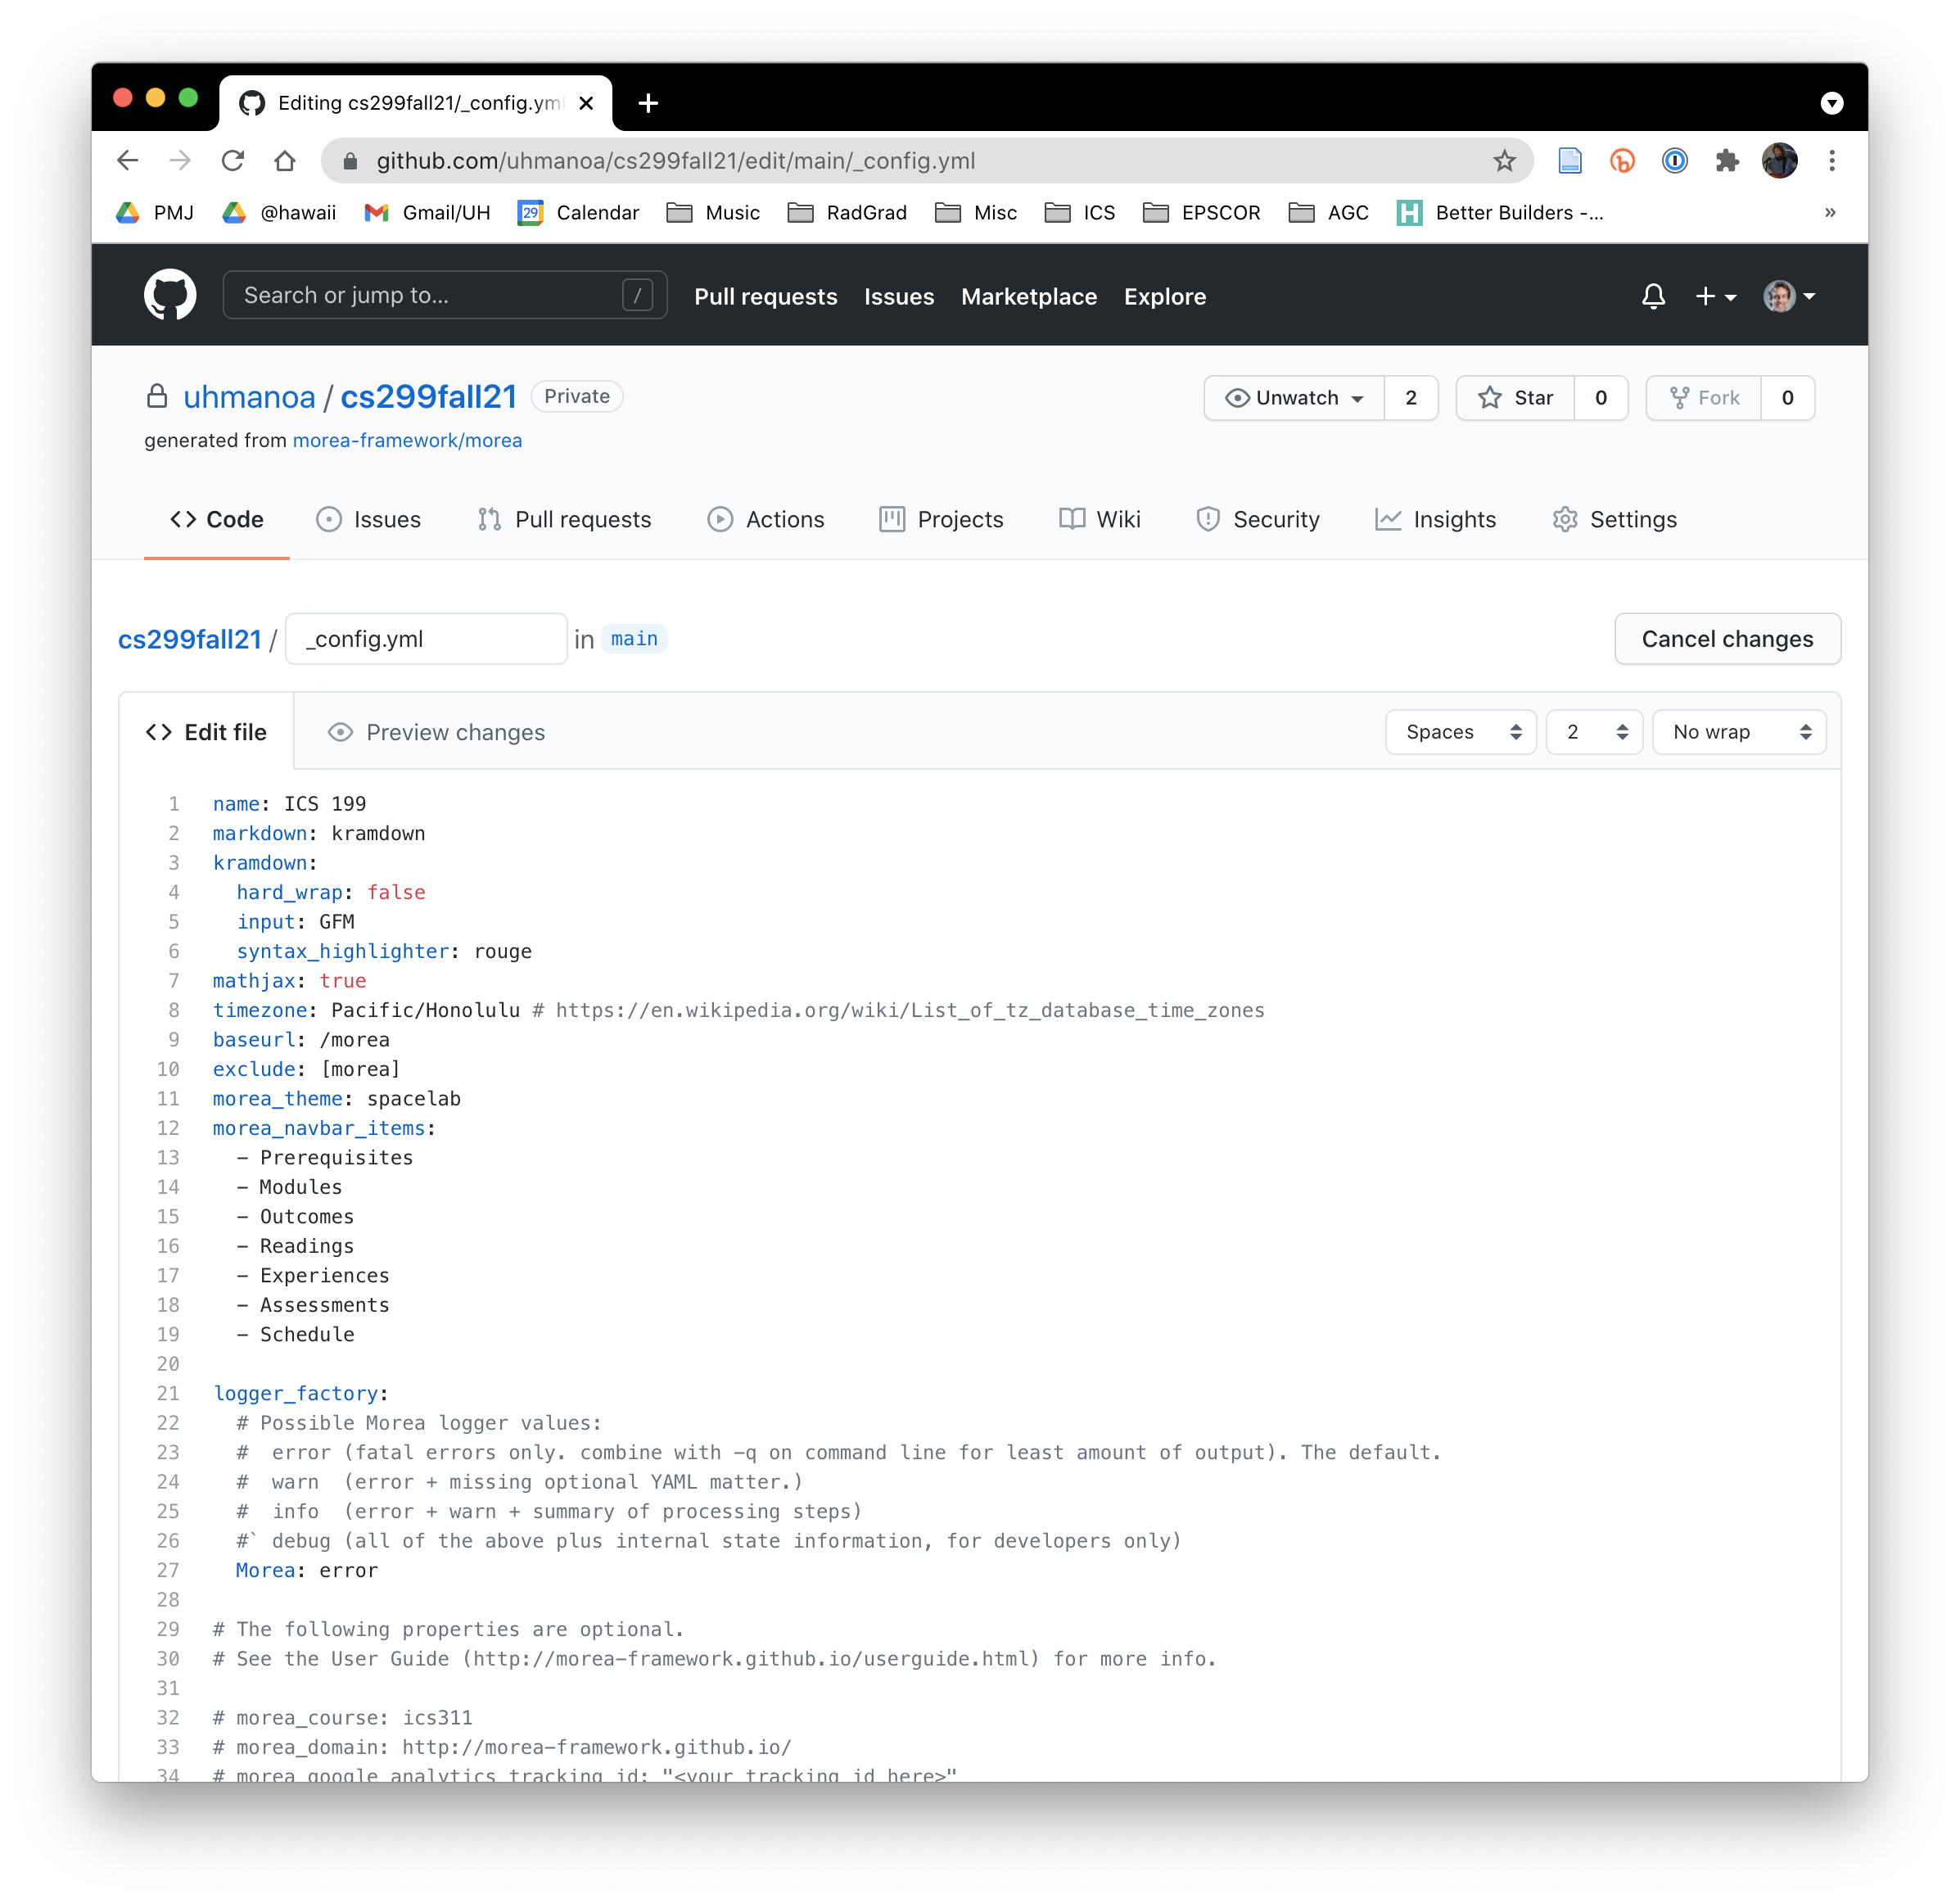
Make the following changes to this file:
- Edit the "name:" field to specify your course name. (Example: "CS 299 Fall 2021")
- Edit the "baseurl:" field to specify your repository name. (Example: "/cs299fall21").
Here's what it might look like:
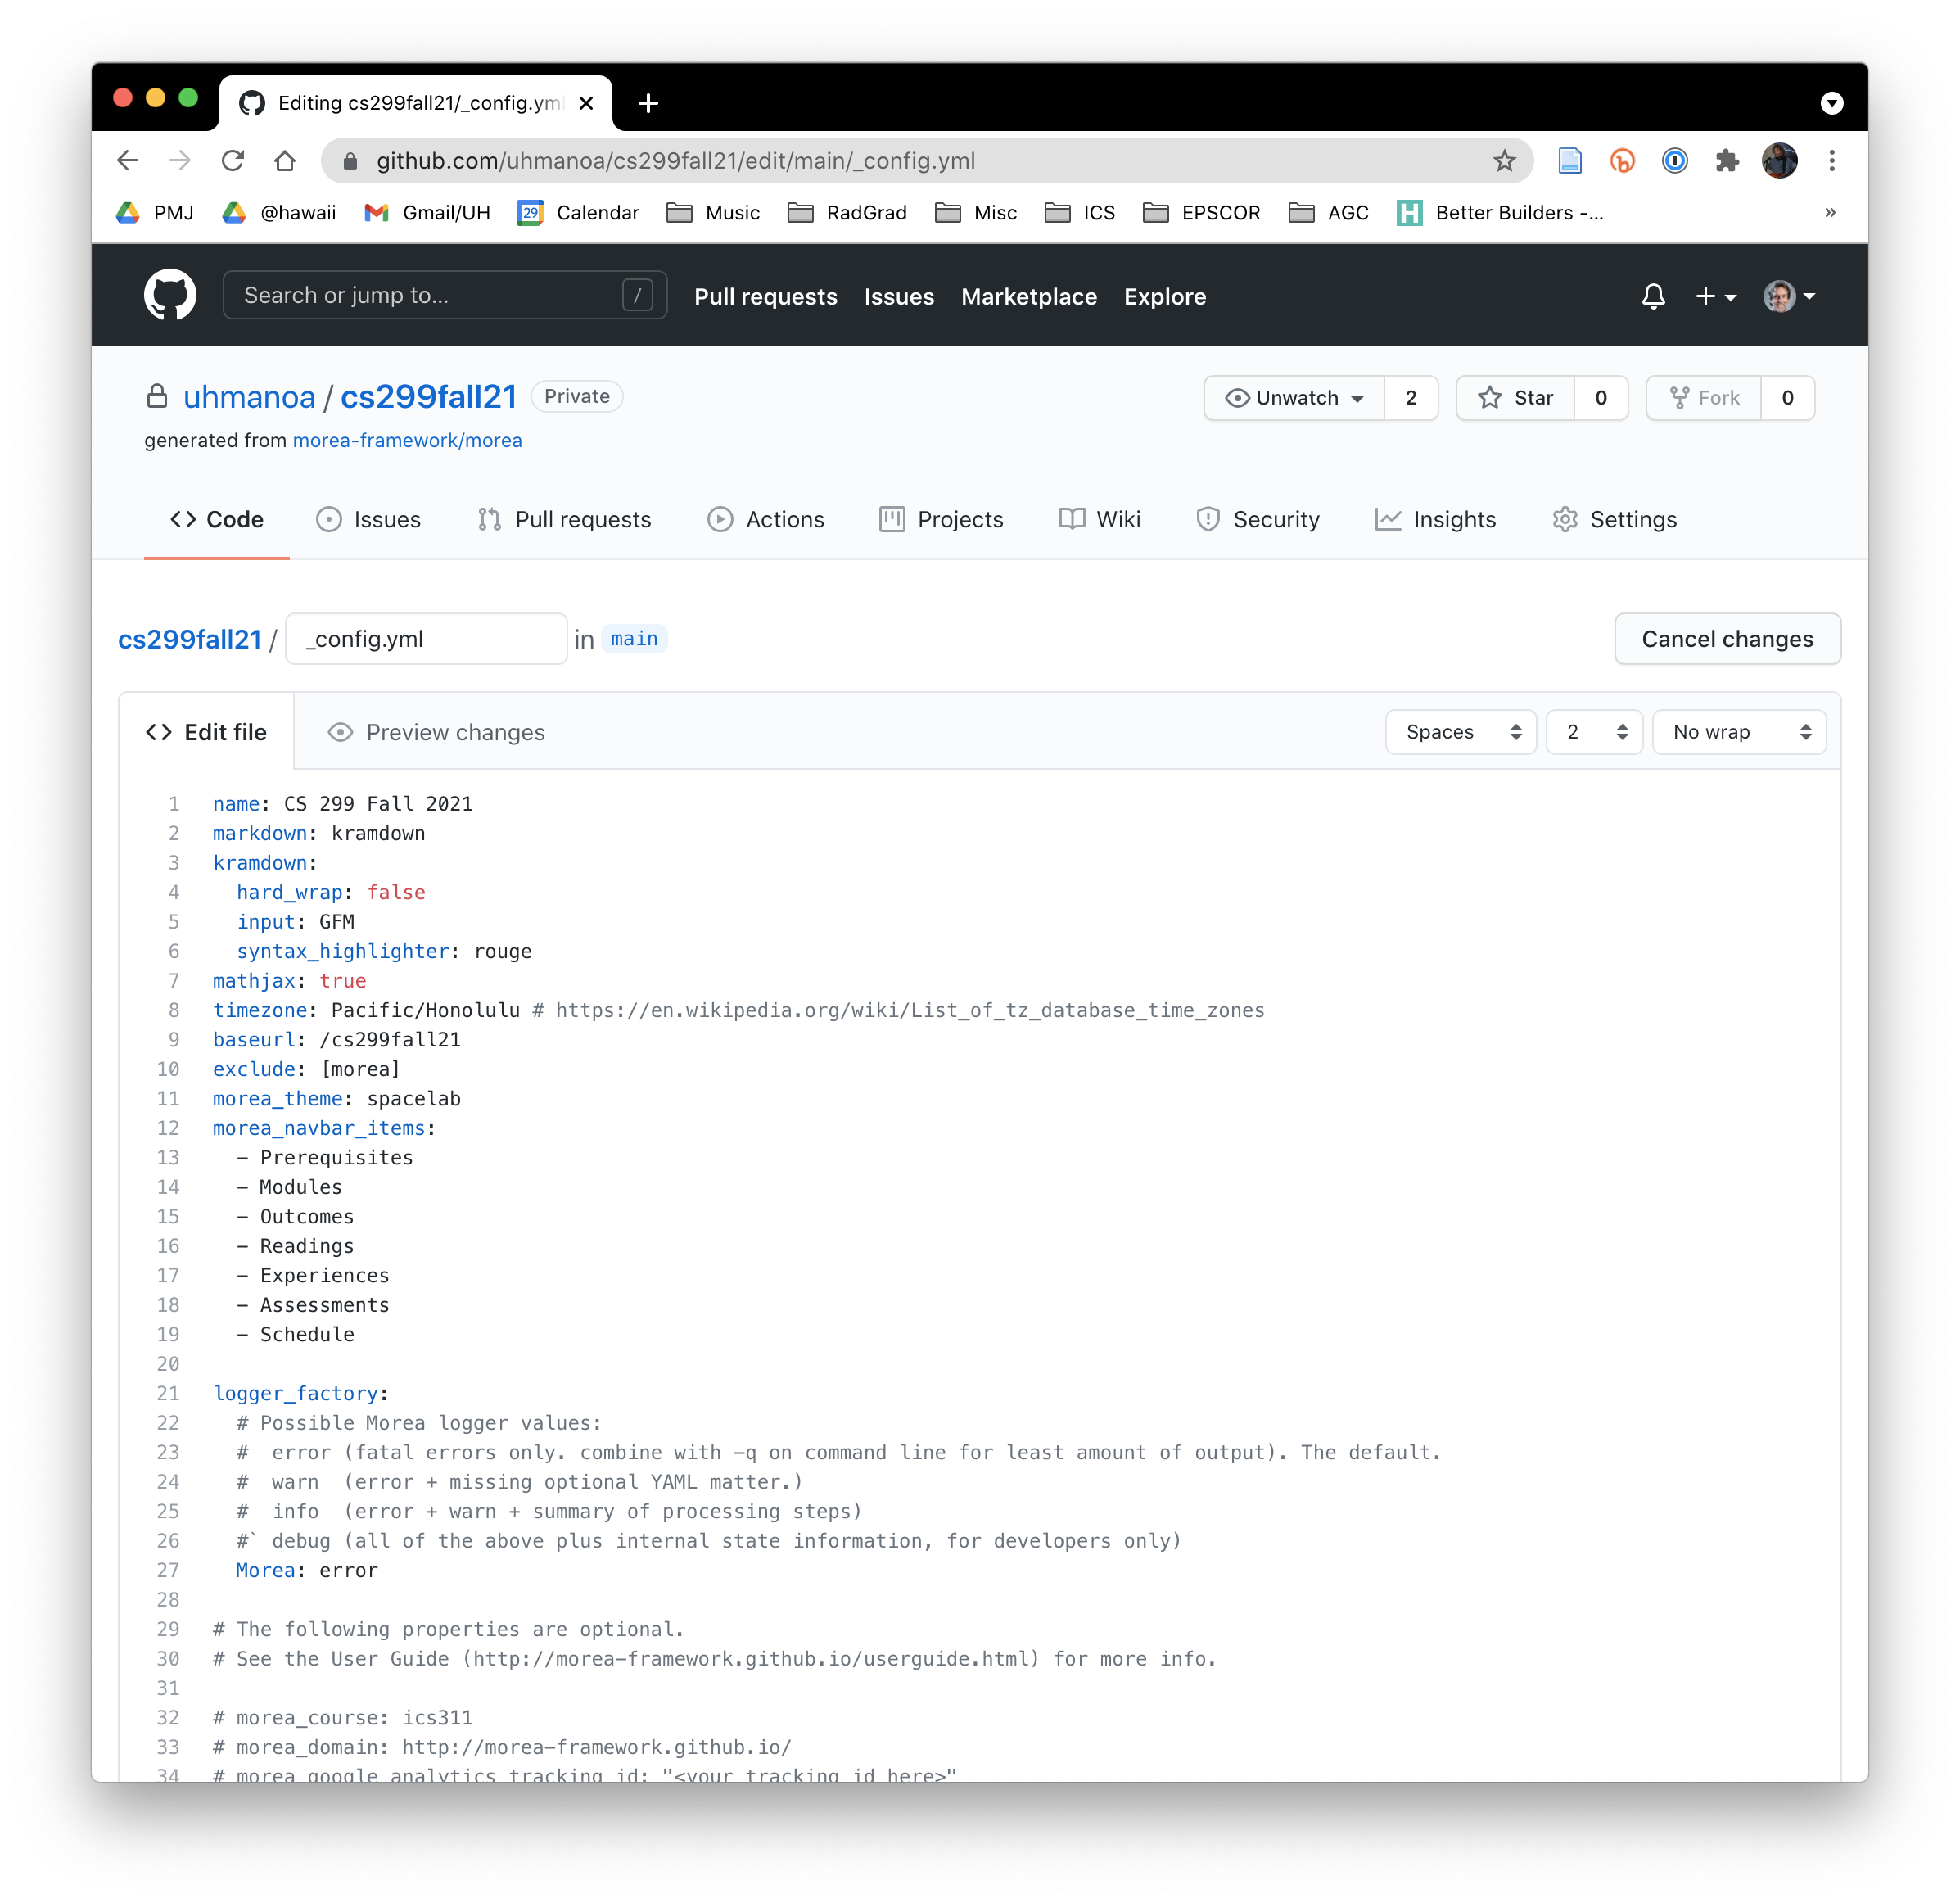
Now scroll down to the bottom of the page, write in a commit comment (i.e. "Update _config.yml"), and click "Commit changes".
Verify that GitHub built the site
Next, click on the "Actions" tab. You will see a workflow running. This task is building your site and deploying the HTML pages to the gh-pages branch of your repository. When it has completed, you should see a green checkbox next to your commit:
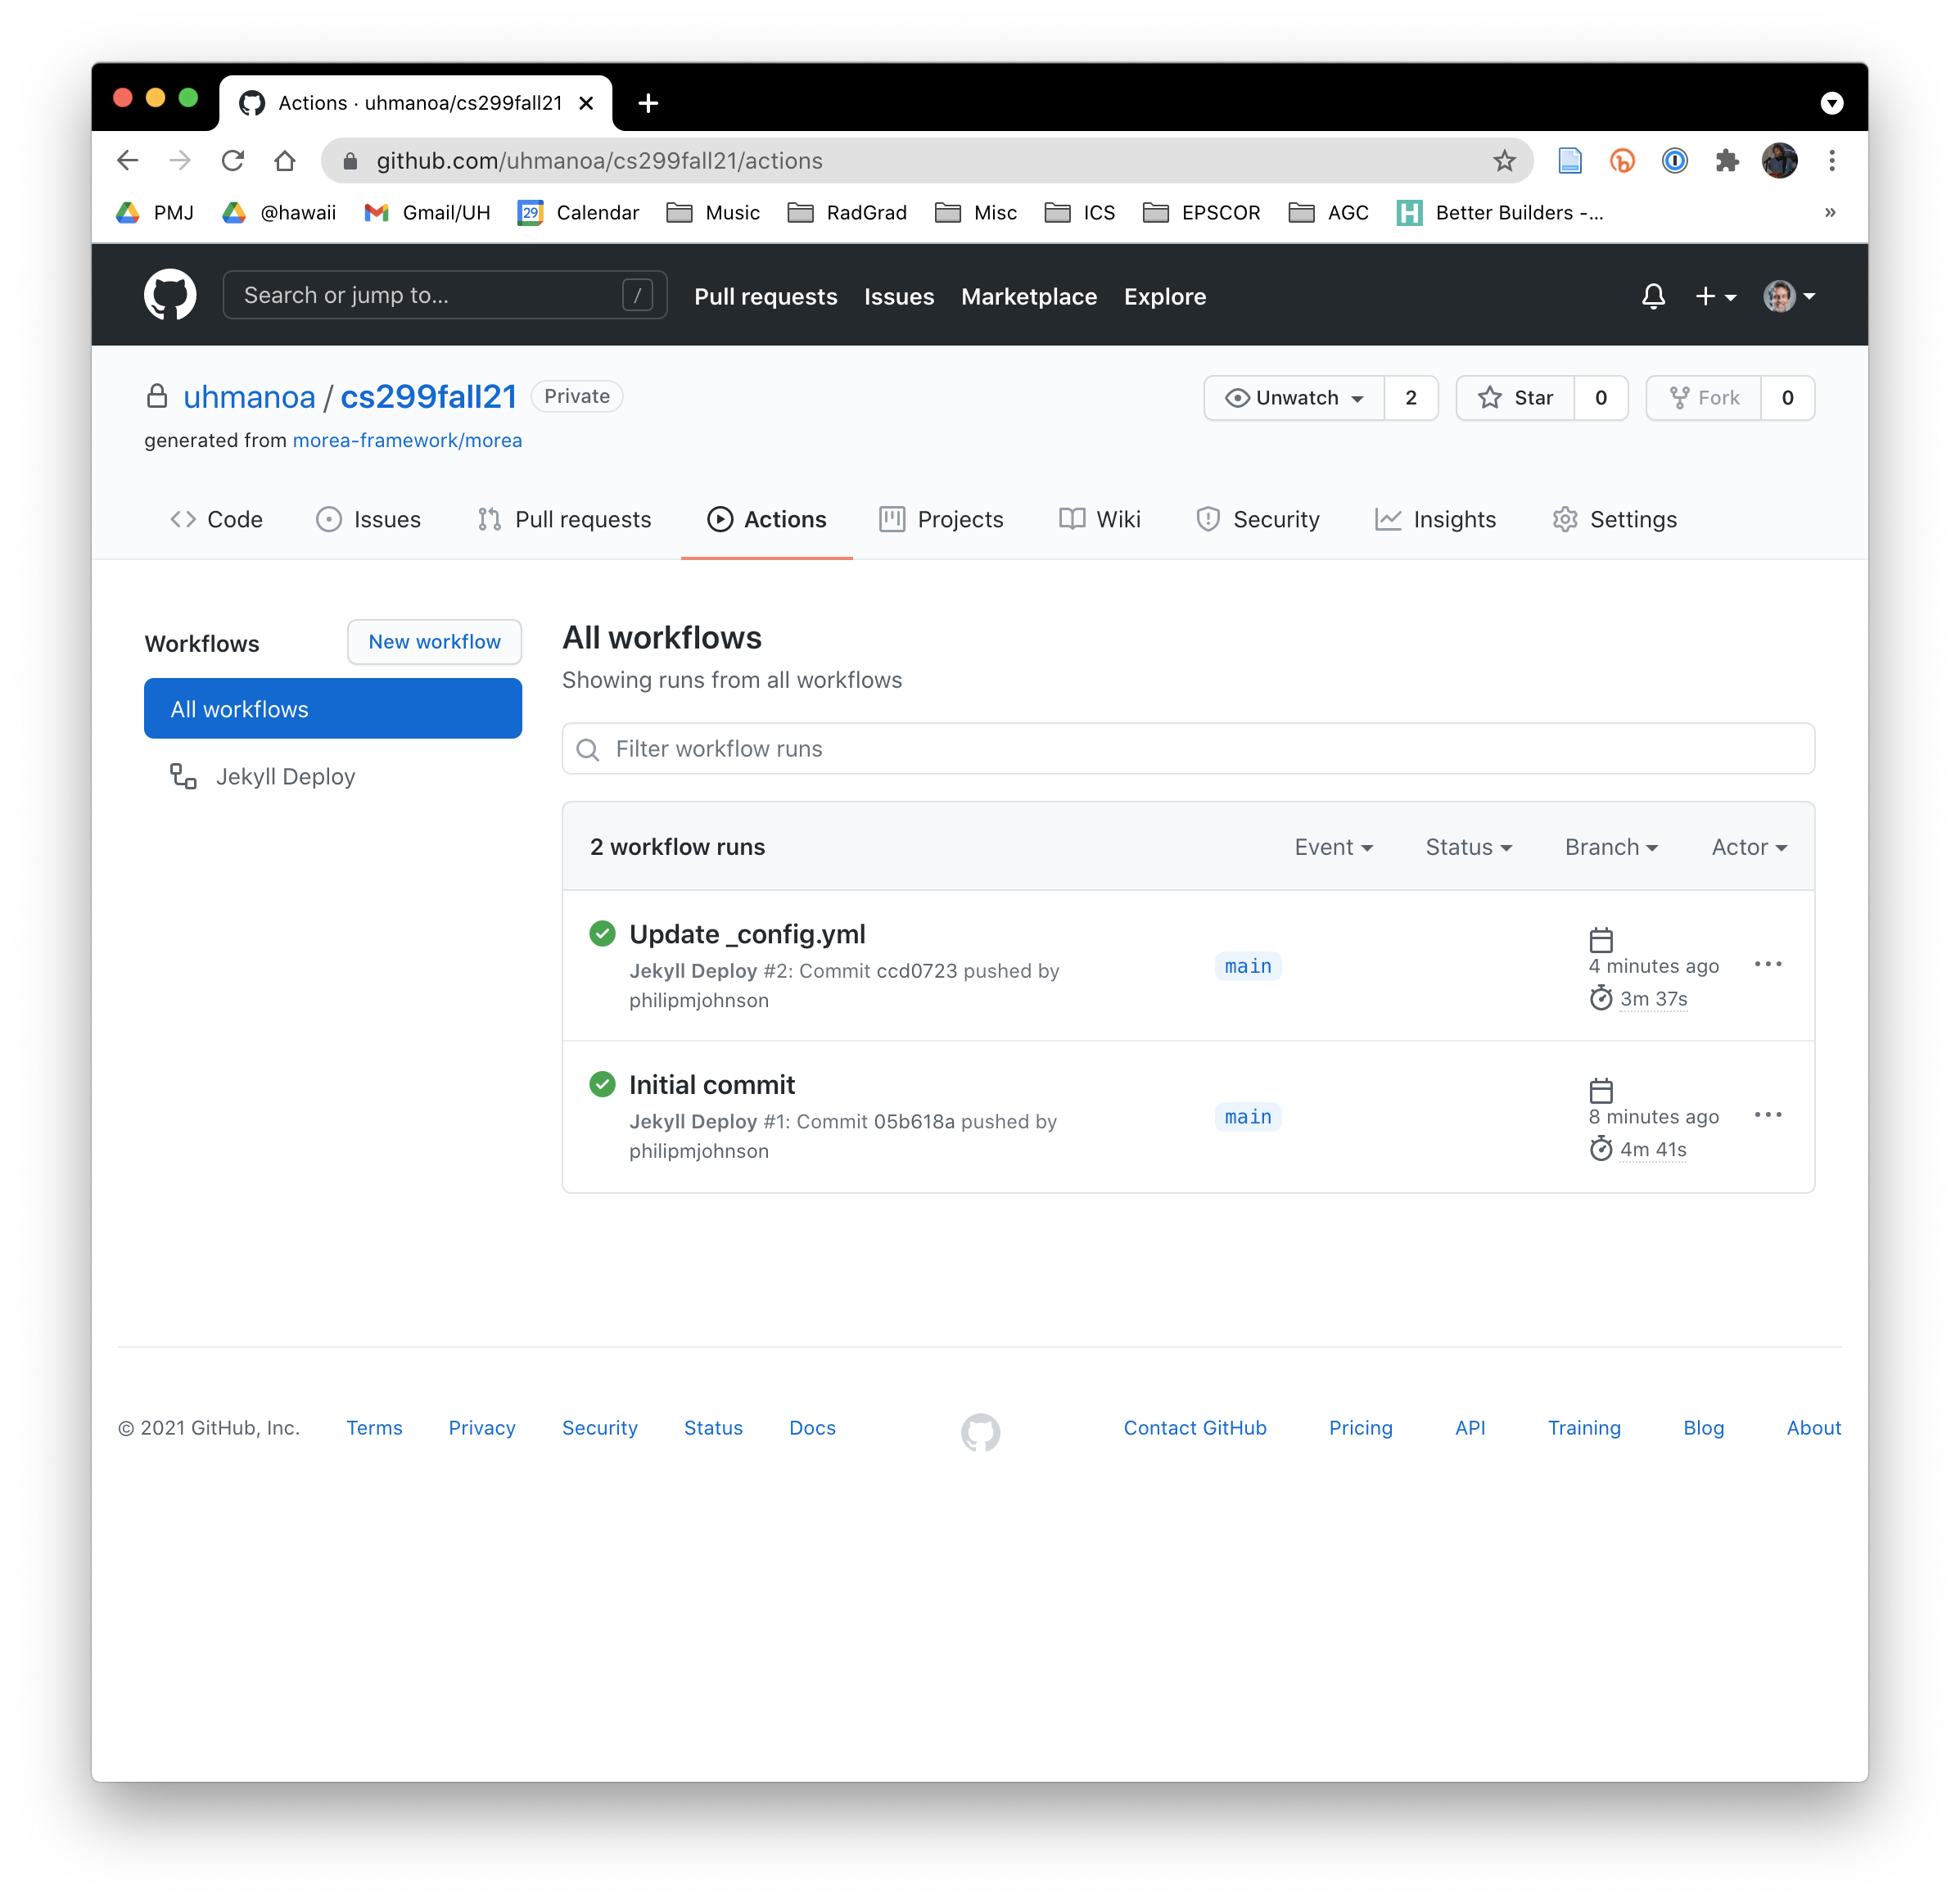
The first couple of workflow runs could take several minutes, but these runs result in caching that should decrease subsequent build times substantially. After this initial setup, your site should typically build in less than a minute.
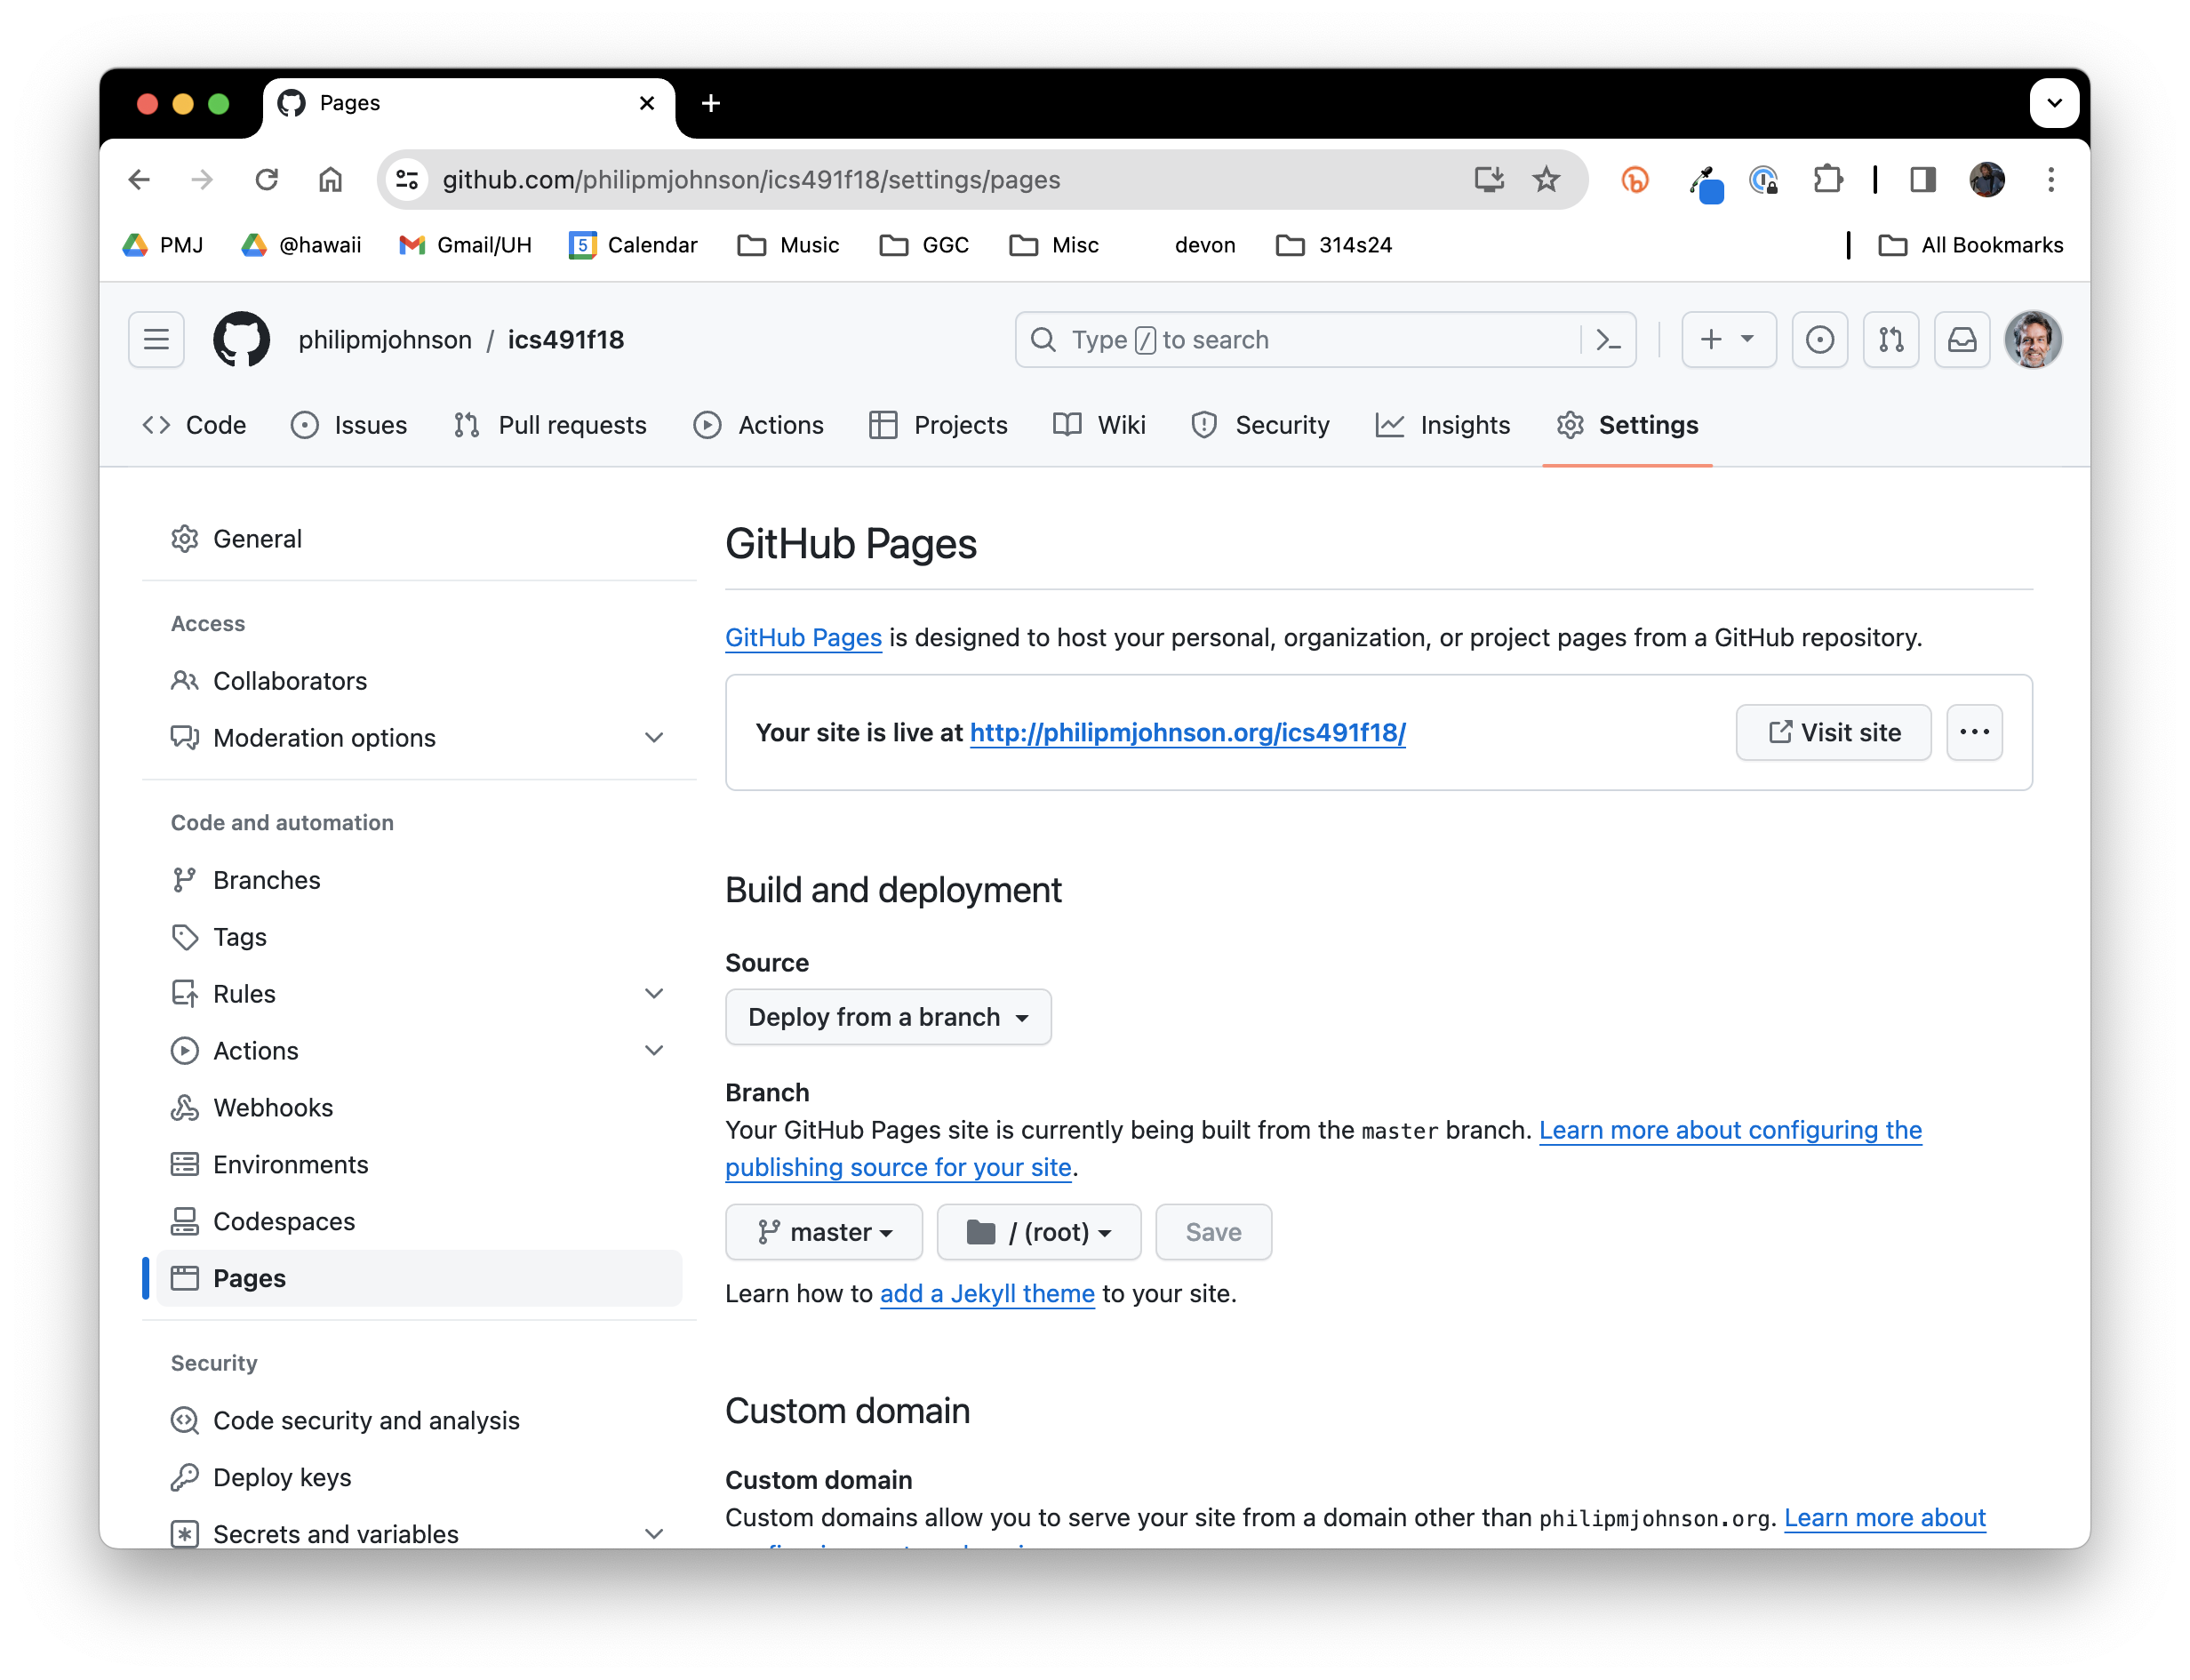
Verify the GitHub Pages settings
Now click on the Settings tab, then click "Pages". You should see something like the following:
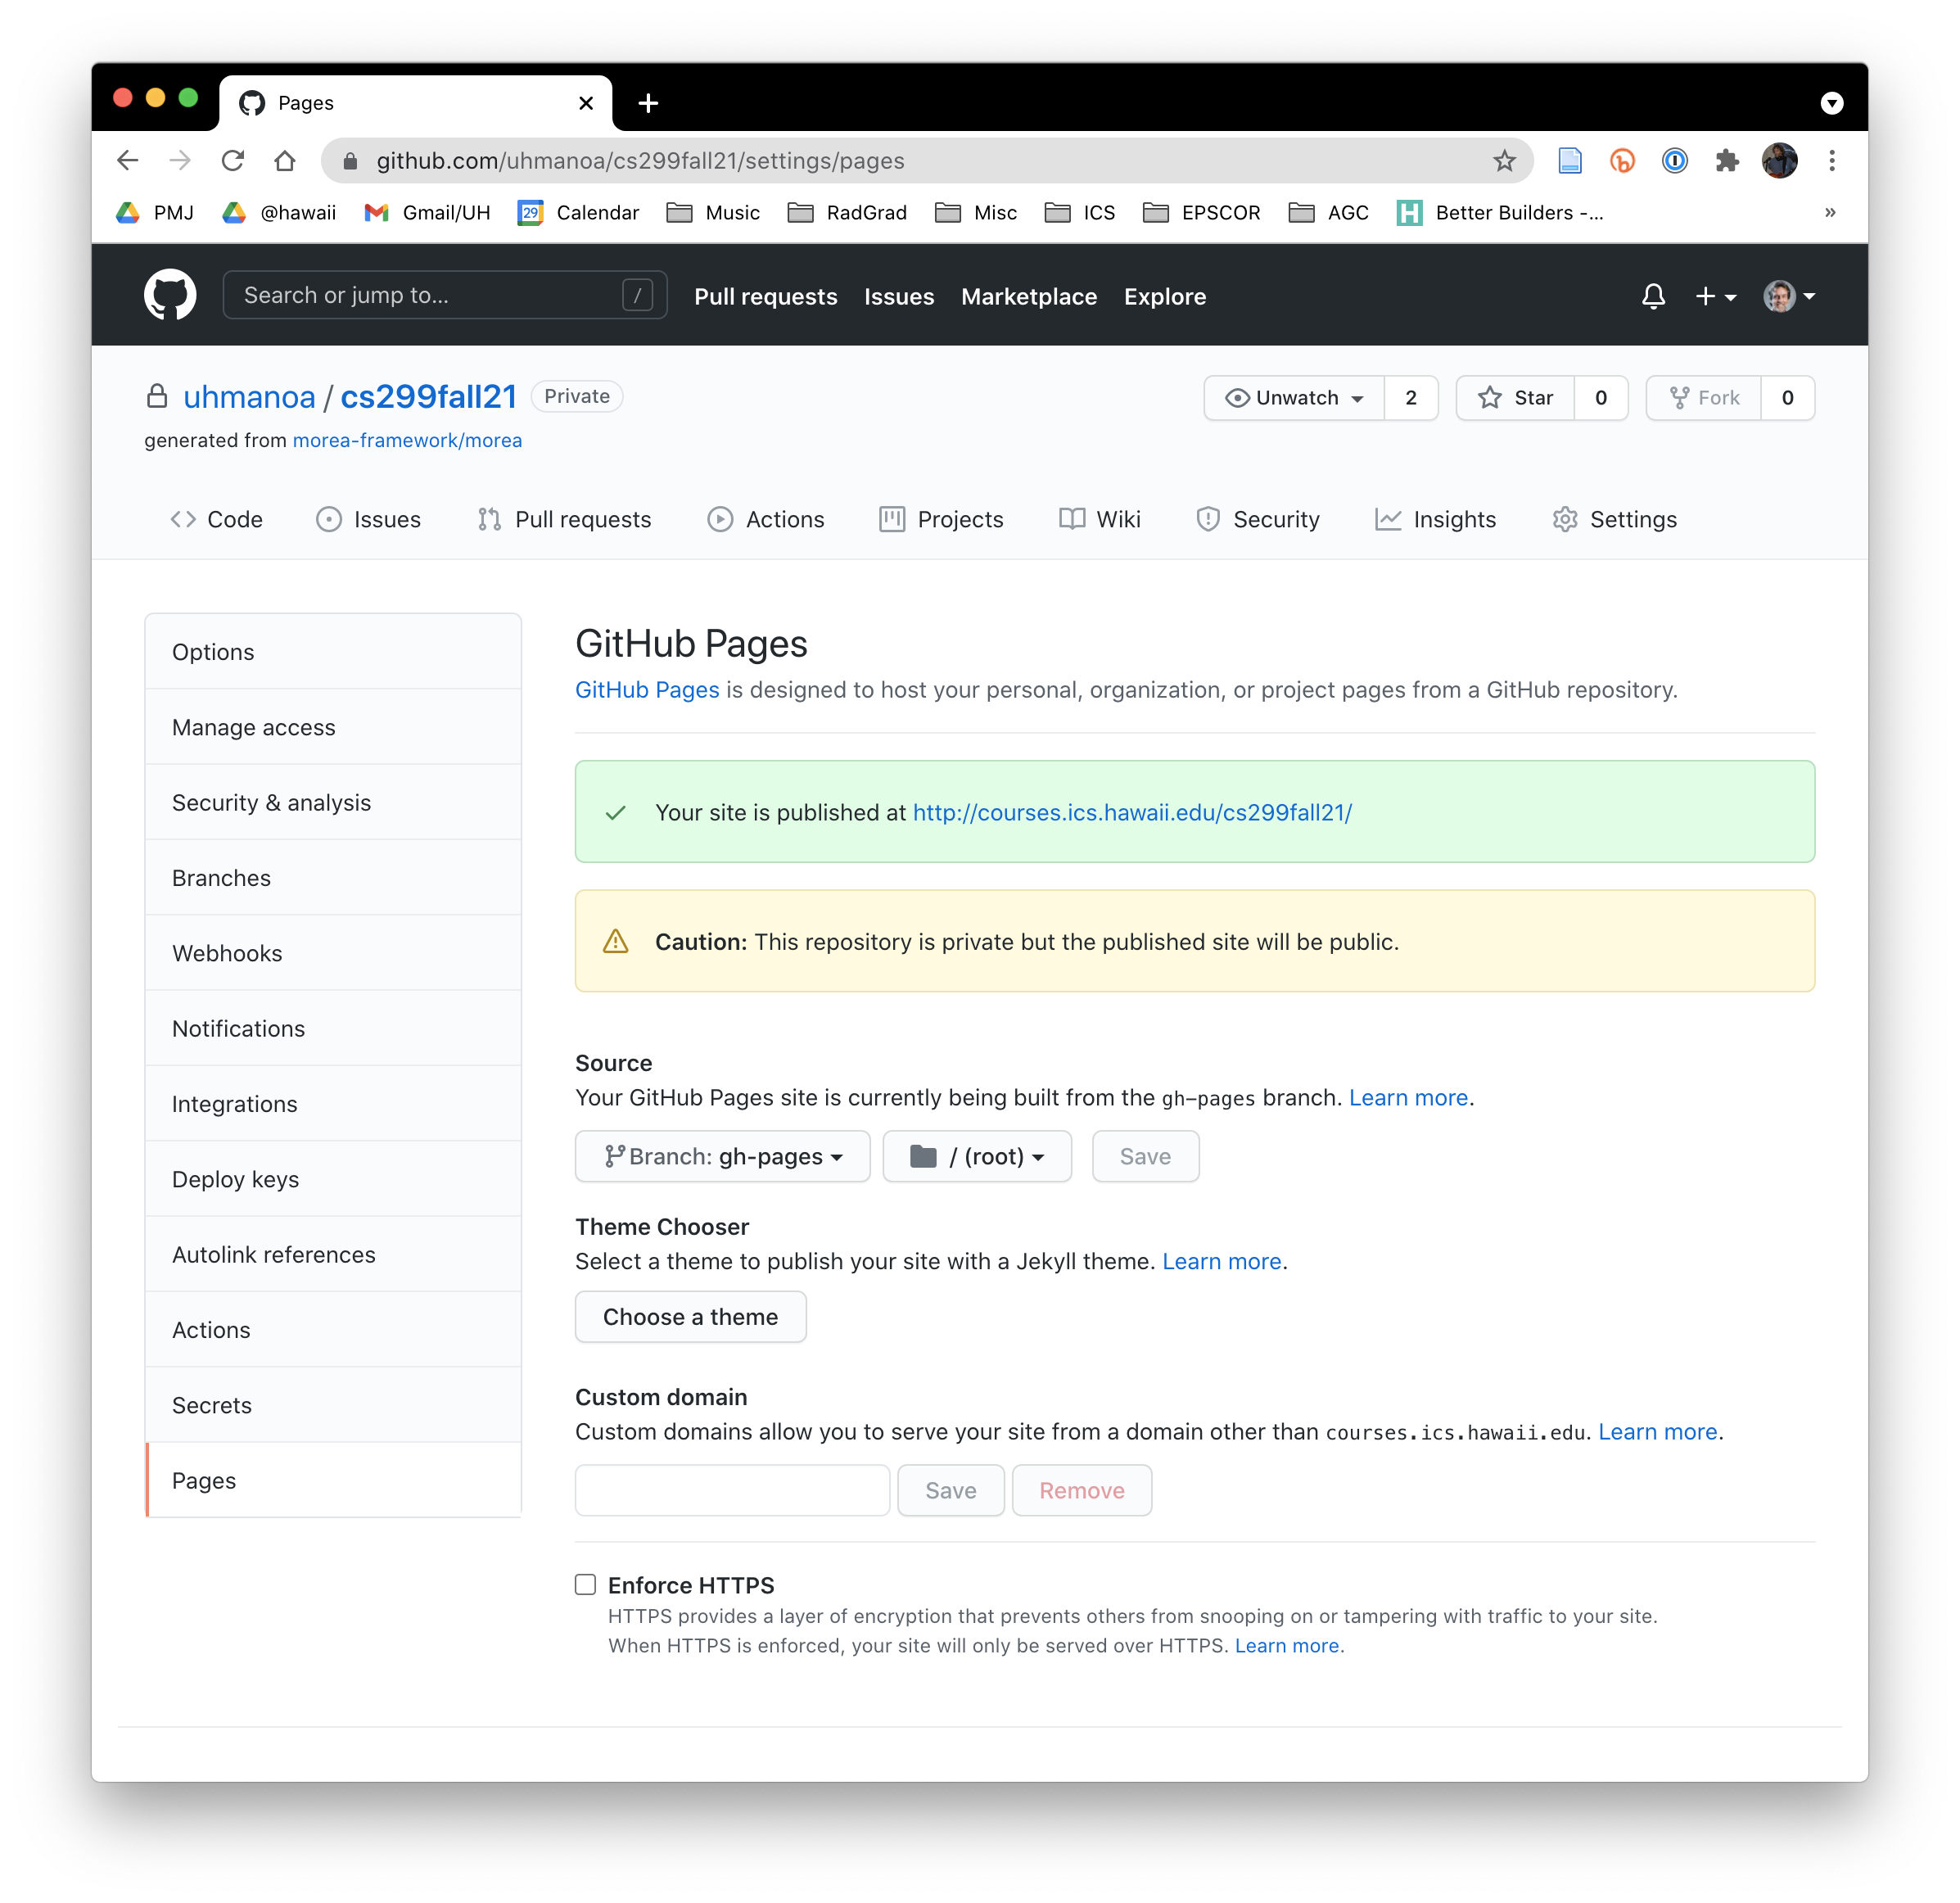
Check the following things:
In the "Build and Deployment" section, make sure that "Source" is "Deploy from a branch", and that the branch is "gh-pages". If you have to change this setting, then this should trigger a rebuild of the site which you can follow from the Actions tab.
In the "Custom domain" setting, click the "Enforce HTTPS" checkbox.
When everything is configured correctly and the site is built and deployed, then this page should display a link to the publicly available URL to your site.
Display your published course website
Now click on the link in the GitHub Pages page to see your newly published Morea site. It should look similar to this:
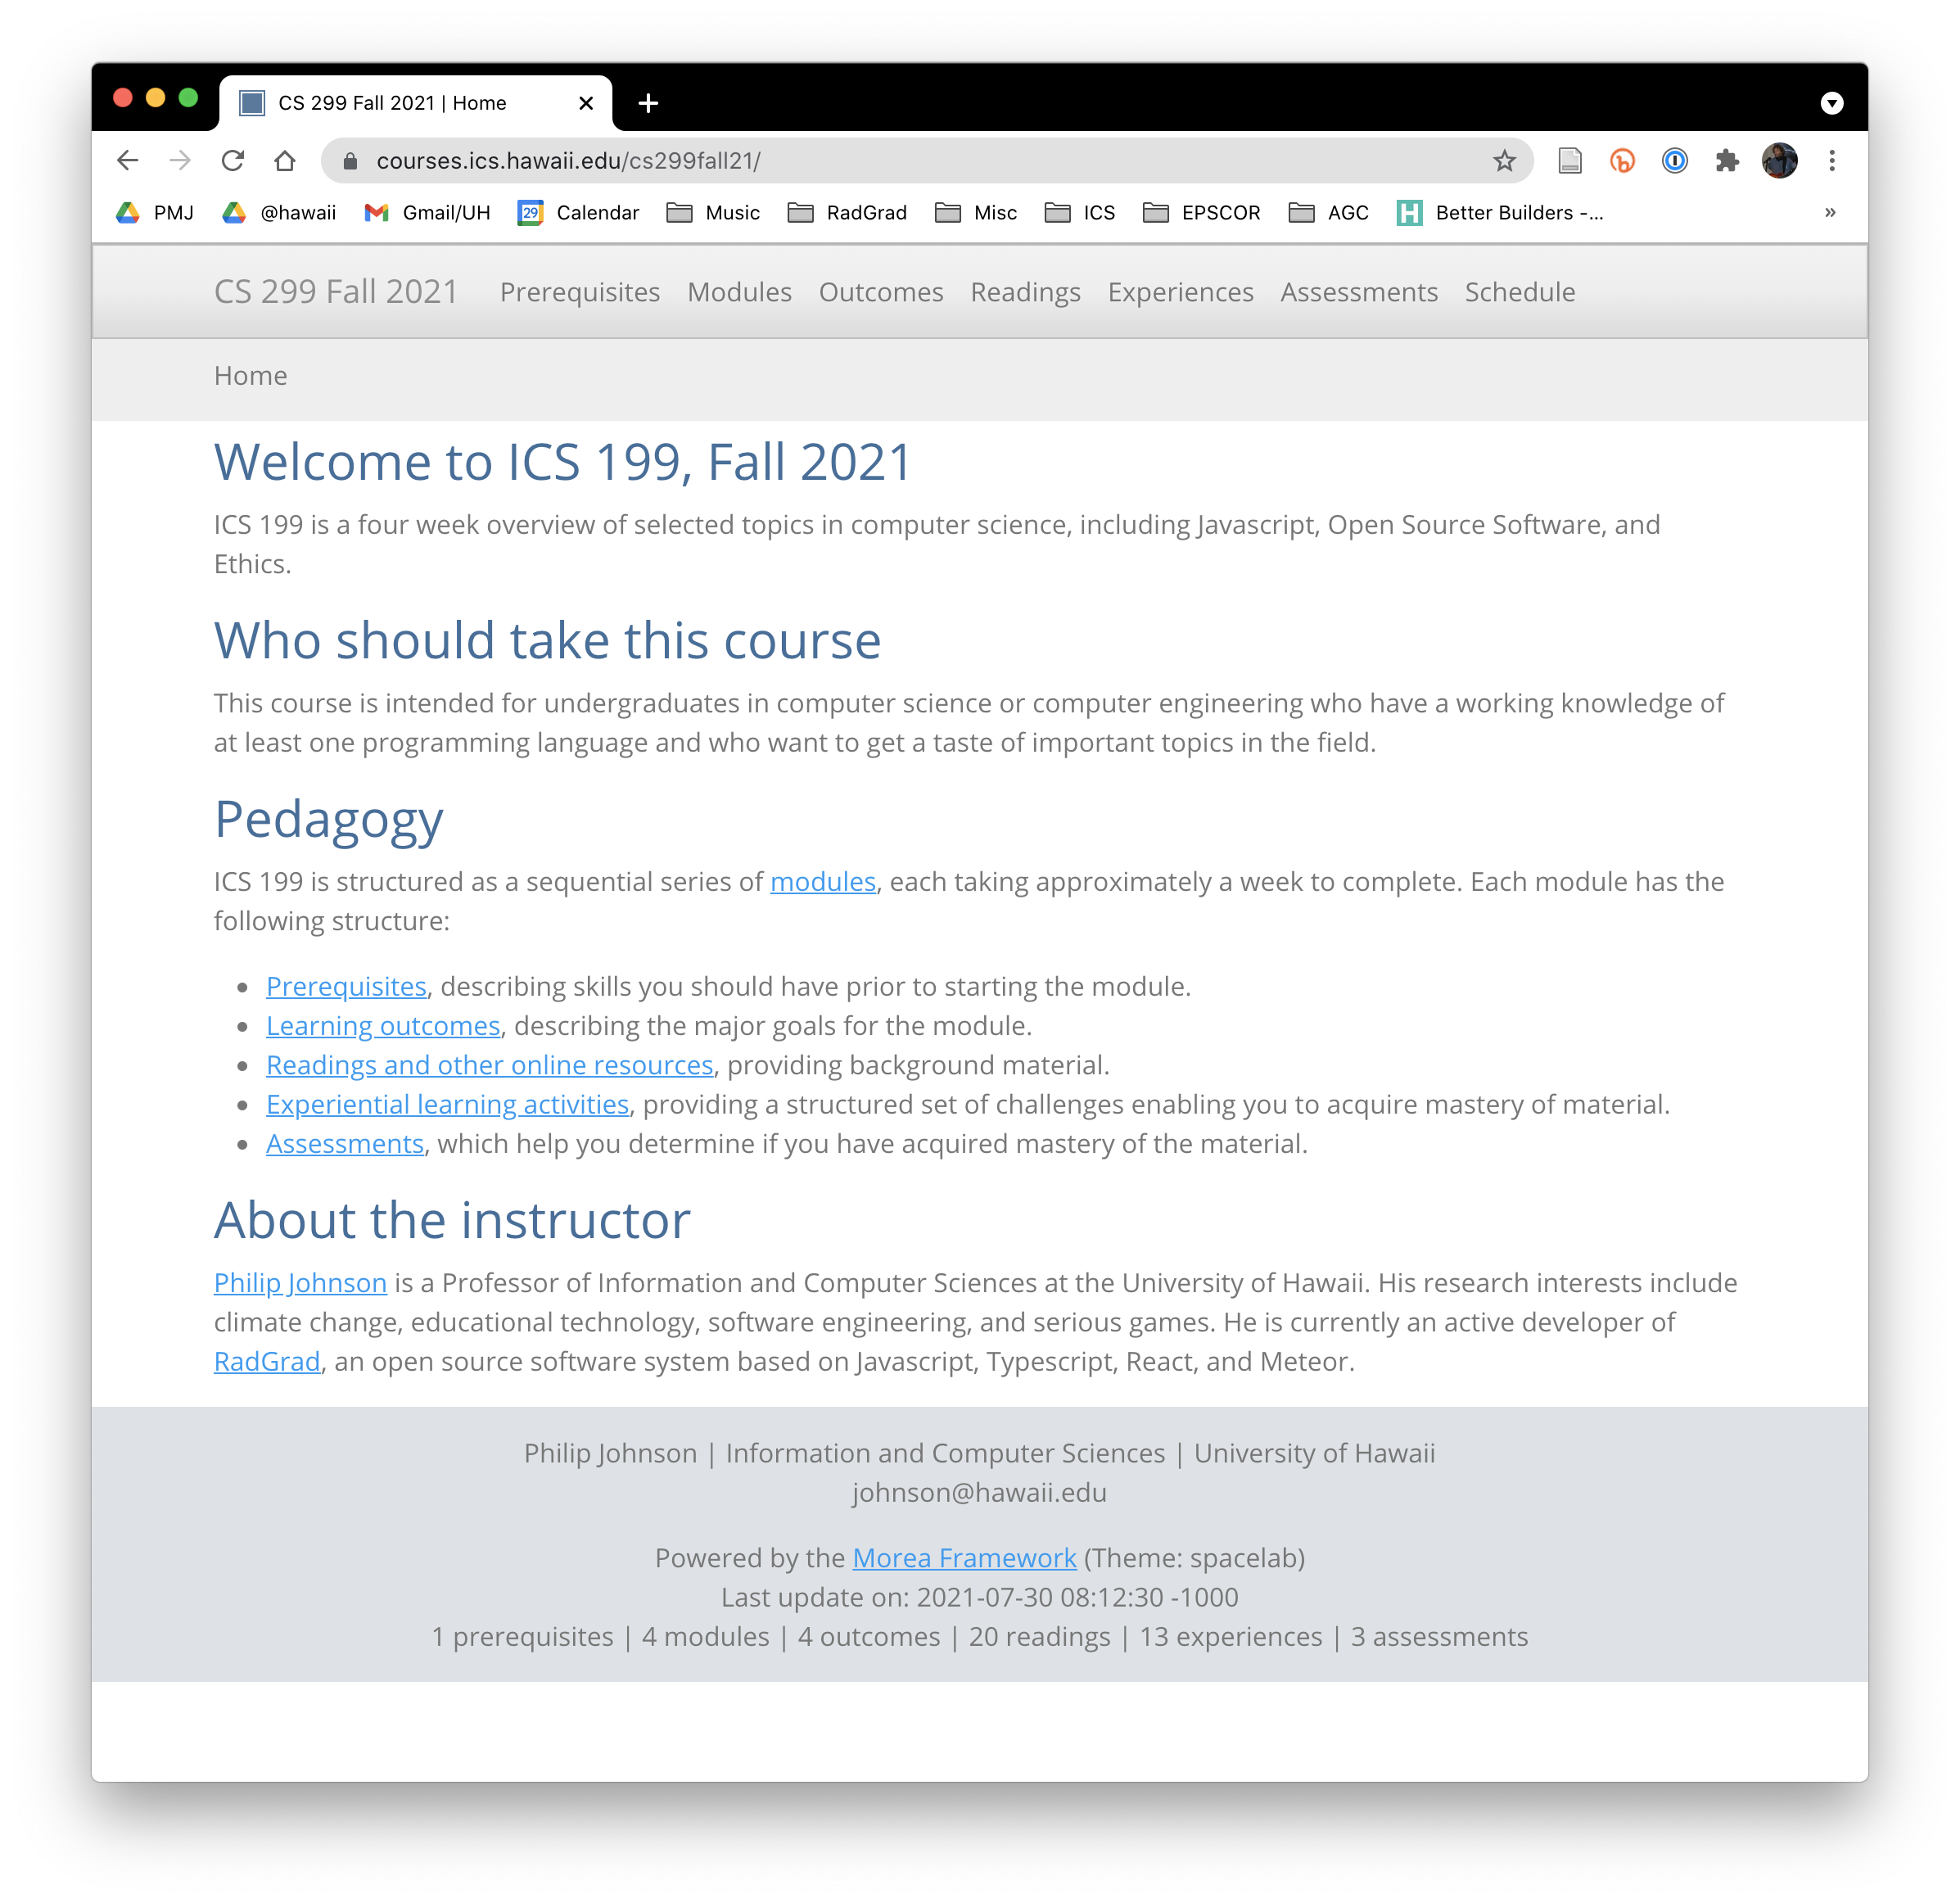
Unfortunately, apart from the site name in the menubar ("CS 299 Fall 2021"), none of this content is appropriate for your course!
Before proceeding, you might want to spend a few minutes clicking around your newly site. This site illustrates many (though not all) of the features of a Morea site.
If the site builds successfully but you get an error when trying to retrieve the published site in your browser, check that the baseurl field in _config.yml matches the repository name. If it doesn't, then edit the _config.yml file, commit the change, and wait for the new build to conclude. Then retrieve the home page of your site again.
If that doesn't fix it, please contact a Morea developer (i.e. Philip Johnson (johnson@hawaii.edu)).
Choose local or cloud development
Once you're ready to move on, you need to decide whether you want to develop your site "locally", by running programs directly on your laptop, or "in the cloud", using a browser to do everything.
Here are some of the pros and cons of these two alternatives:
"Local" development. Local development requires you to install a few tools on your computer, including GitHub Desktop, an editor, and Jekyll. If you are a software developer, you might have most or all of these tools installed already. If you are using MacOS (Unix), then installing these tools are relatively easy. Once you have the tools installed, then development (particularly if you have a favorite editor) is pretty easy.
The big downside of local development is the need to install tools--particularly Jekyll, and particularly if your laptop uses Windows. Many people have a hard time installing Jekyll successfully on Windows. If you can't get Jekyll installed, then it's very difficult to develop your Morea site efficiently.
"Cloud" development. Cloud development involves using a cloud-based based package called Gitpod. Basically, Gitpod provides a unix box pre-installed with all the tools you need to develop your Morea site in the cloud. You access everything through a browser, and edit your site using a browser-based version of Visual Studio Code.
For many people, cloud development is the clear winner: you don't have to install anything locally, and so it doesn't matter if you are using Unix or Windows. In fact, the only significant reason I can think of to choose Local development over Cloud development is if you prefer a different editor to Visual Studio Code.
The good news about making this "choice" is that it isn't permanent: you can switch back and forth between these alternatives at any time. So, just pick the approach that seems most likely to work for you right now, and if it doesn't, then come back and switch to the other one.