Cloud development
If you've completed the Quick Start and Cloud Installation sections, you now have your own Morea website in a GitHub repository, and you've set up GitPod to access your code, build the site, and display it in a browser.
The following video provides a walkthrough of the instructions in this page.
Customize your content
Now let's make some simple changes to your site.
Modify theme & navbar
To begin, let's change the theme of the site from spacelab to cerulean, and get rid of the "Prerequisites" navbar menu item (because your course will not include any prerequisite modules). Edit config.yml by changing morea_theme: to cerulean, and comment out the Prerequisites entry in morea_navbar_items:
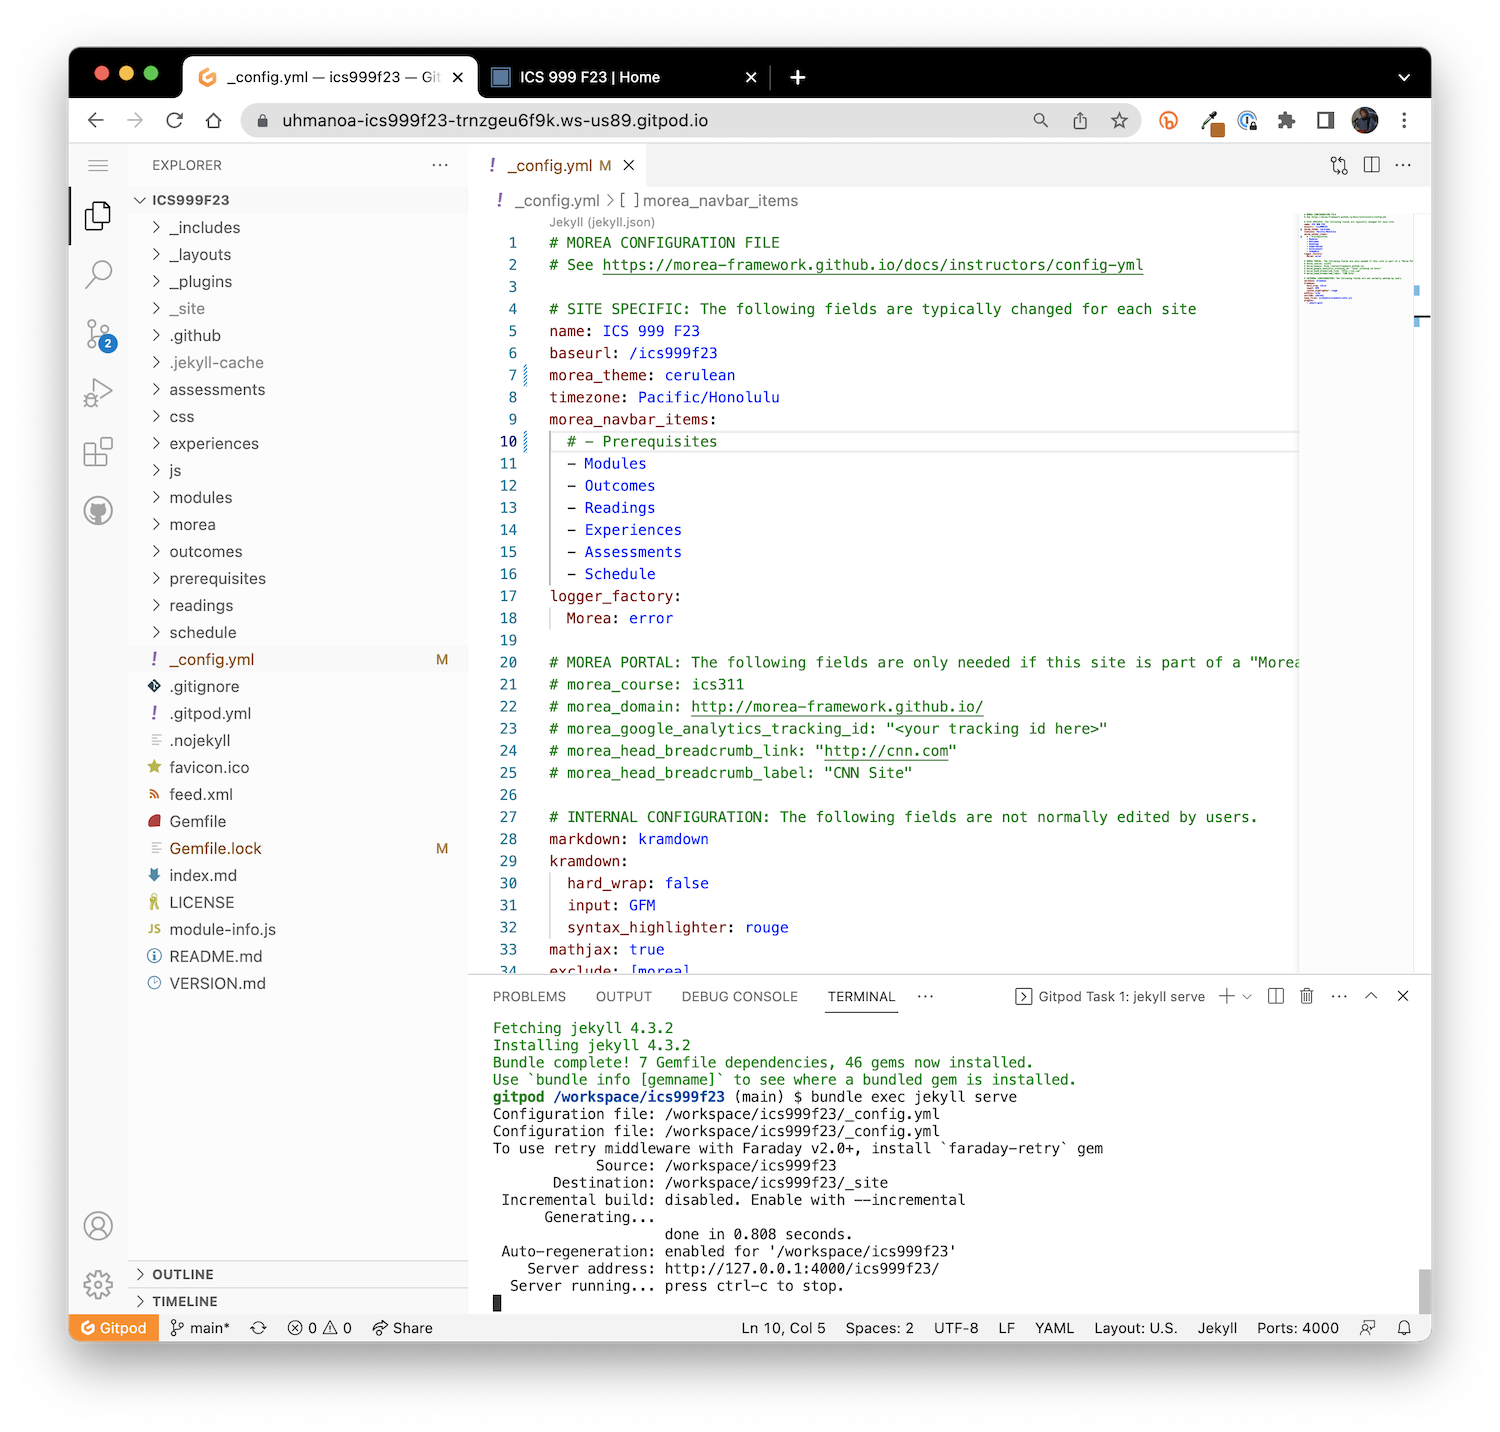
Now click into your terminal window, press control-c to terminate the Jekyll process, control-p to retrieve the last command (i.e. bundle exec jekyll serve), and return to restart. Refresh the browser window in the other tab and it now should look like this:
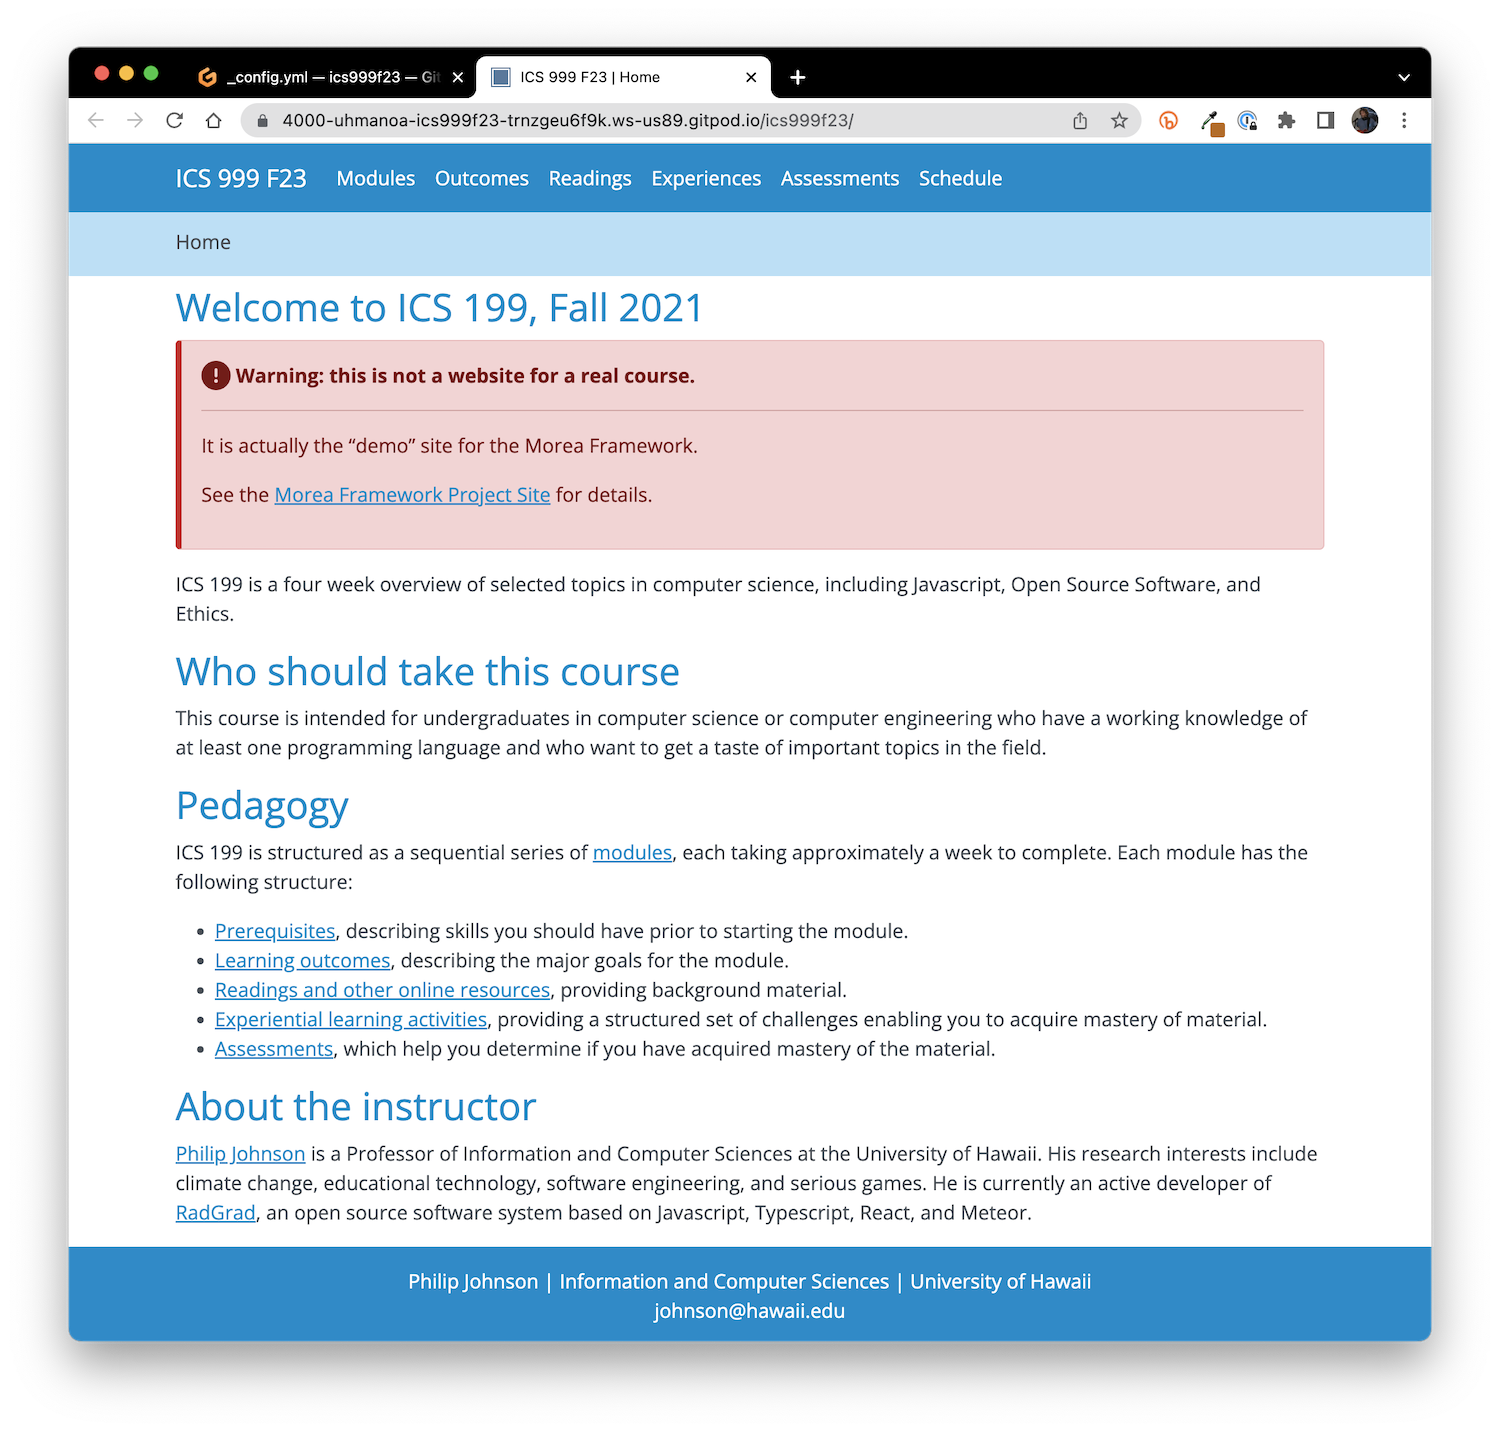
The Prerequisites menu item is gone, and the color theme is now blue.
Unpublish modules
The example modules provide useful guidance on the syntax of Morea, but you don't want them to be part of your actual site. The easiest way to do that is to unpublish them. To unpublish the Introduction module, go into morea/modules/example-introduction/module-introduction.md, and change the published: field to false:

Jekyll may report some errors in the terminal window after you save this change. You can ignore them. Just type control-c followed by bundle exec jekyll serve as before to restart Jekyll. The first thing you'll notice after refreshing your browser window is that the Introduction module no longer appears on the Modules page:
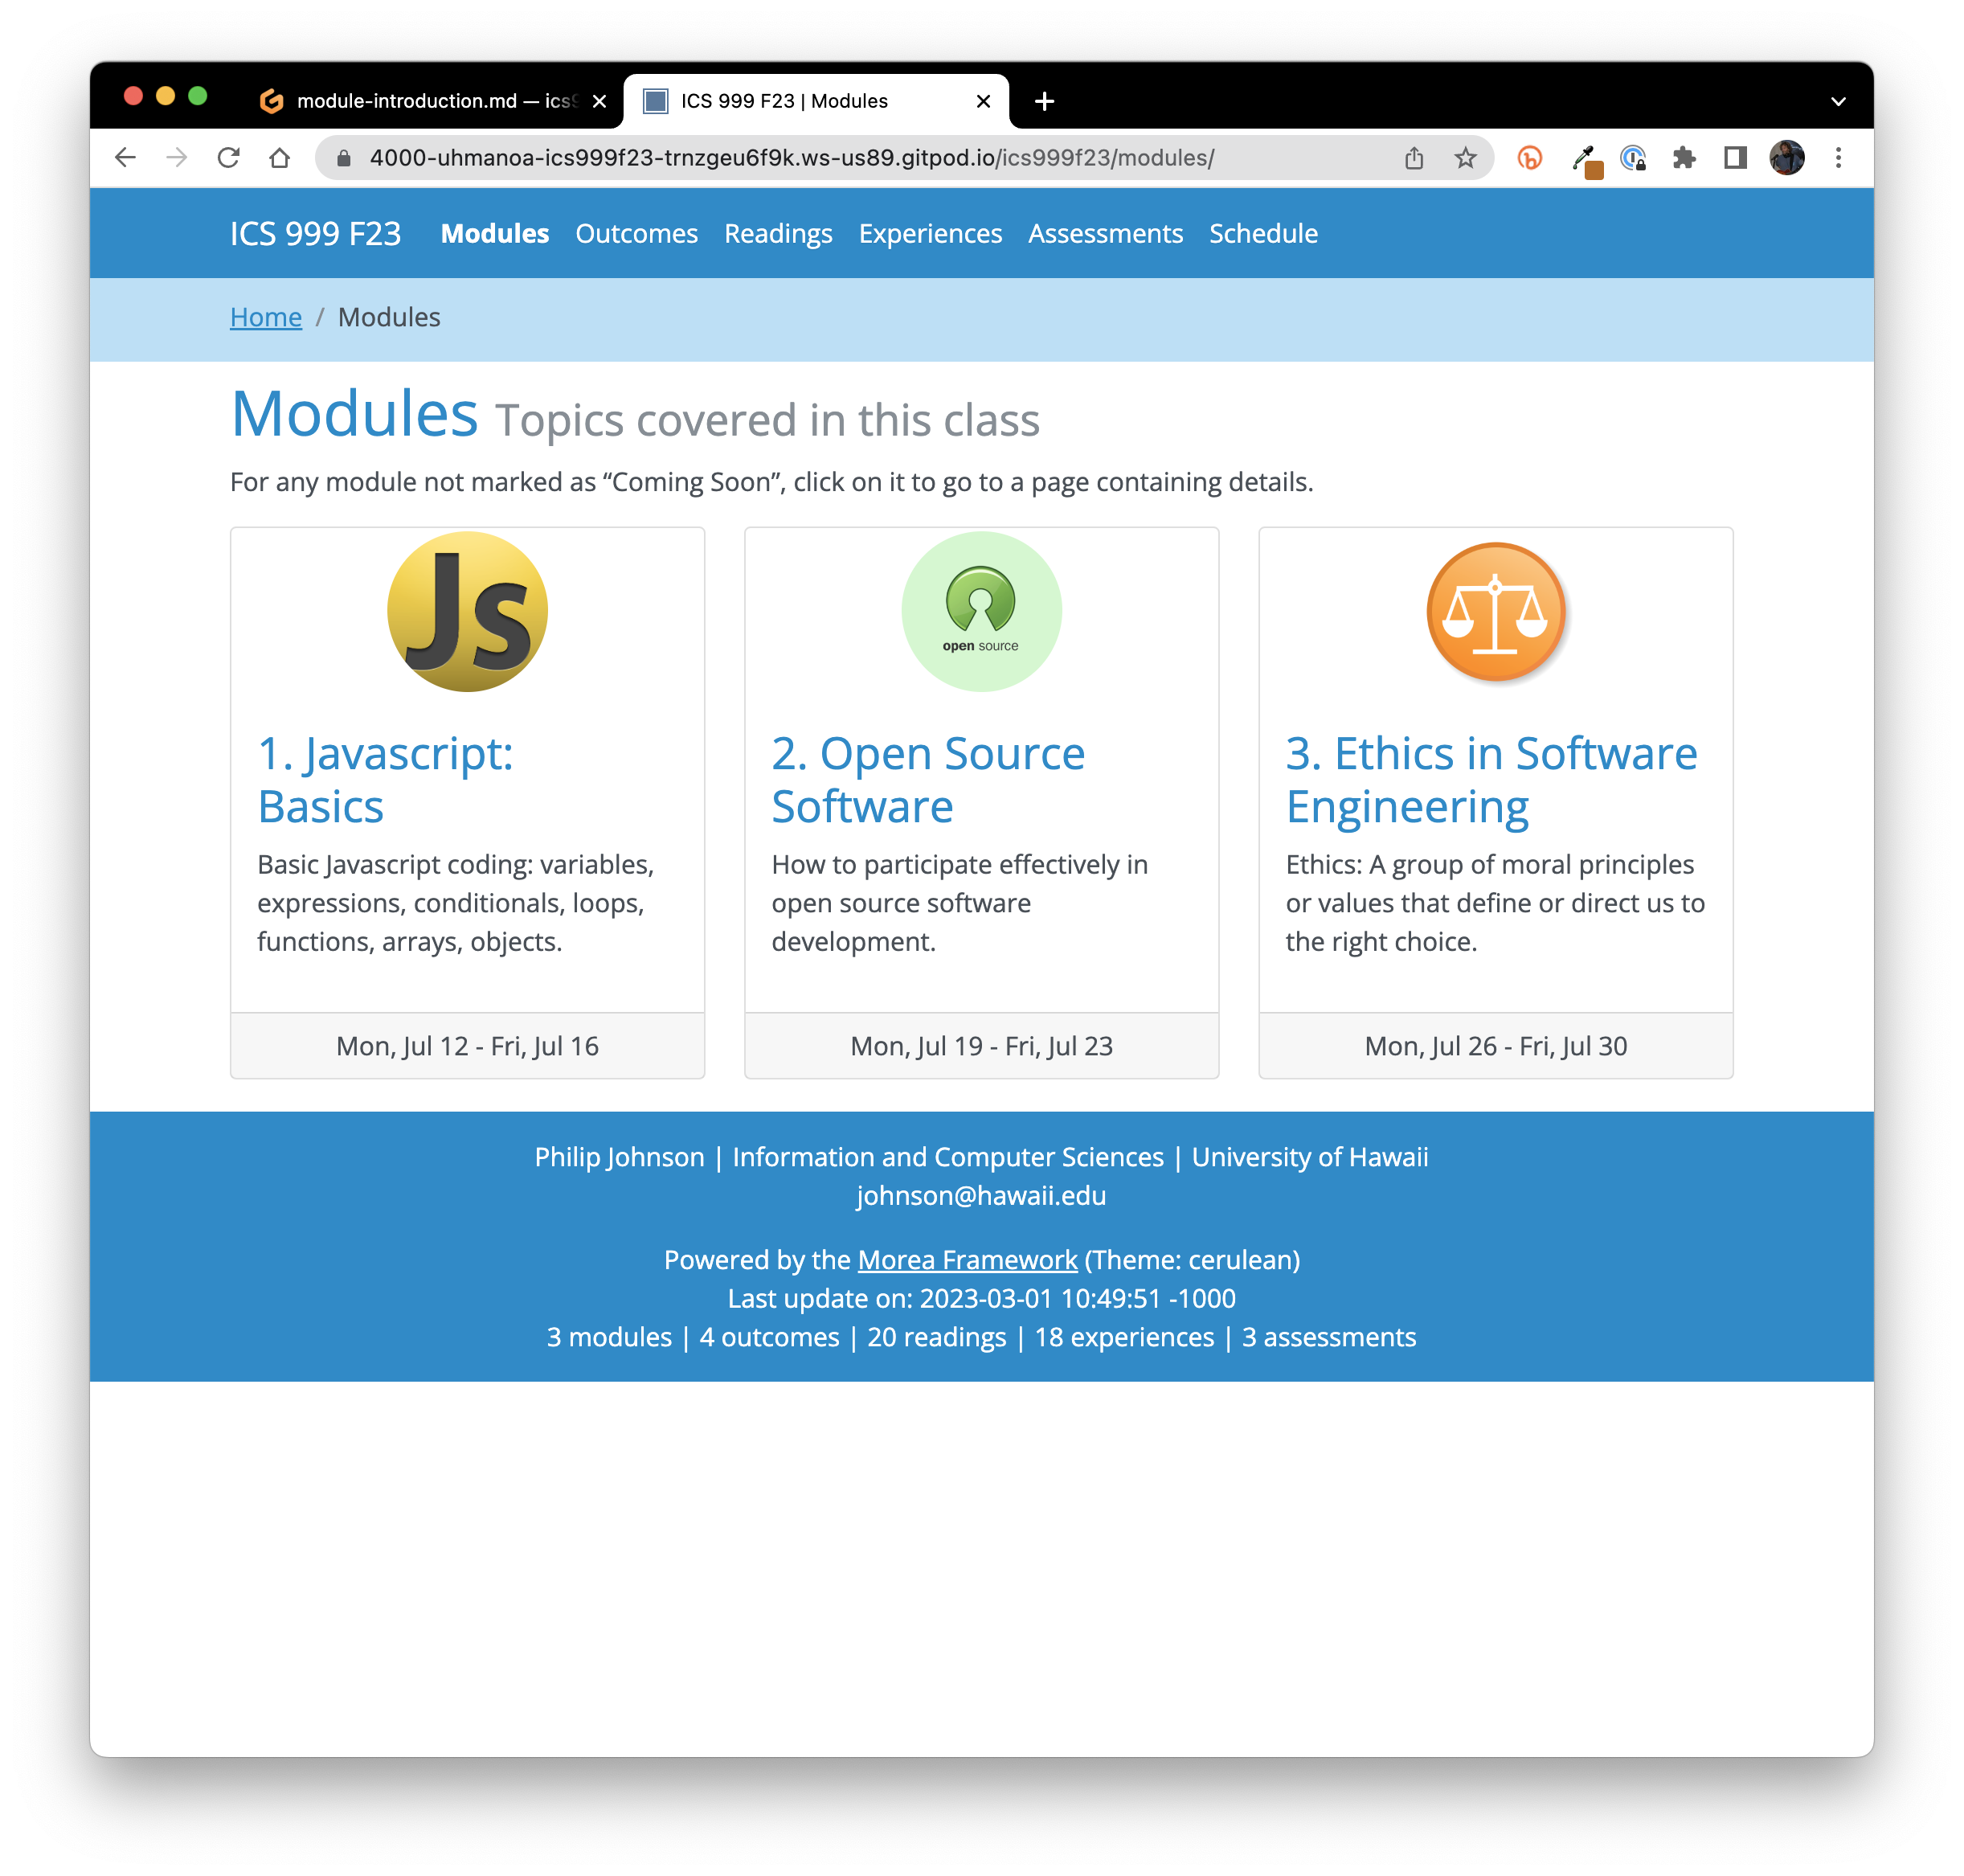
More significantly, the outcomes, readings, experiences, and assessments associated with that module have also disappeared.
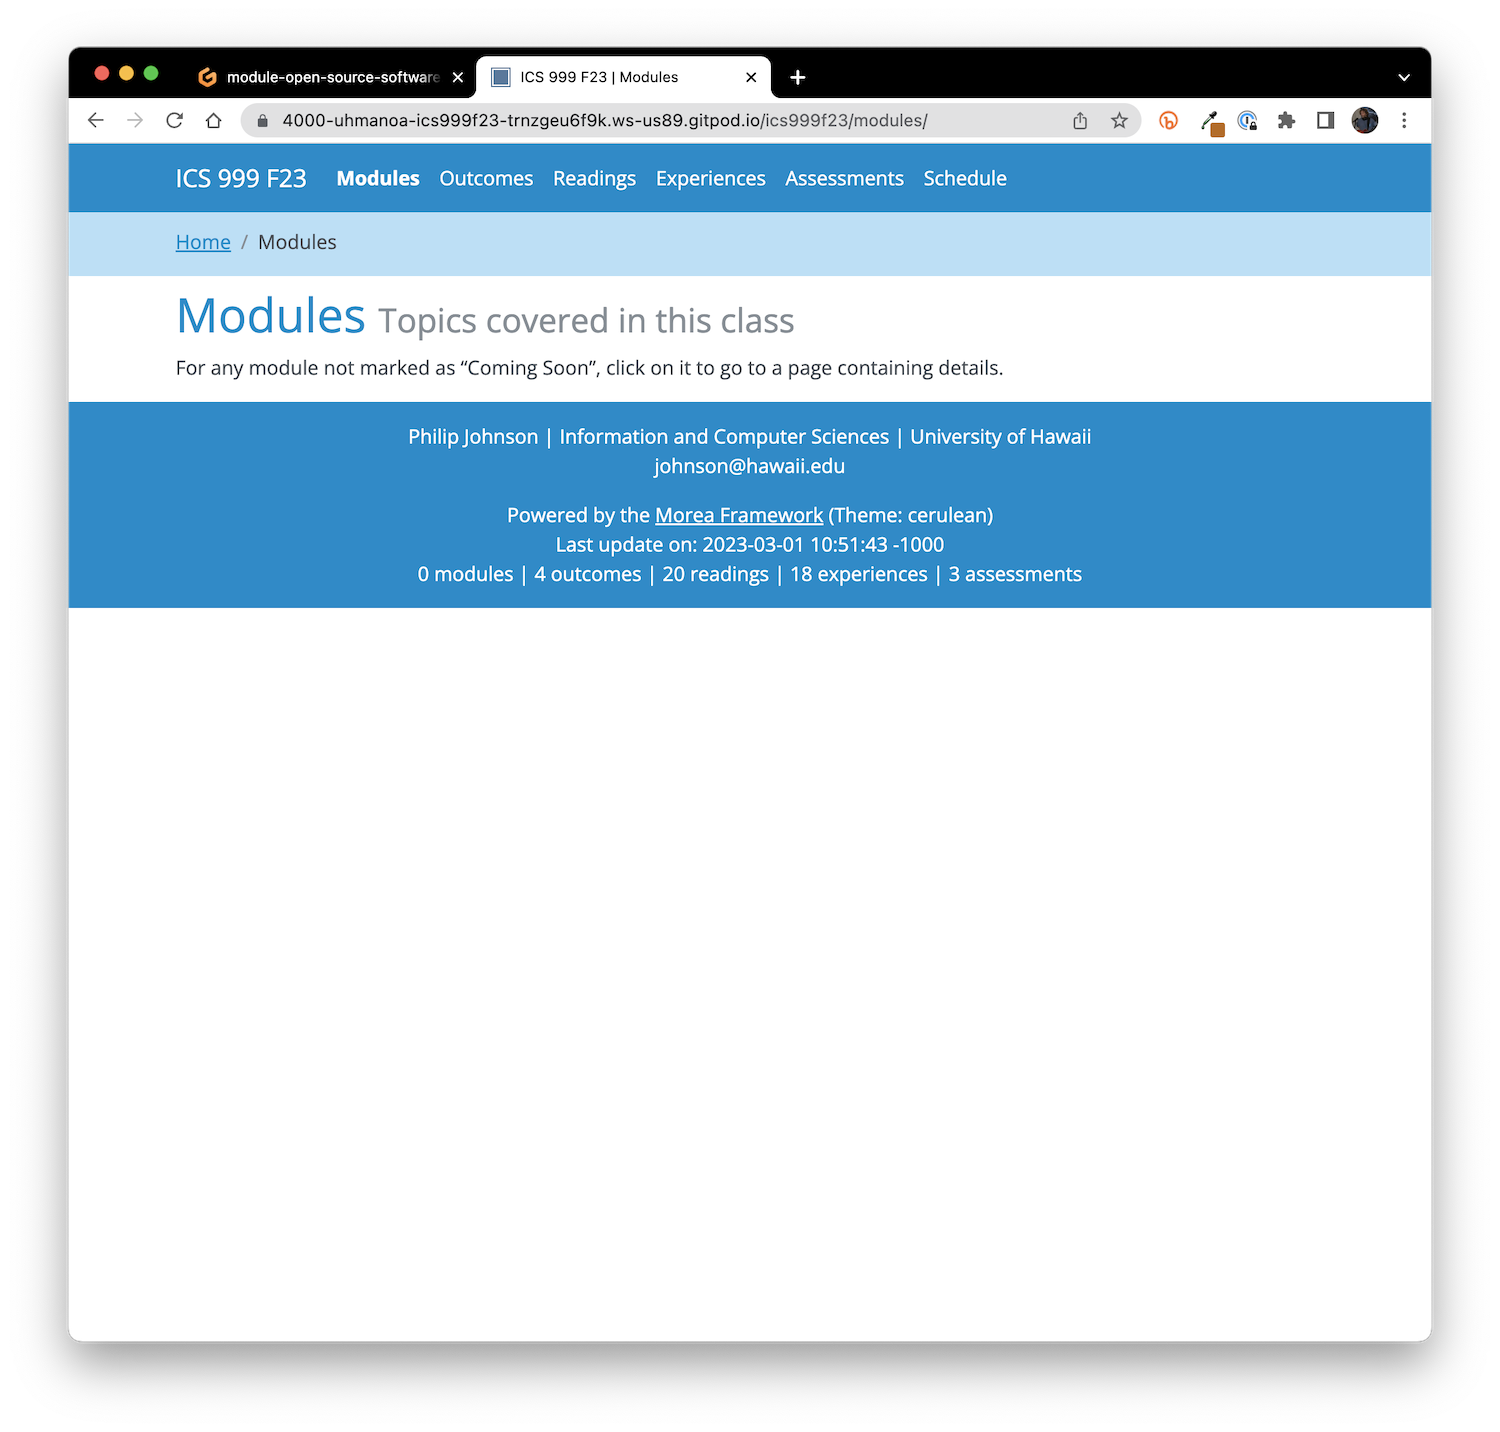
Now go ahead and unpublish the remaining three example modules in the same fashion. Restart Jekyll, and now there's no modules at all:
Create a new module
Let's start creating our own course content. Do the following:
- Make a copy of the example-introduction directory and call it introduction.
- Once you've made the copy, delete the example-introduction directory.
- In morea/introduction/module-introduction.md, edit the published: field from false to true.
- Edit the title: field to your course number.
- Edit the morea_id: field from example-introduction to introduction.
- Edit the morea_icon_url: field from /example-introduction/ to /introduction/.
- In module-introduction.md, delete all of the morea_readings: except for reading-syllabus. (You can delete the files as well if you like.)
- In module-introduction.md, delete all of the morea_experiences: except for experience-introduce-yourself. (You can delete the files as well if you like.)
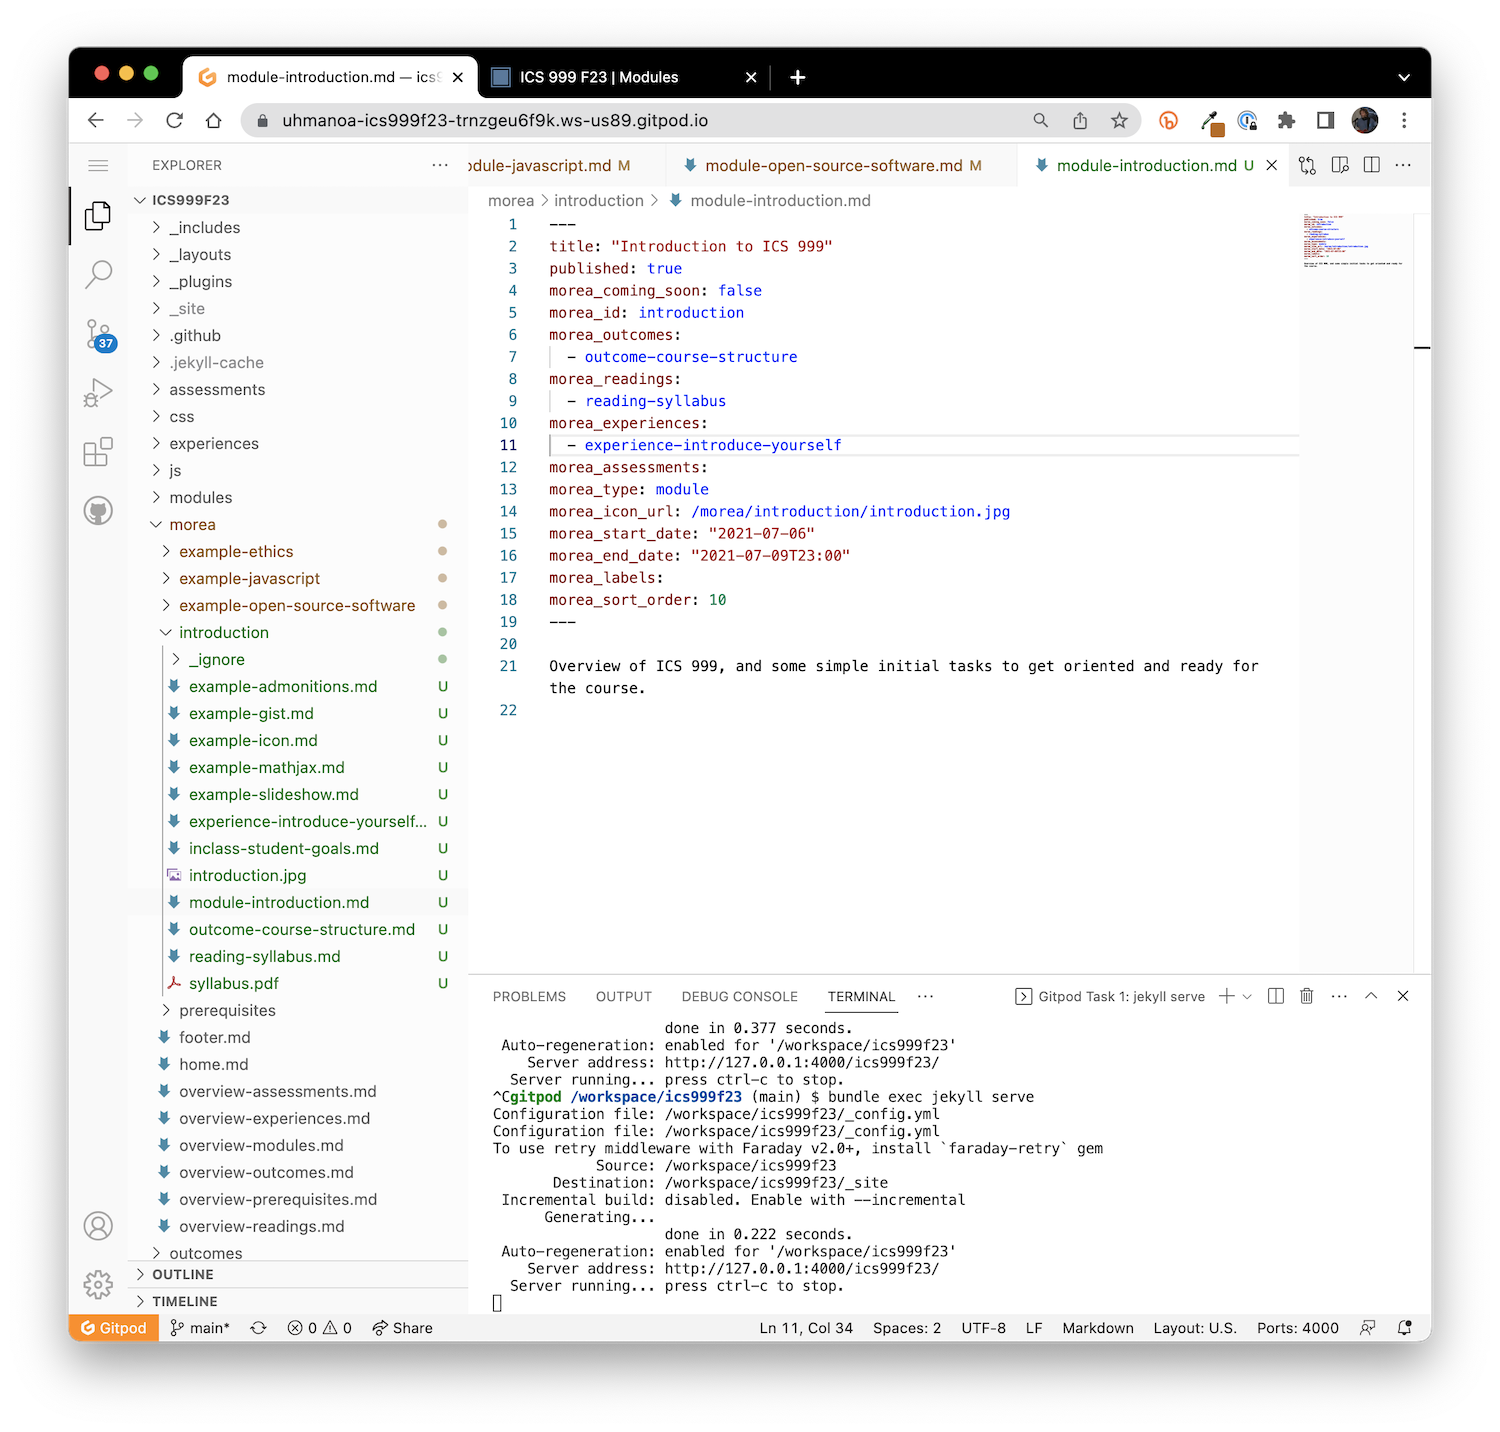
- In module-introduction.md, edit the text following the front matter to refer to your course name.
When you're done, module-introduction.md might look similar to this:
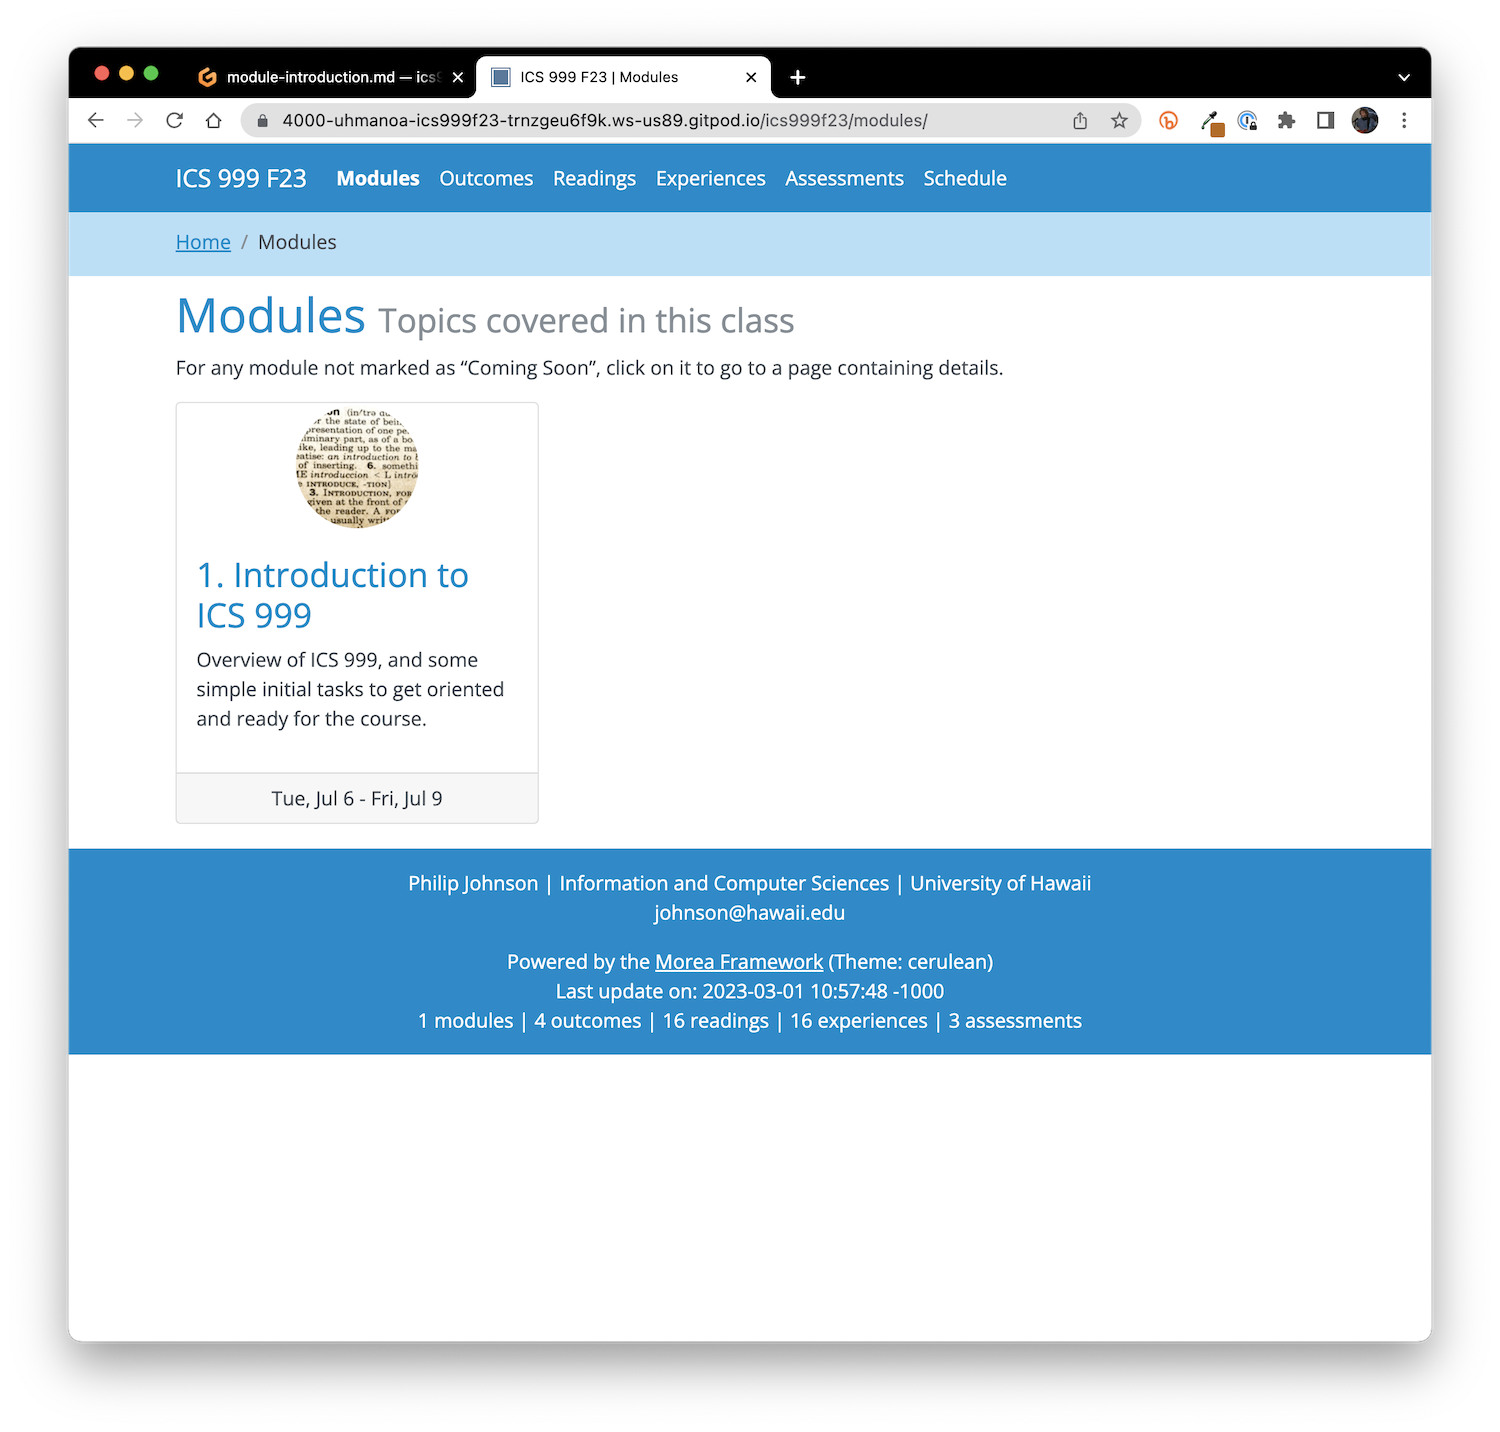
Restart Jekyll, and the modules page might look like this:
And the readings page might look like this:
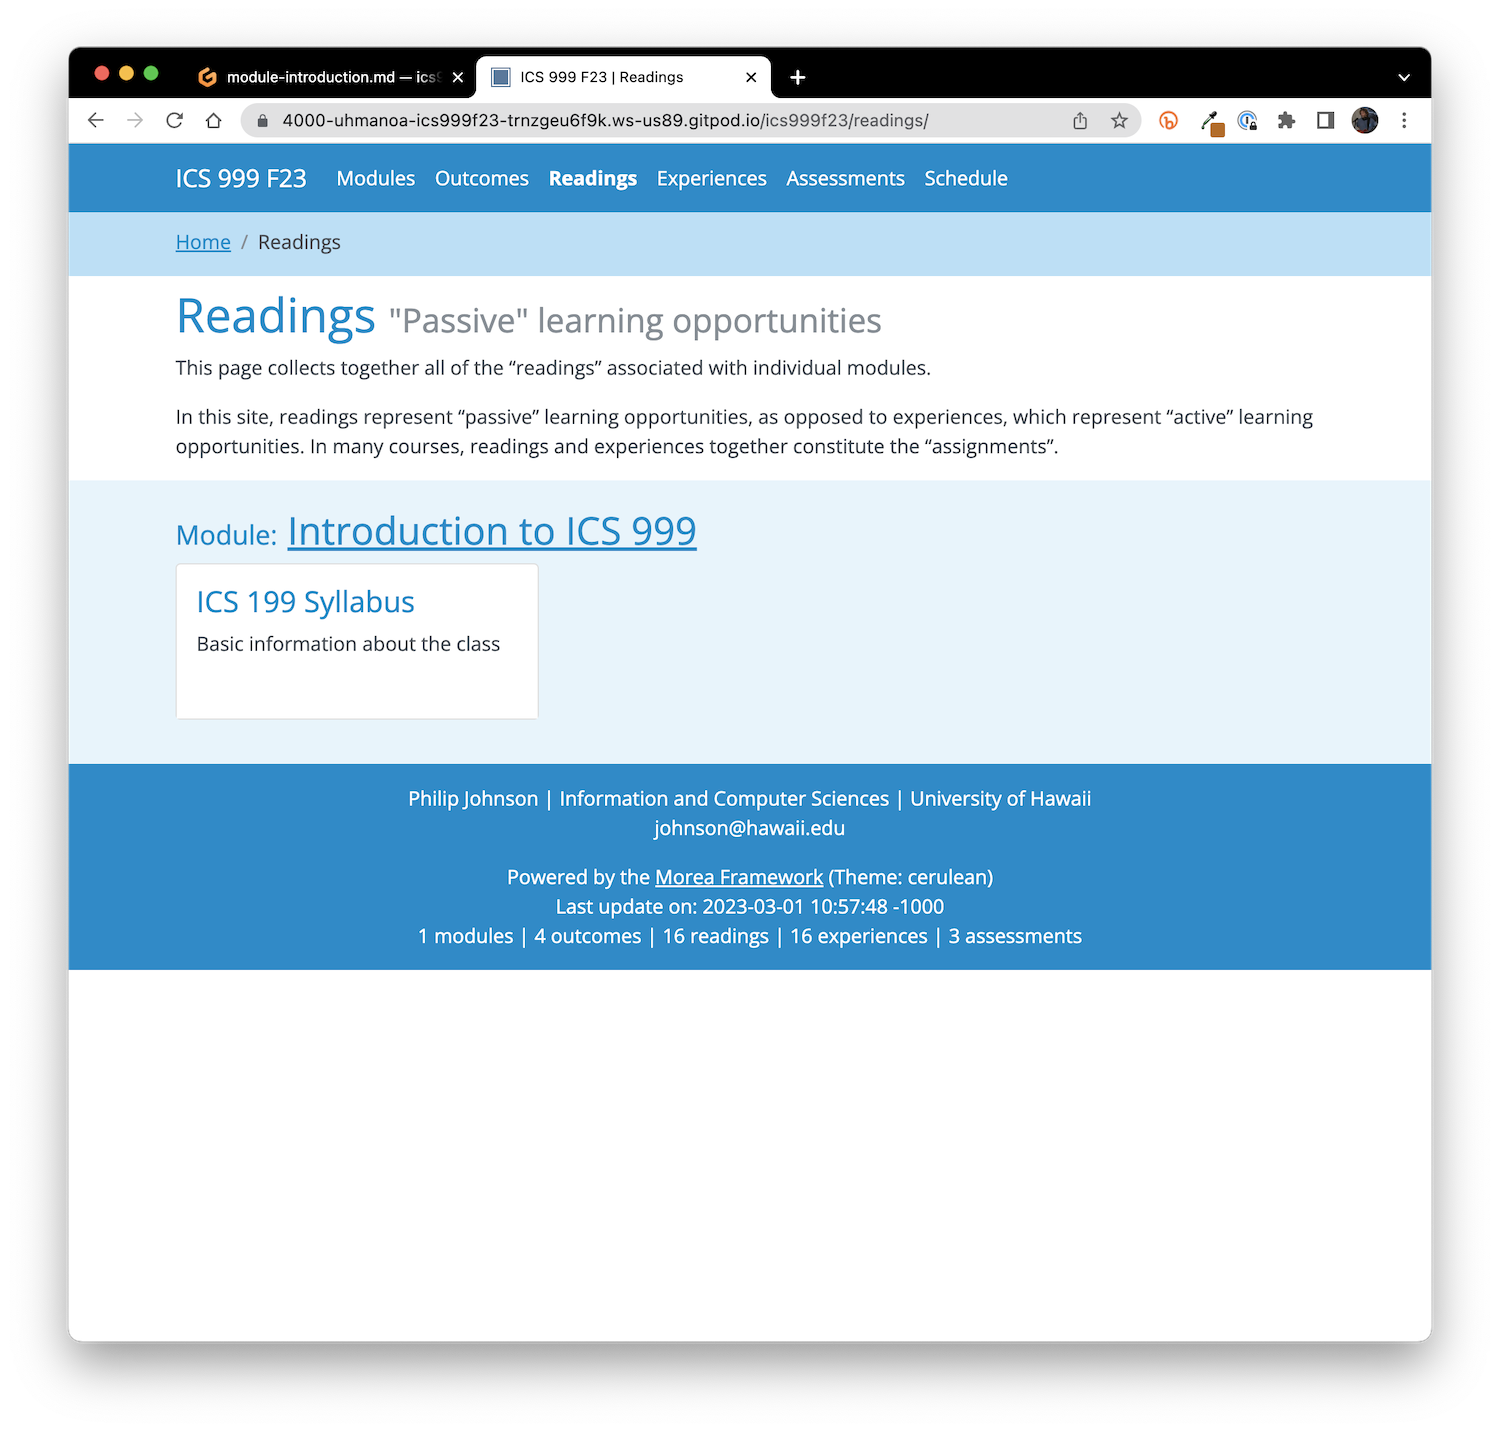
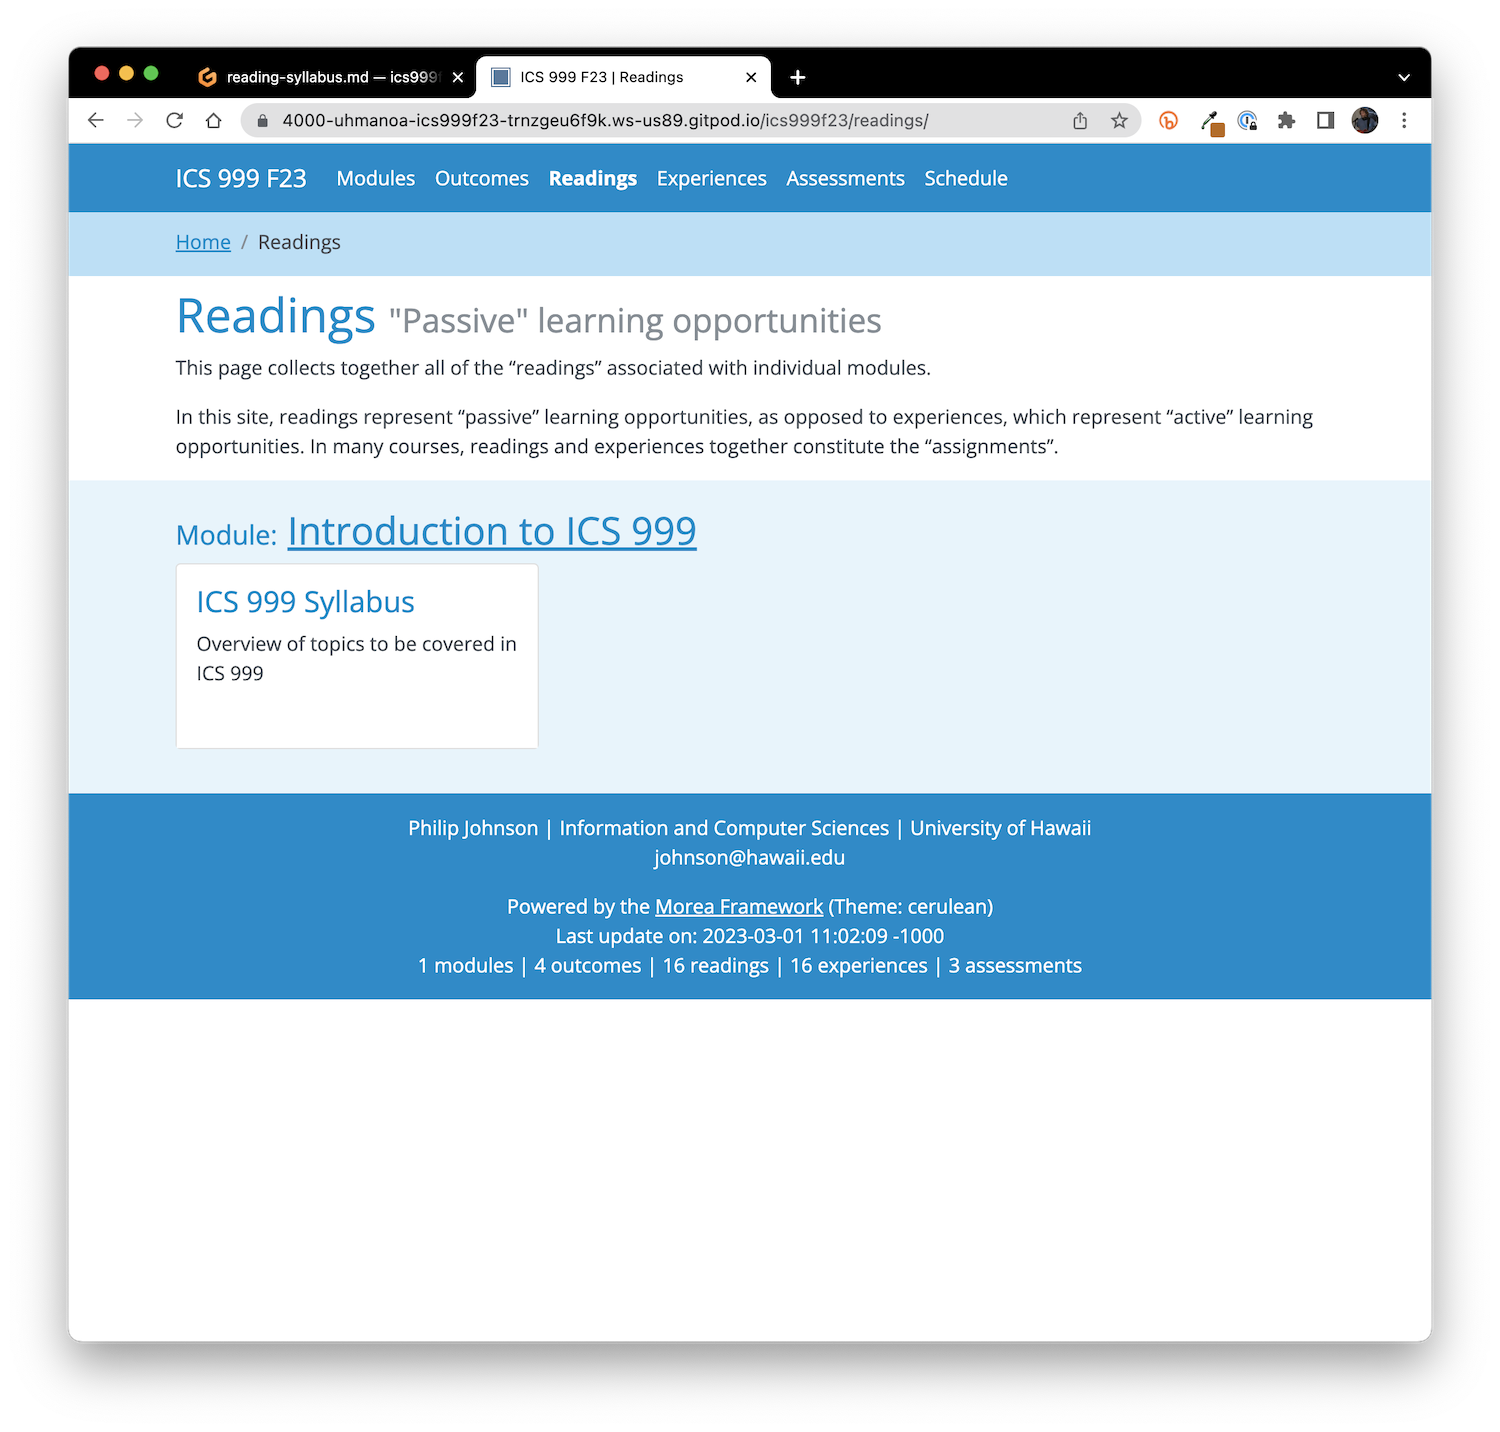
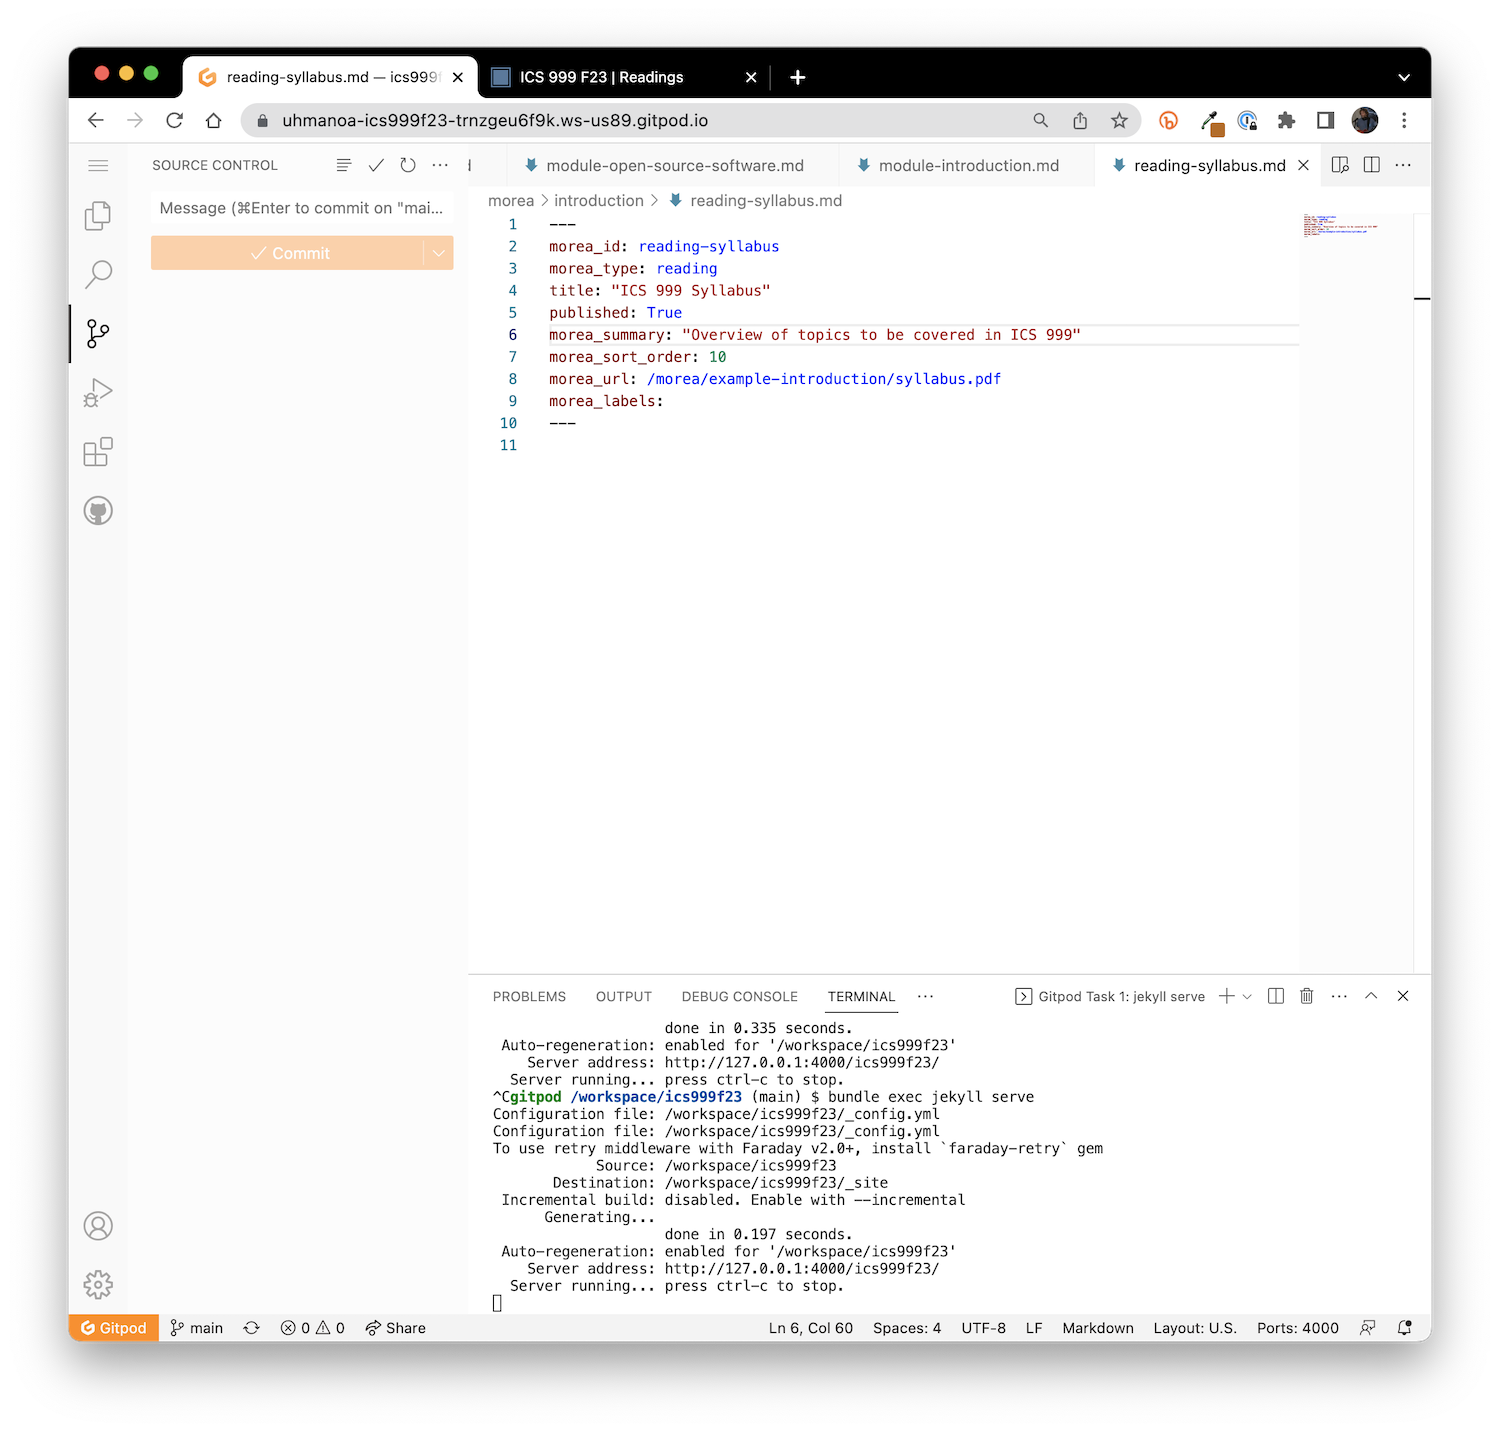
Whoops! The reading still refers to ICS 199! Go into the reading-syllabus.md file and edit the title: field (as well as any other content you want). Now restart Jekyll, and the readings page might look like this:
Publish your changes
Of course, there's lots more that needs to be done to this site, but let's now see how to publish these local modifications. Click on the "Source Control" icon on the left side bar (it will have a badge indicating the number of changed files). Your browser window will now look something like this:
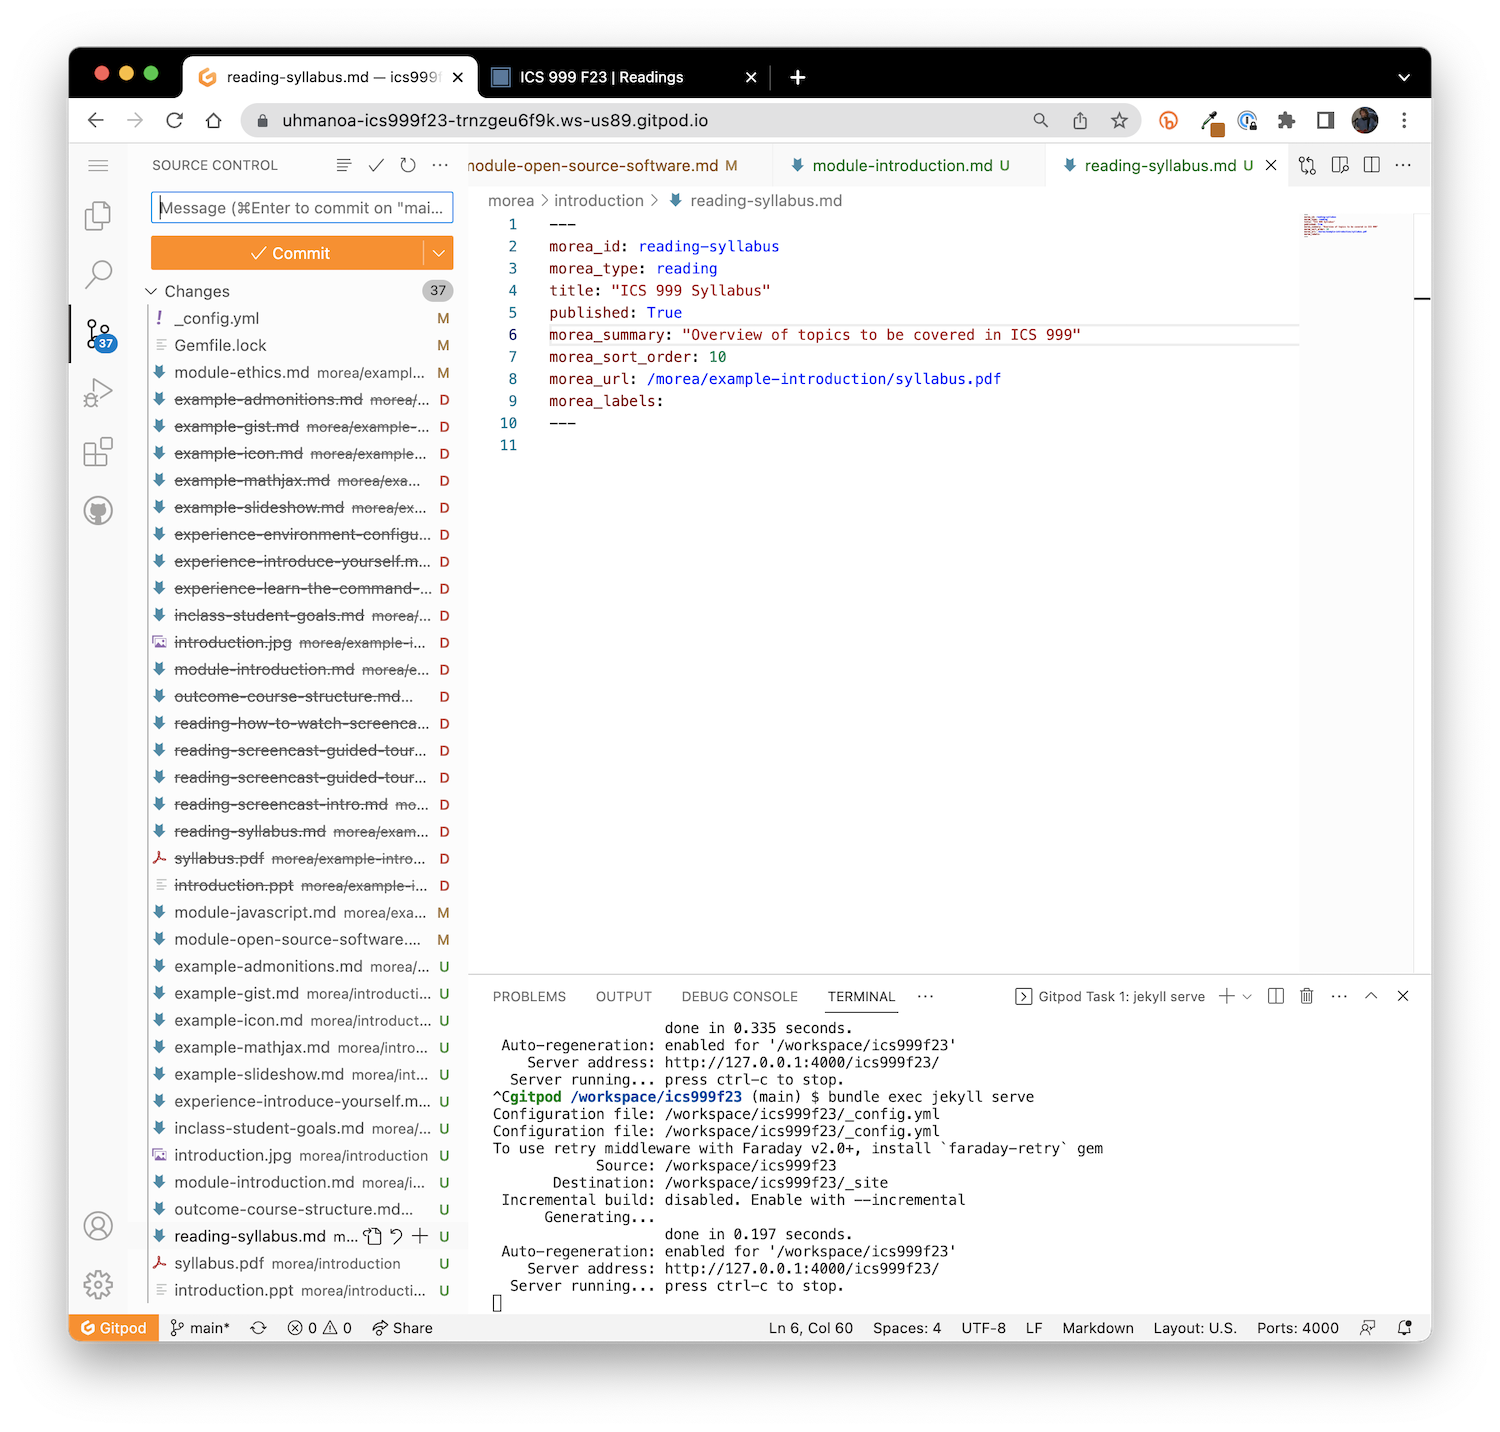
It shows all of the files which have been changed since the last commit. In the above image, you can see that some existing files have been modified (indicated by an "M"), some files have been deleted (indicated by a "D"), and some files are new (indicating by a "U", which indicates they are currently "untracked" by GitHub).
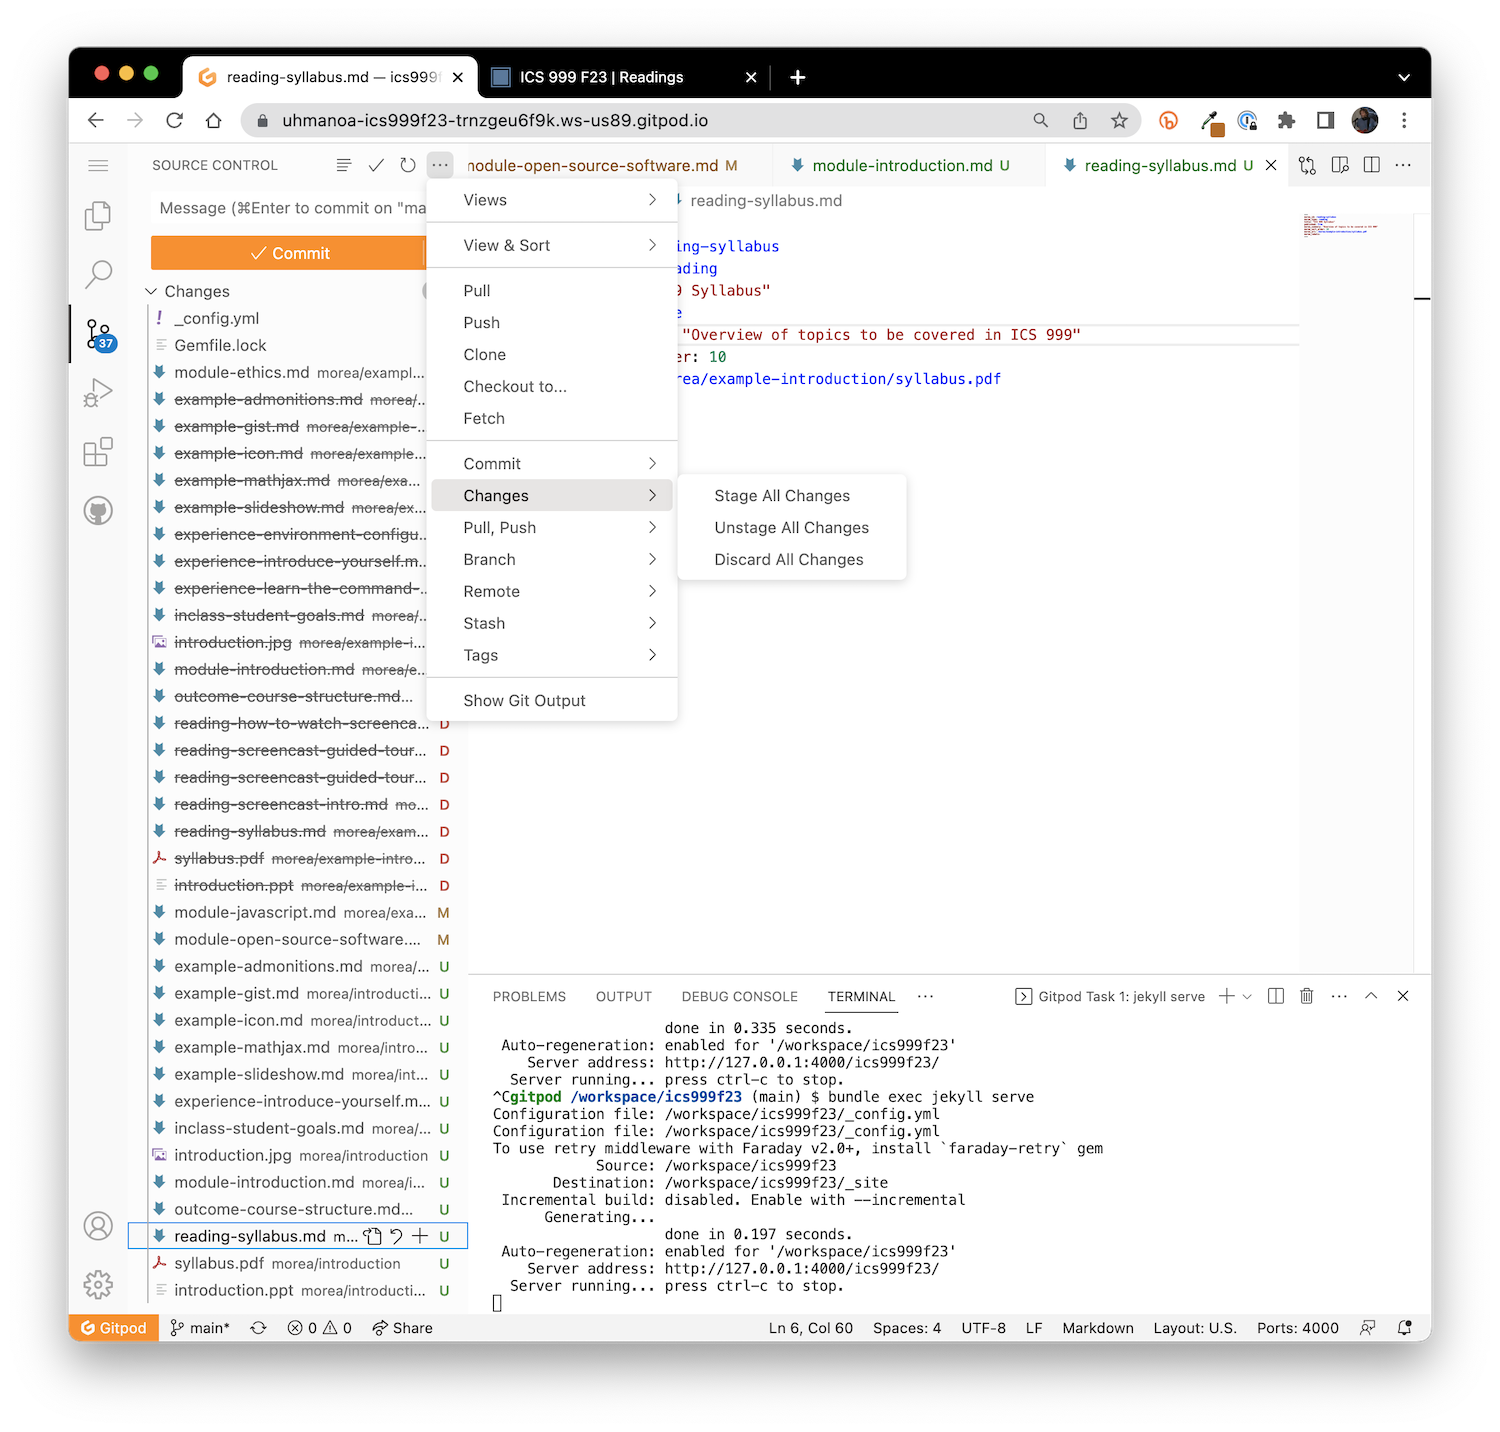
We want all the files in the repository to be "tracked" by GitHub. The easiest way to do that is to click on the "..." icon at the top of the Source Control pane, then select the "Changes" menu item, which will reveal a submenu including the "Stage All Changes" selection.
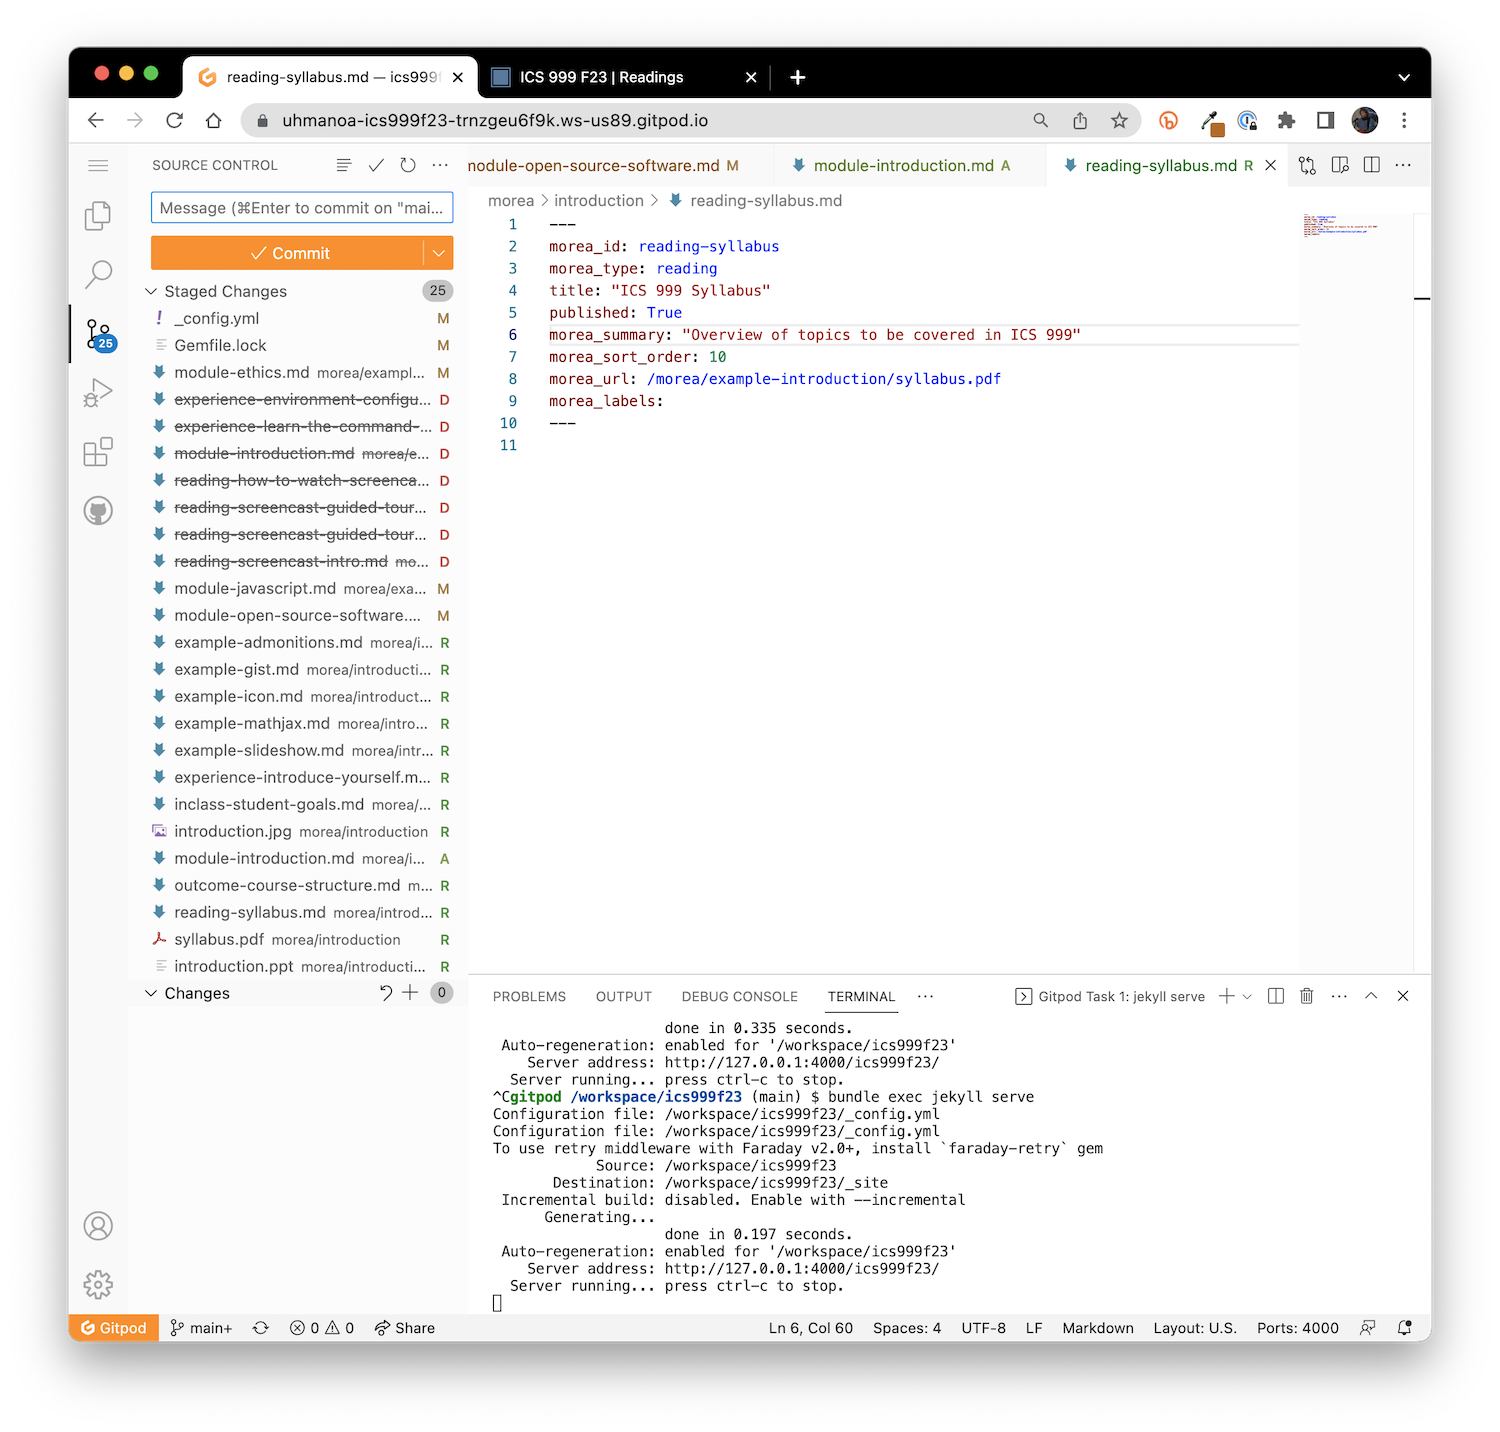
Click "Stage All Changes". This will result in all of the changes being "tracked" by git. In this case, git now understands that several of the files have been renamed (as indicated by an "R"):
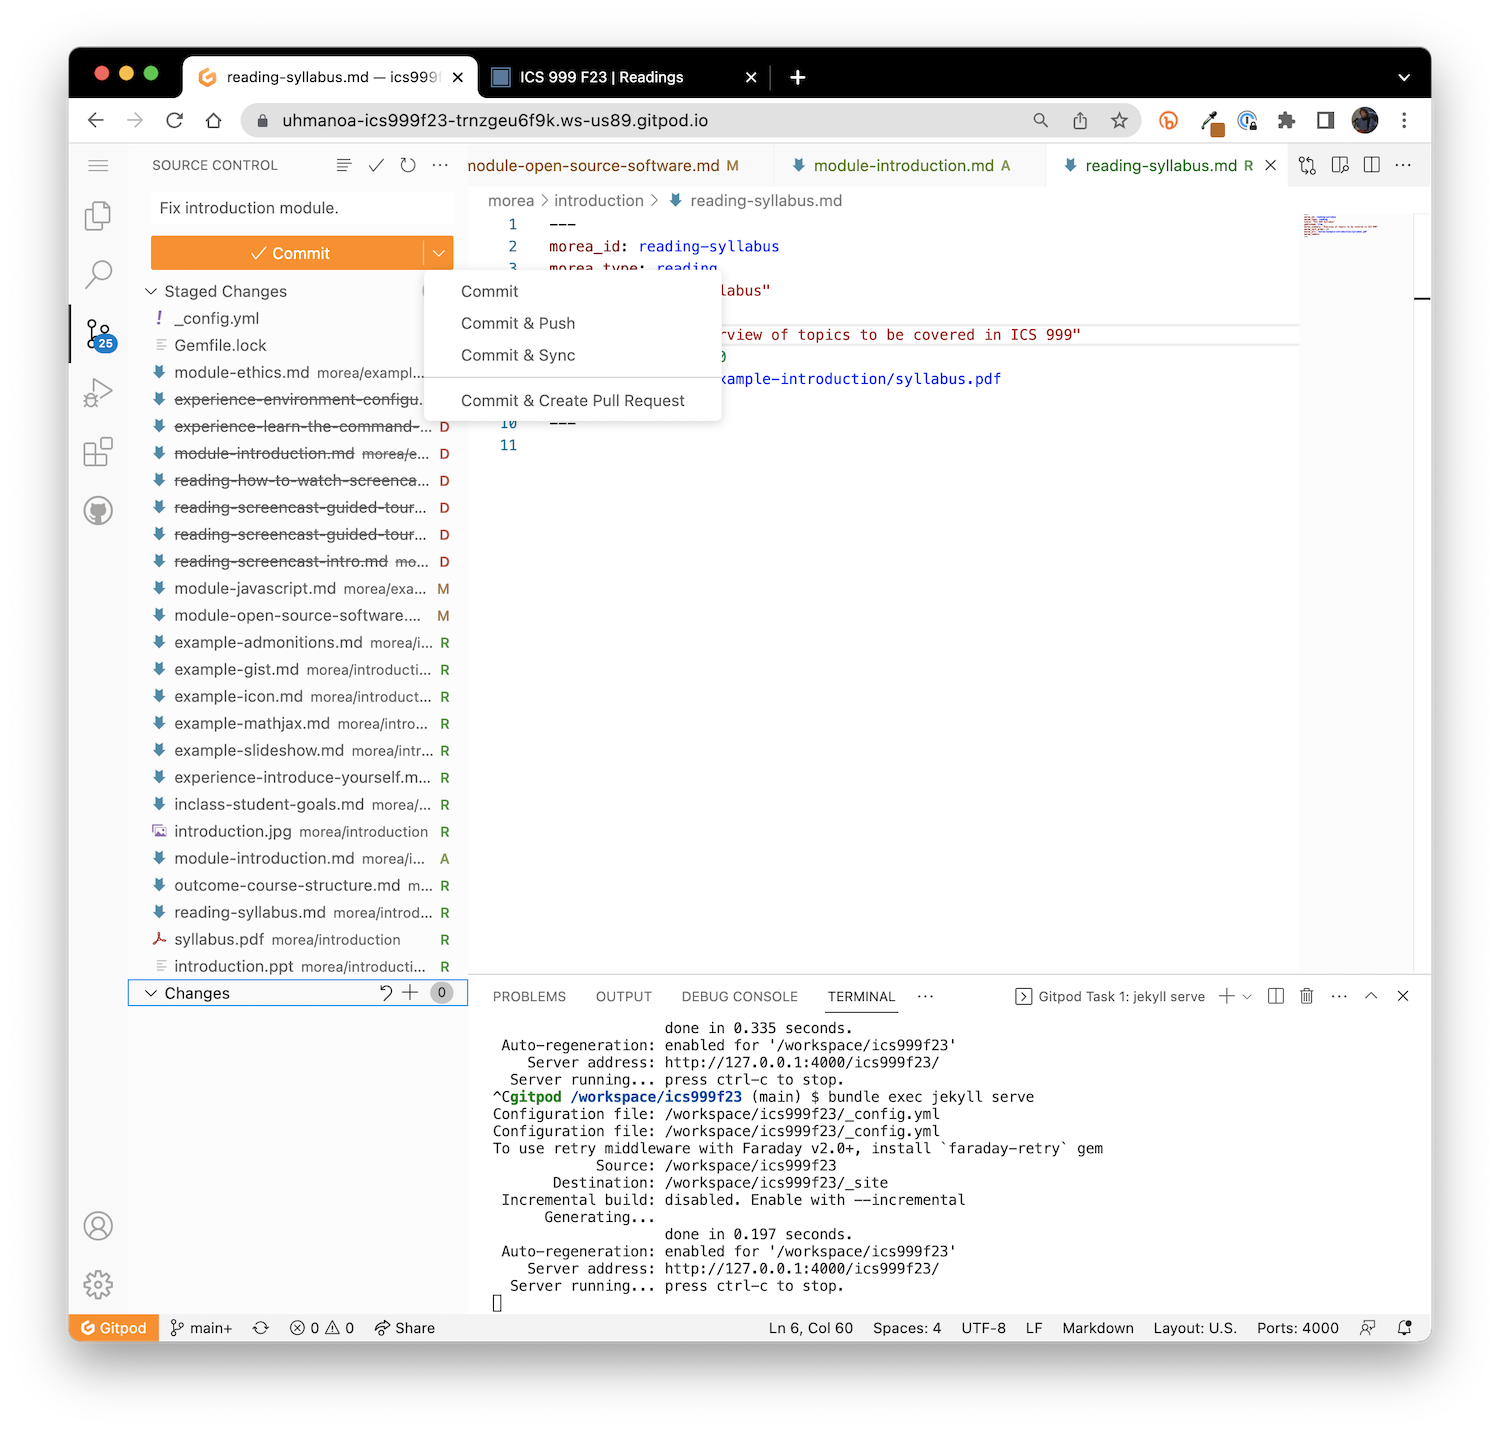
Now you're ready to commit your changes to your local repository, and (if you like) push the changes to your copy of the repository at GitHub.
To do that, type in a message indicating the nature of the changes (for example, "Fix introduction module"), then pull down the "Commit" menu and select (for example) "Commit and push":
After it's finished, the Source Control panel's "Commit" button is grayed out, indicating that there all changes have been committed and there's no changes to commit:
Morea is configured so that every time you push changes to GitHub, a GitHub Action is triggered to rebuild the site. In your browser, go to your repository on GitHub and click on "Actions". You should see something similar to this:
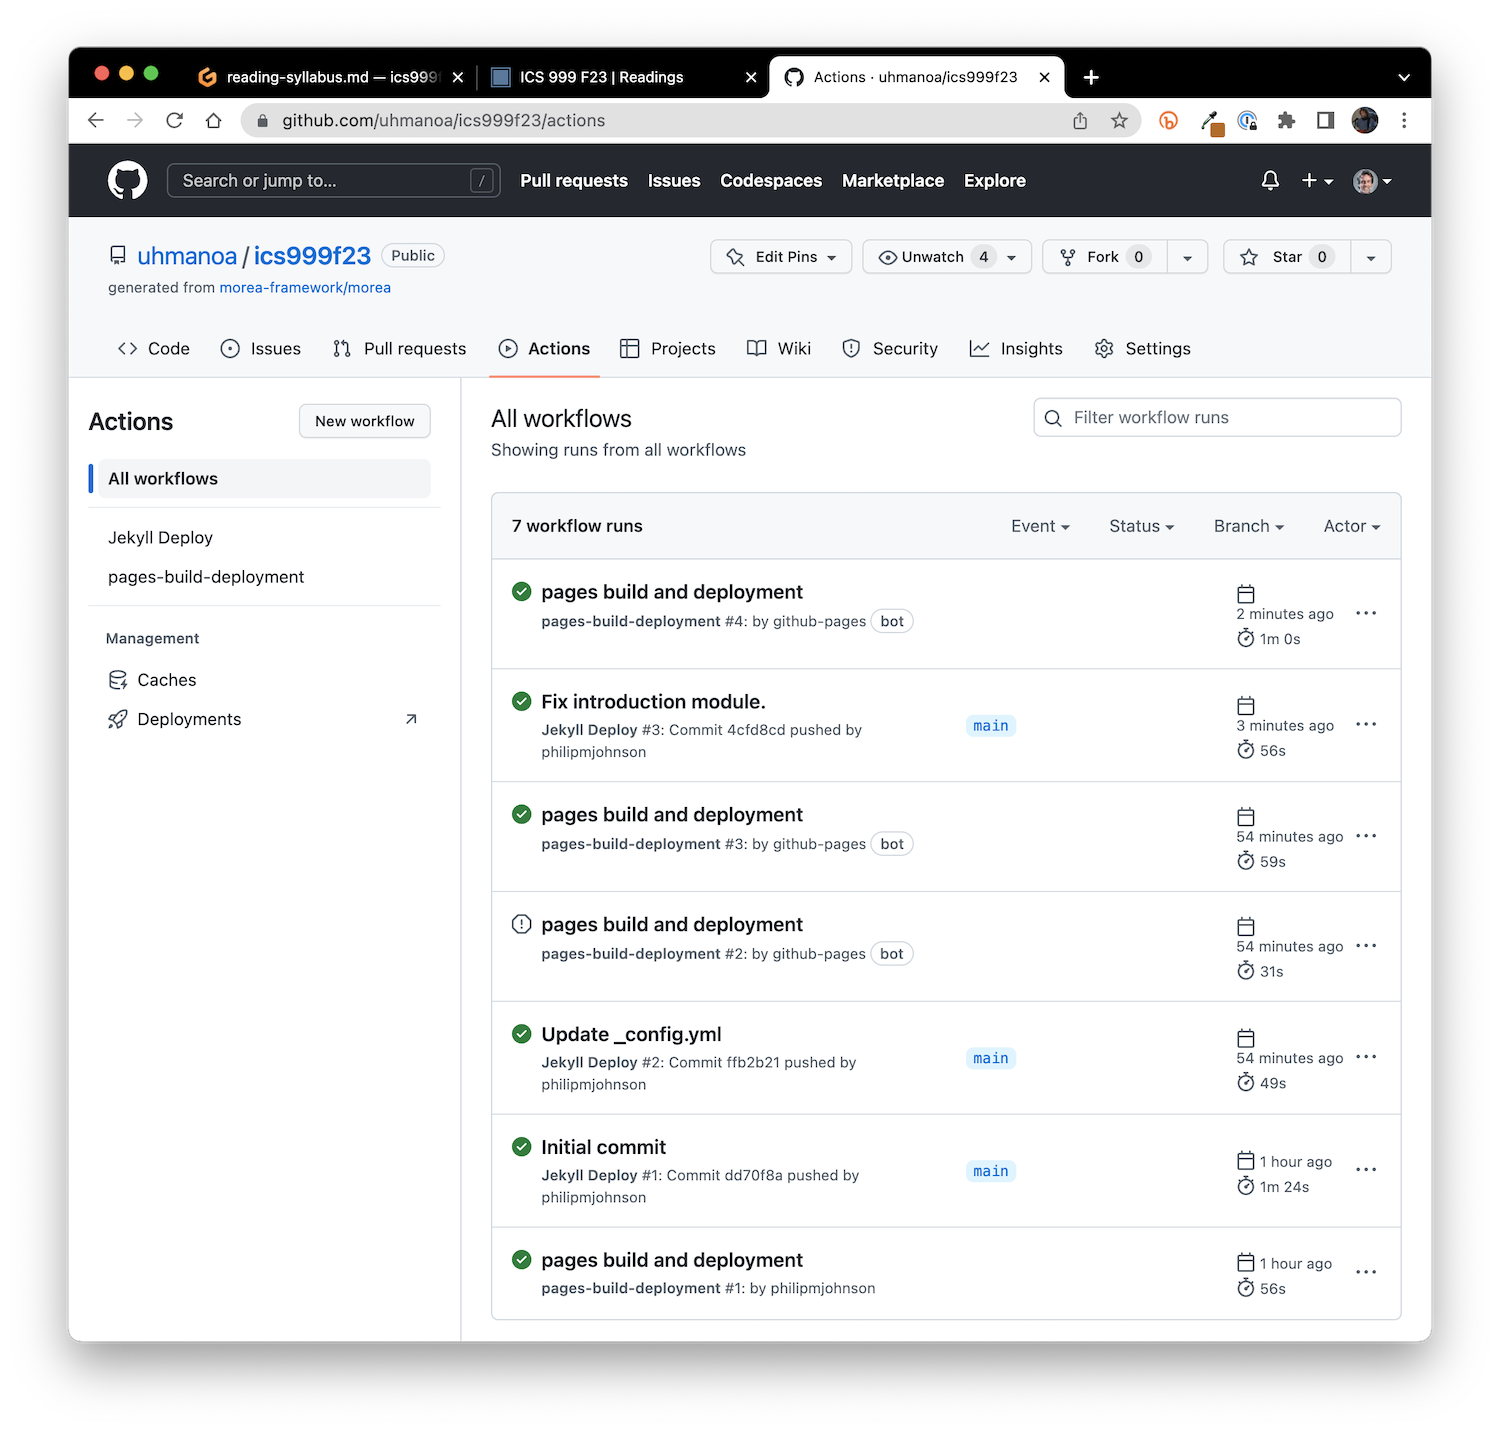
This page indicates that the commit "Fix introduction module" triggered a build, which took 1 minute and 1 second. It successfully completed (as indicated by the green checkmark), which then triggered a "pages build and deployment" action, which also completed successfully.
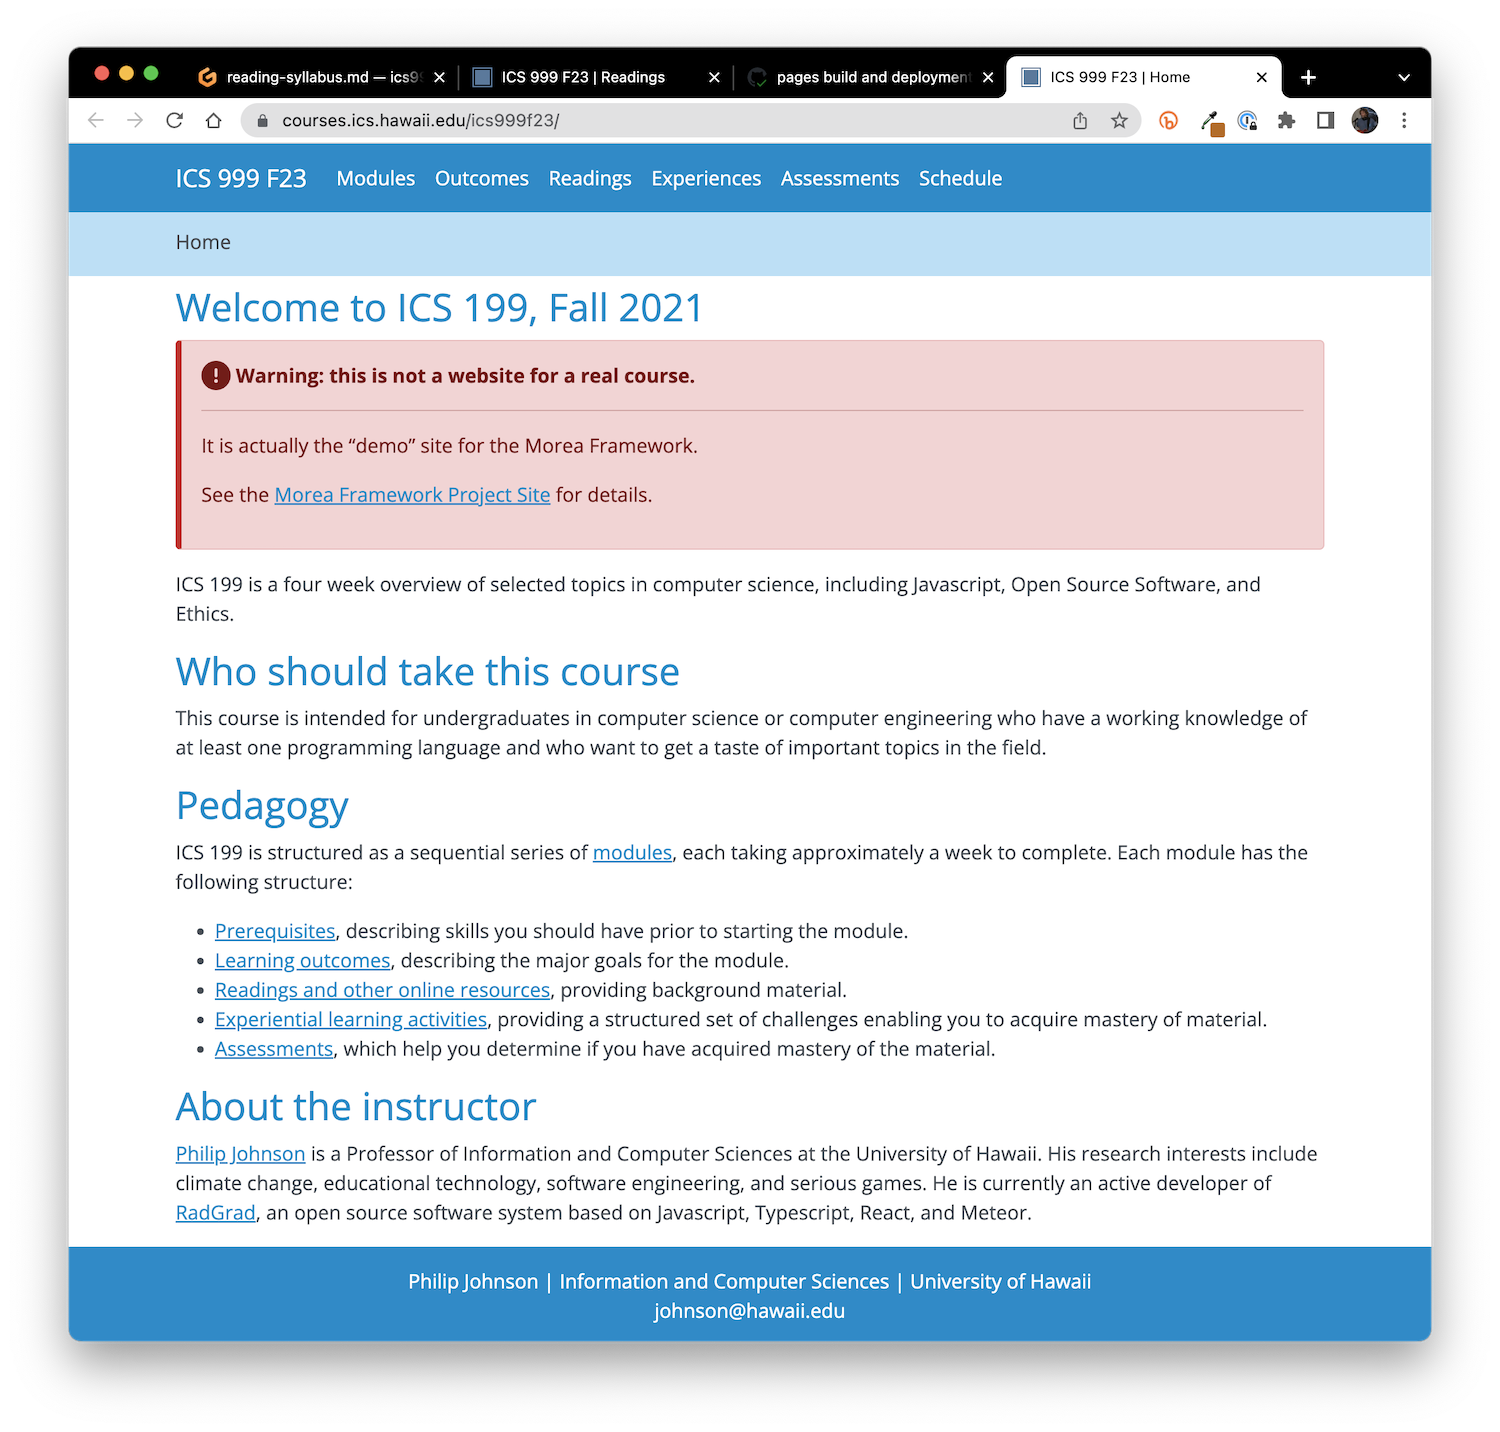
Let's confirm that our local changes are published by retrieving the URL to our site:
Summary
This might seem complicated the very first time you do it, but with a little bit of practice, you'll find that content development with Morea is relatively efficient.
To review, there are a couple of one-time setup actions following the "Quick Start" instructions:
- Login to GitPod.io, and create a workspace for your repository.
- Check permissions.
Once that's done, develop your site by an iterative process of:
- Type
bundle exec jekyll serveto build your site and display it in a browser window. - Edit source files and directories to change your course content.
- Type
control-cfollowed bycontrol-p(which retrieves thebundle exec jekyll servecommand) to rebuild and redisplay your site.
Finally, once you're ready to publish your changes, go to the Source Control panel:
- Stage All Changes to make ensure all new files are tracked by GitHub.
- Commit your changes to your local repository and push them to the GitHub copy of your repository.
- Monitor the GitHub actions as they build and deploy your site, then check to see that your changes are public (usually takes about one minute).
Next step: module design!
Now that you have a basic understanding of using Morea, let's get to the real reason you are here: to create actual modules for actual courses.