Local development
If you've completed the Quick Start and Local Installation sections, you now have your own Morea website in a GitHub repository, and you've installed GitHub Desktop (or another git client), a text editor, and Jekyll. Let's step through the use of these tools to make some simple changes to your site.
While it's technically possible to do all of the development of your site using GitHub's browser based editor (i.e. the same way you edited the _config.yml file in the Quick Start, that approach is not recommended for two reasons. First, that browser-based editor is lame. Second, you can't see your changes without committing them and having GitHub build and publish the site. Local tools provide a better development experience, and allow you to preview your site before publishing it so that mistakes are not made public.
Download your repository
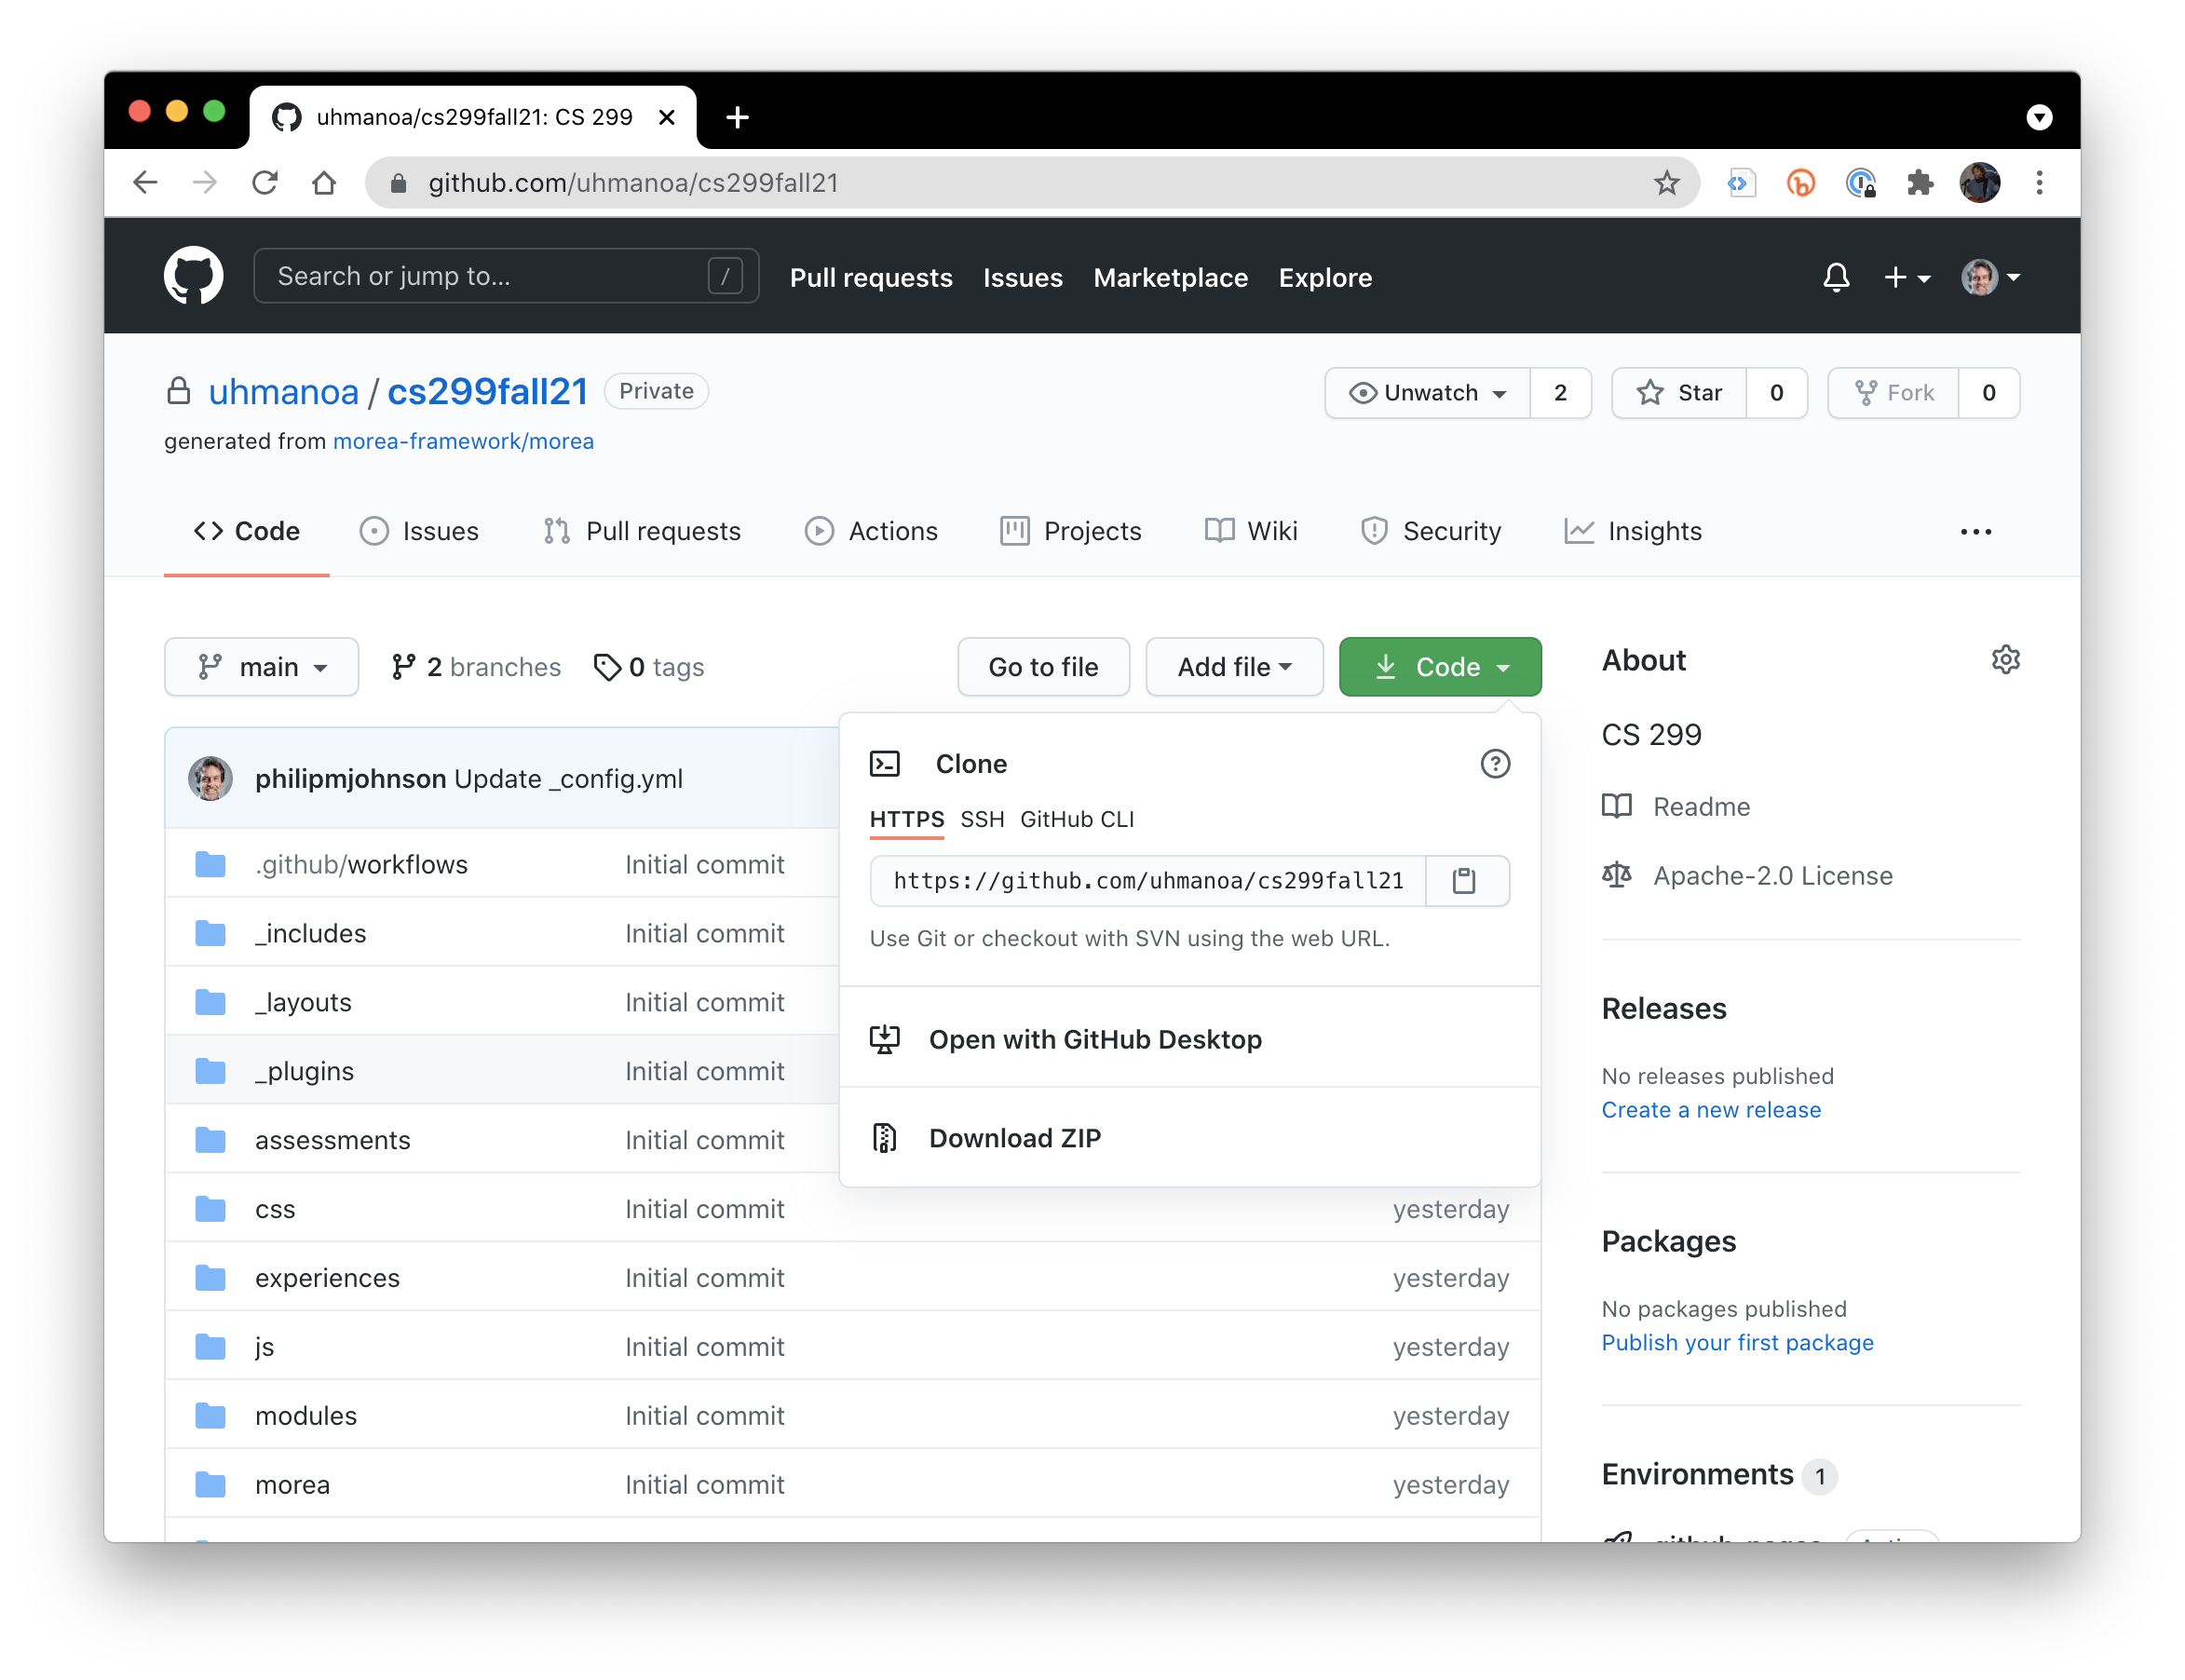
Go to your site, click on "Code", and then select "Open with GitHub Desktop":
That will bring up GitHub Desktop, which will ask you where in your file system you want to locate the files associated with this repository:
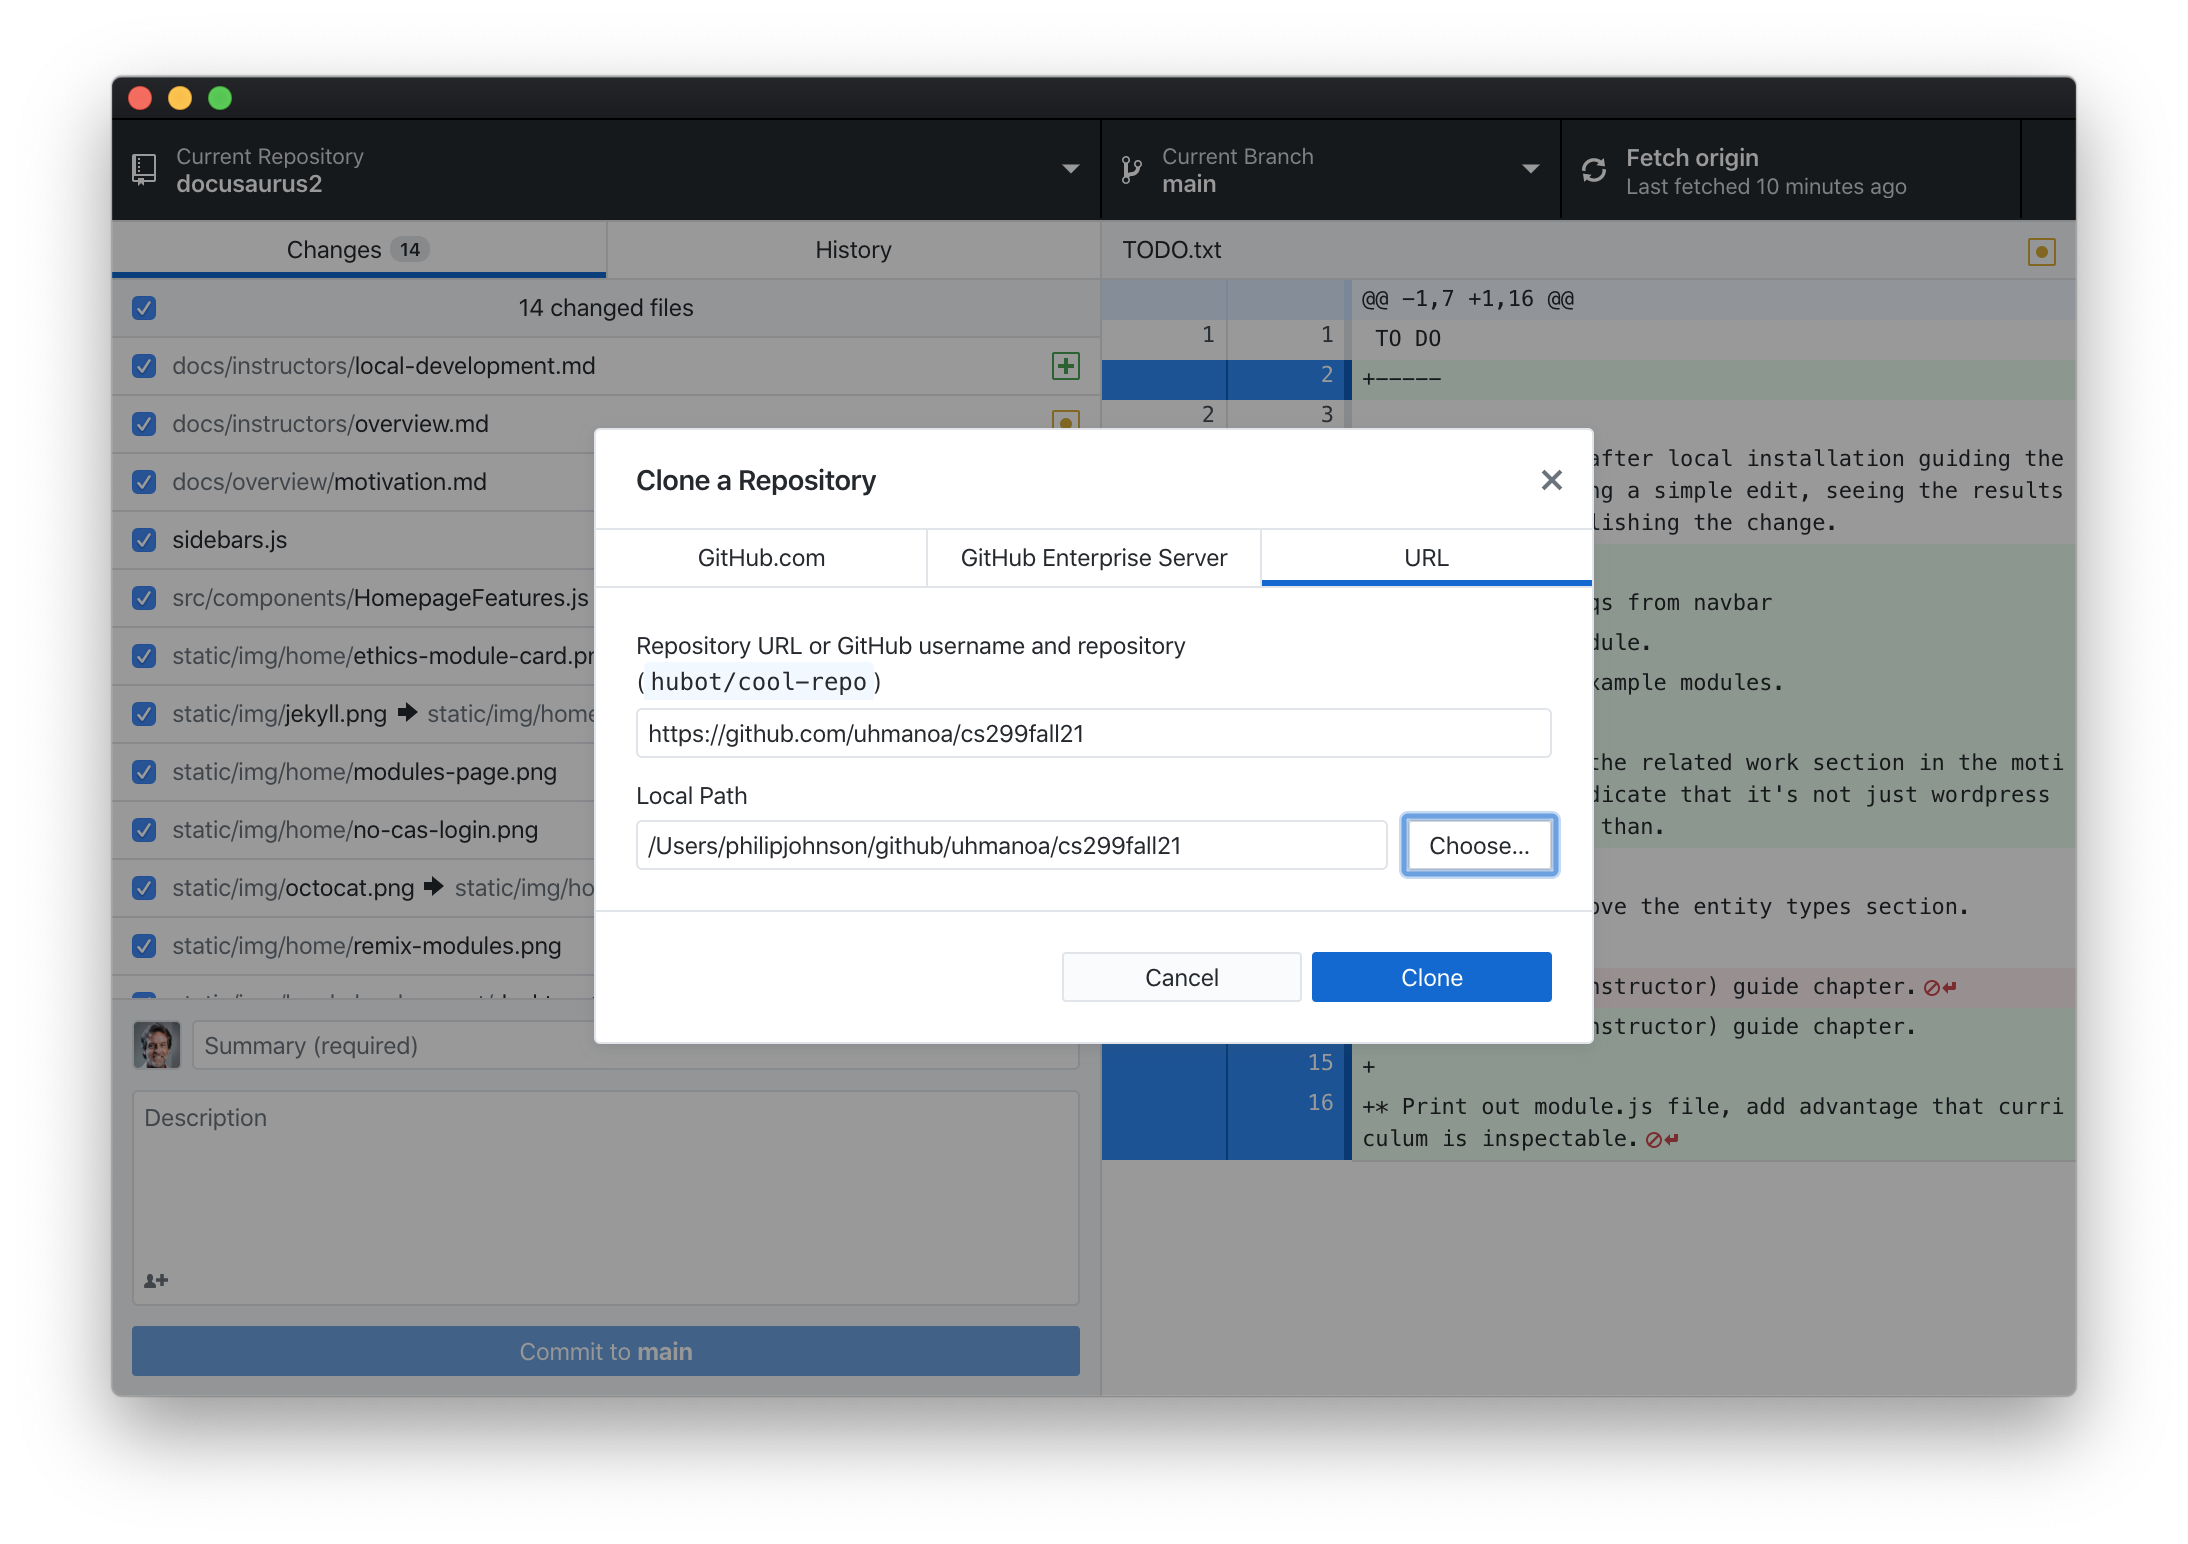
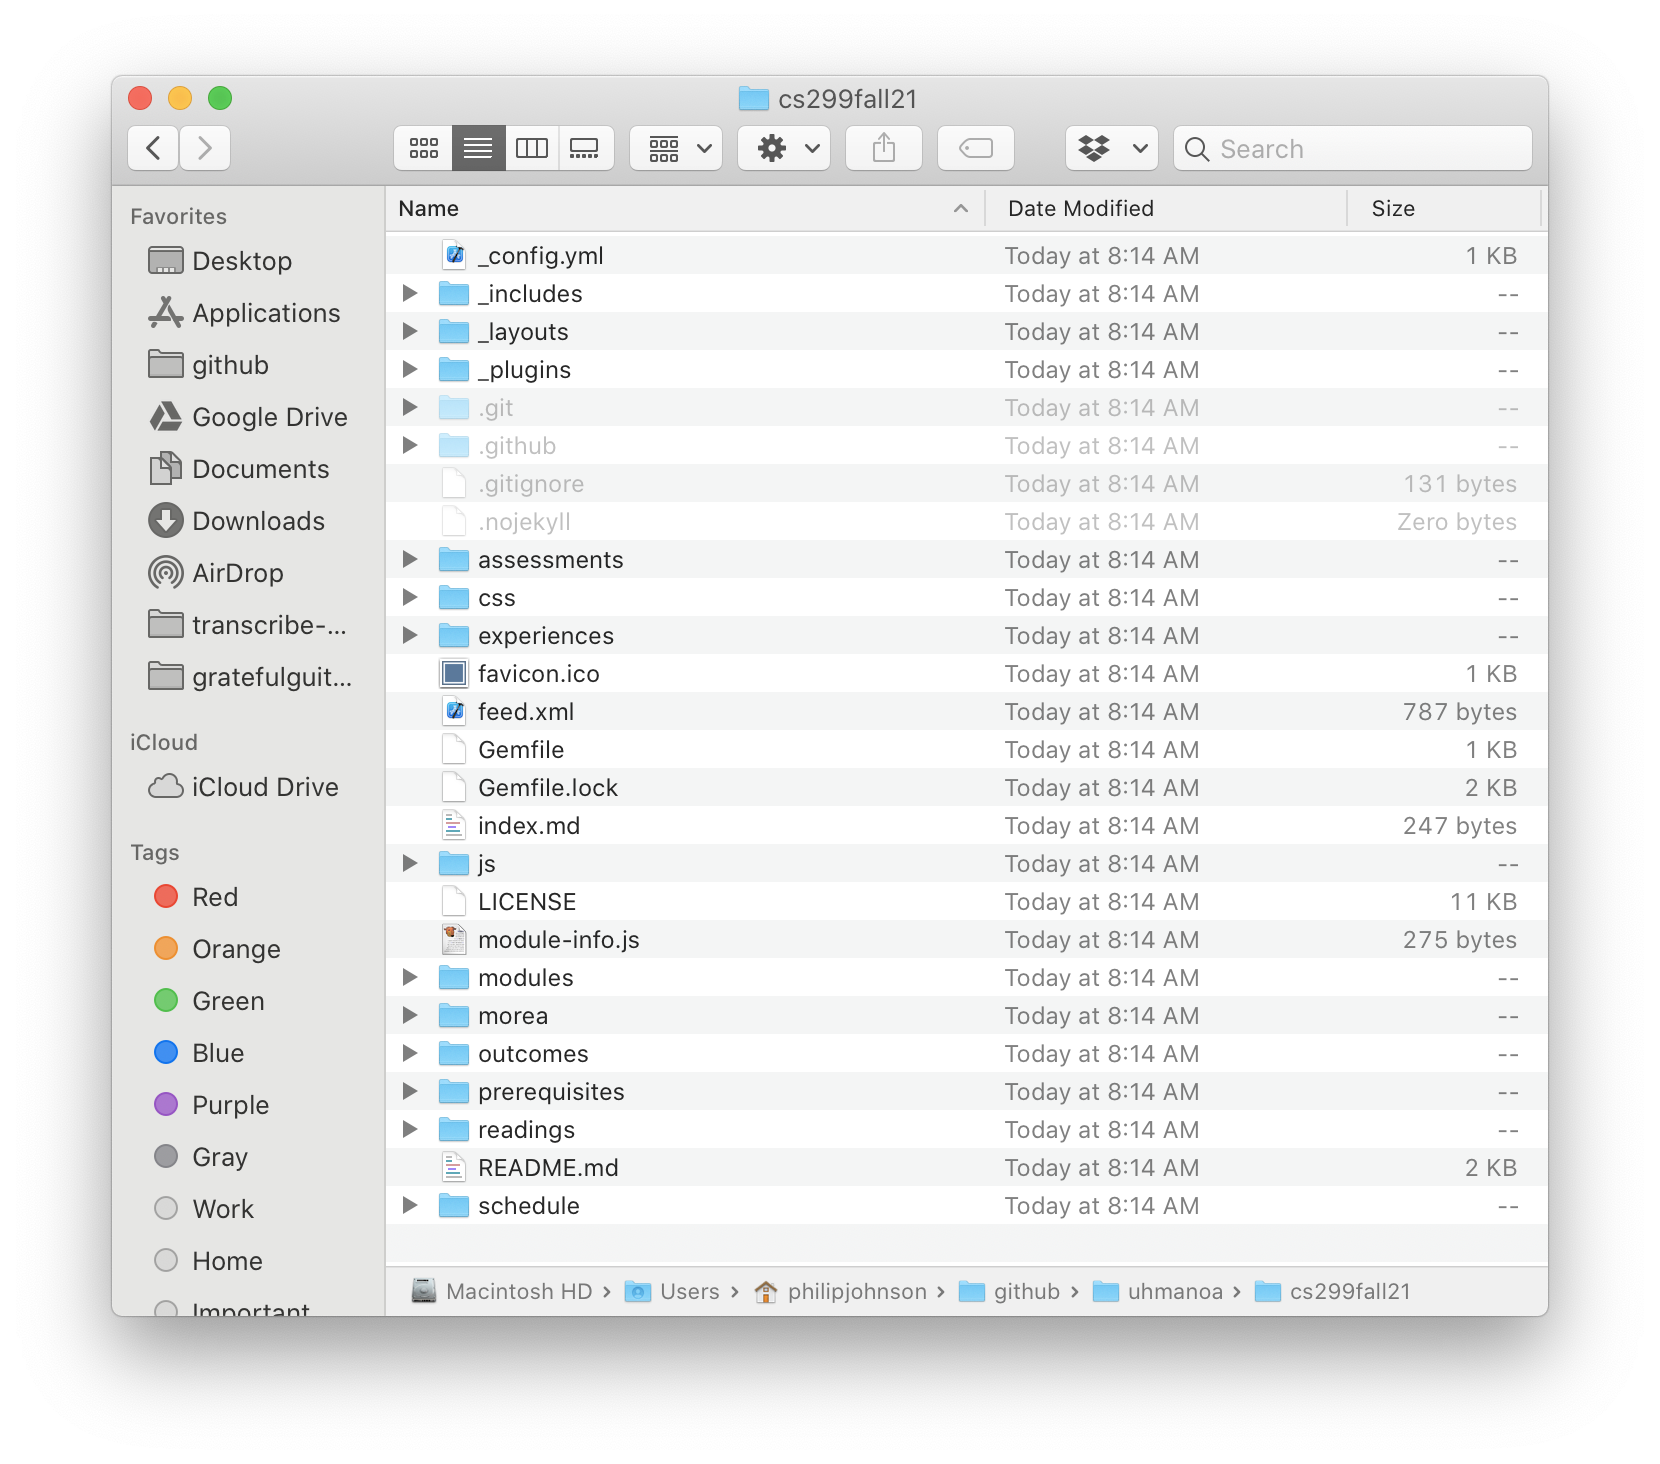
Make any adjustments to the path, then click "Clone" to create a copy of your repository on your computer. You will now have a local directory containing files similar to this:
Install libraries
Next, you need to install the libraries associated with your Morea site. To do this, open a Terminal (or shell), change directories to your repository directory, and invoke bundle install:
$ bundle install
Using public_suffix 4.0.6
Using addressable 2.8.0
Using bundler 2.2.24
  :    :
Using jekyll 4.2.0
Using webrick 1.7.0
Bundle complete! 6 Gemfile dependencies, 38 gems now installed.
Use `bundle info [gemname]` to see where a bundled gem is installed.
Run jekyll
Now, build the Morea site and enable it to be displayed locally on your laptop by invoking bundle exec jekyll serve:
$ bundle exec jekyll serve
Configuration file: /Users/philipjohnson/github/uhmanoa/cs299fall21/_config.yml
Configuration file: /Users/philipjohnson/github/uhmanoa/cs299fall21/_config.yml
            Source: /Users/philipjohnson/github/uhmanoa/cs299fall21
       Destination: /Users/philipjohnson/github/uhmanoa/cs299fall21/_site
 Incremental build: disabled. Enable with --incremental
      Generating...
          Conflict: The following destination is shared by multiple files.
                    The written file may end up with unexpected contents.
                    /Users/philipjohnson/github/uhmanoa/cs299fall21/_site/schedule/schedule-info.js
                     - /Users/philipjohnson/github/uhmanoa/cs299fall21/schedule/schedule-info.js
                     - /Users/philipjohnson/github/uhmanoa/cs299fall21/schedule/schedule-info.js

                    done in 0.166 seconds.
 Auto-regeneration: enabled for '/Users/philipjohnson/github/uhmanoa/cs299fall21'
    Server address: http://127.0.0.1:4000/cs299fall21/
  Server running... press ctrl-c to stop.
You can ignore the "Conflict" warning if it appears.
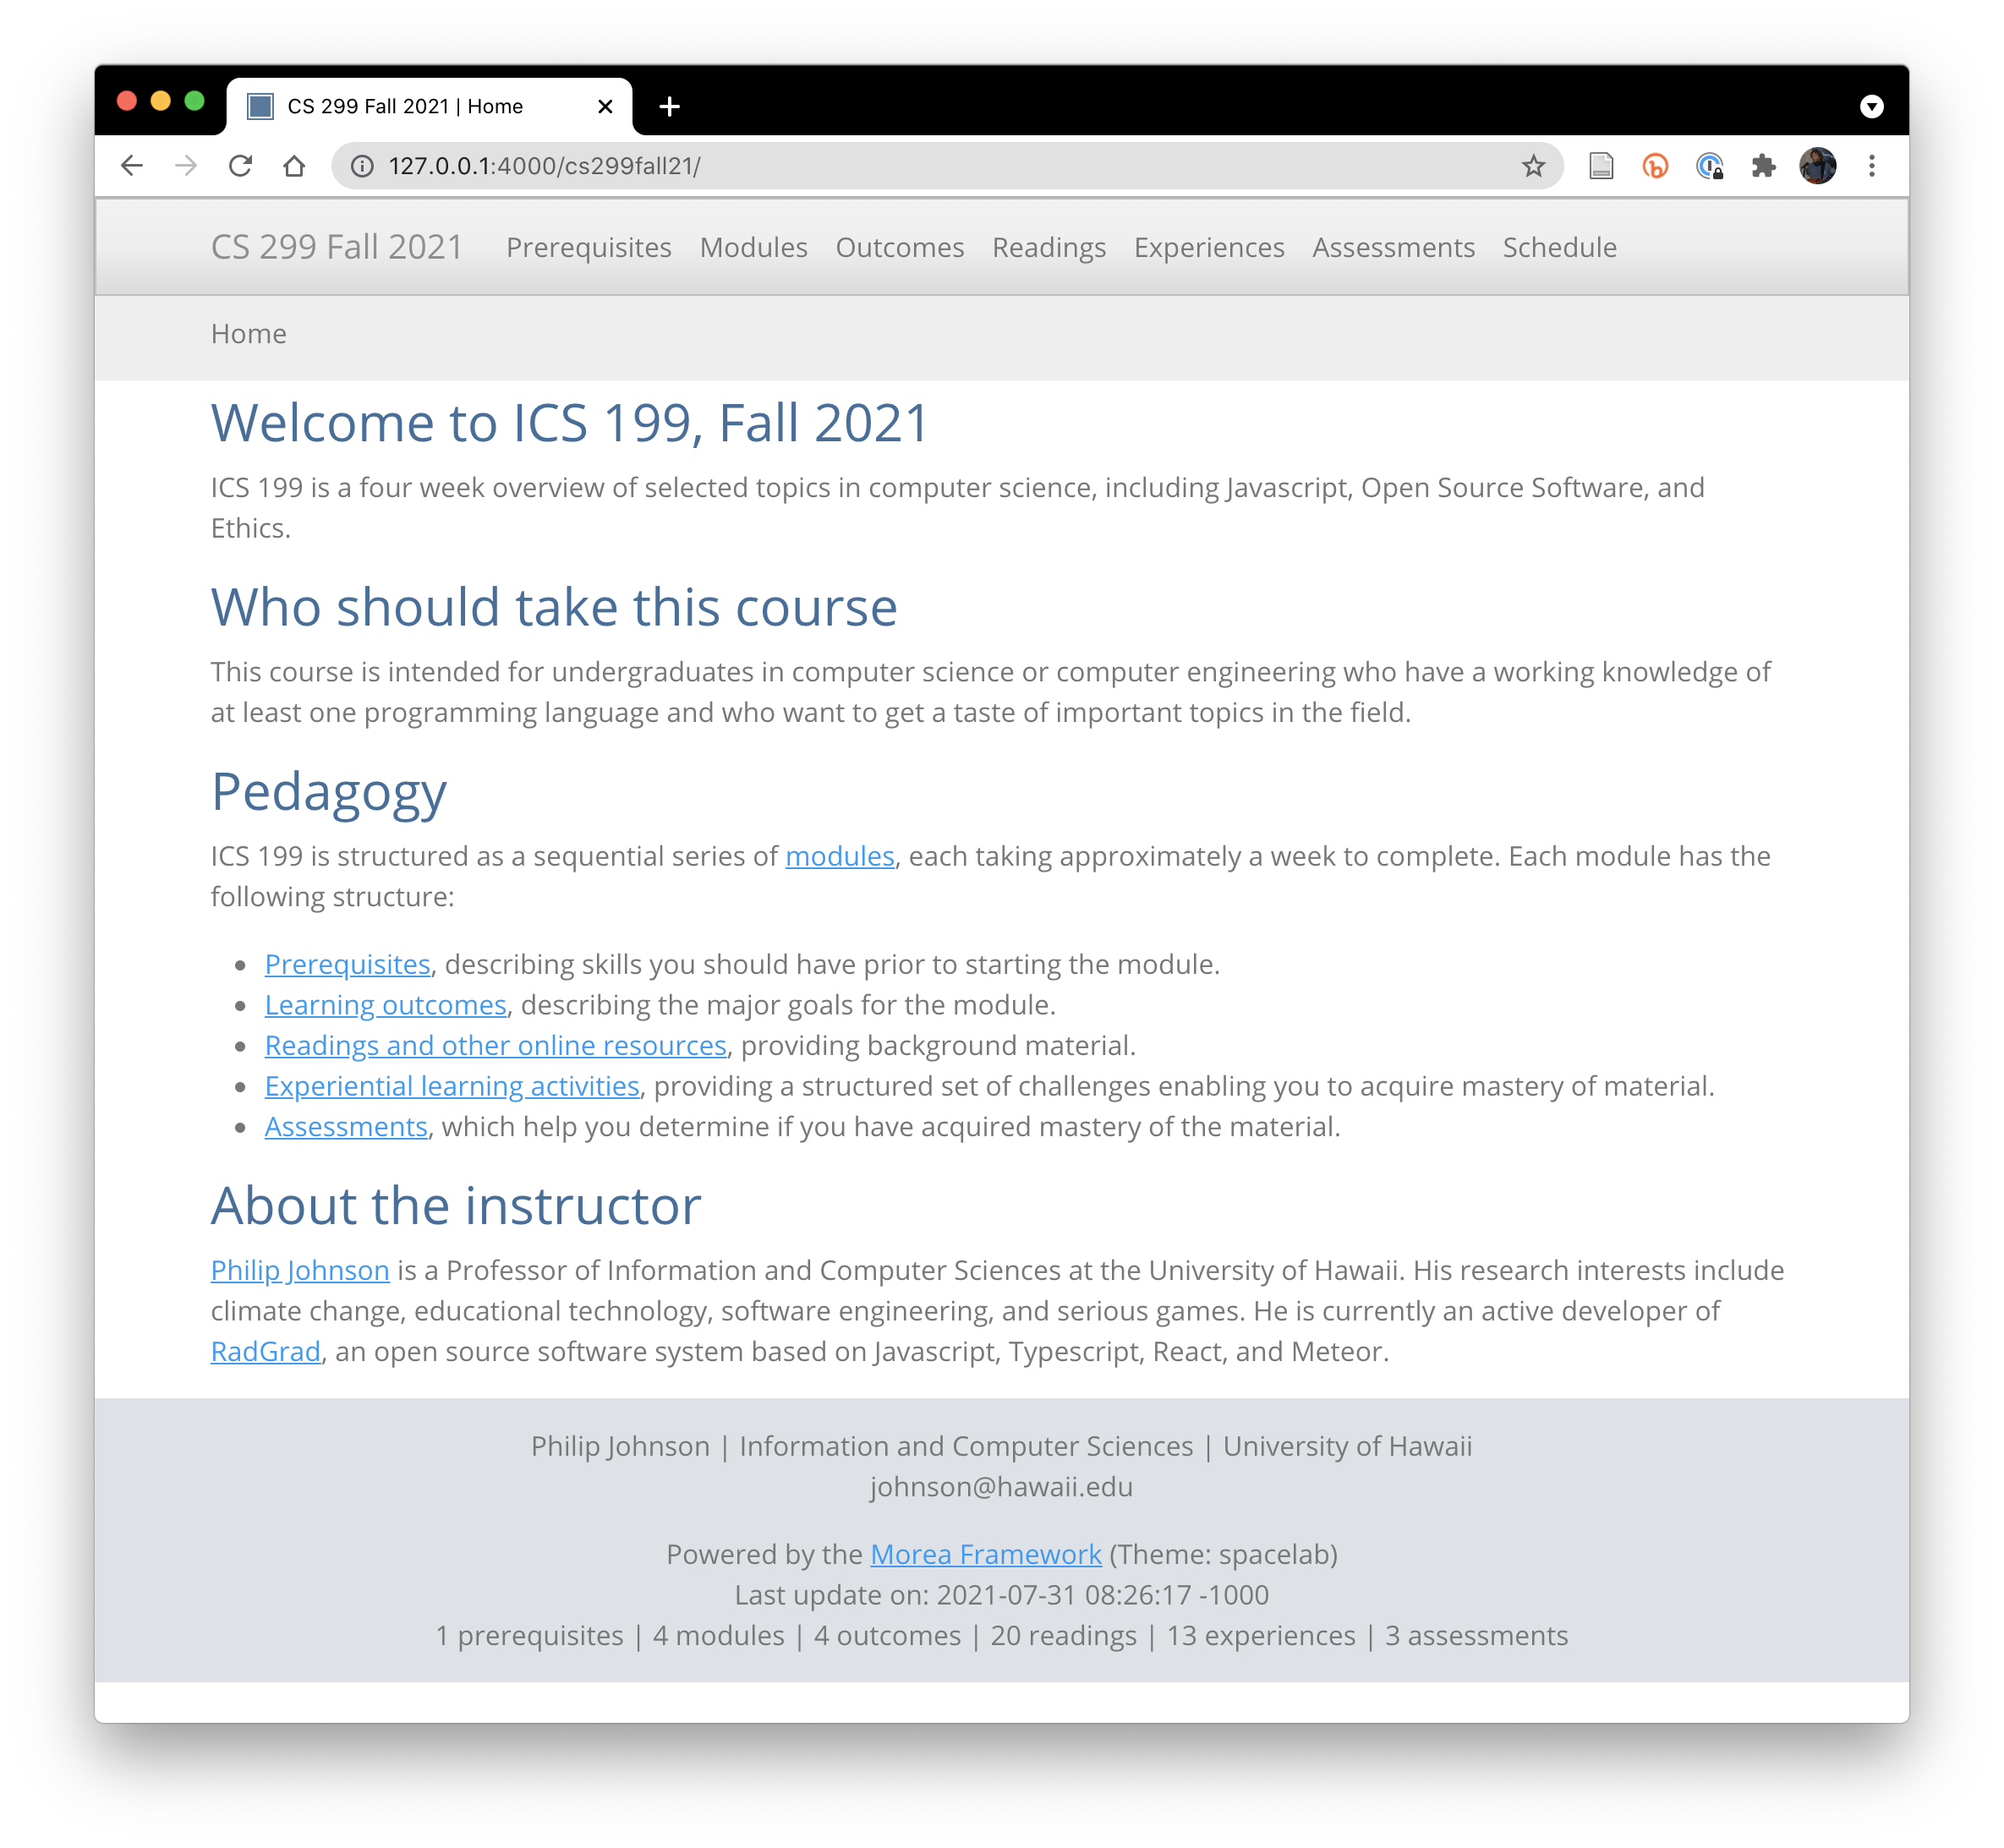
Now look for the "Server address:" field on the second to last line. In this case, it's http://127.0.0.1:4000/cs299fall21/. Cut and paste the value from your terminal window into a browser, and the default site should appear:
Customize your content
Now let's make some simple changes to your site. To do this, you'll need to bring up your text editor and point it at your repository directory. Here is an example of using IntelliJ IDEA to create a "project" that enables manipulation of the repository directory and its contents:
Modify theme & navbar
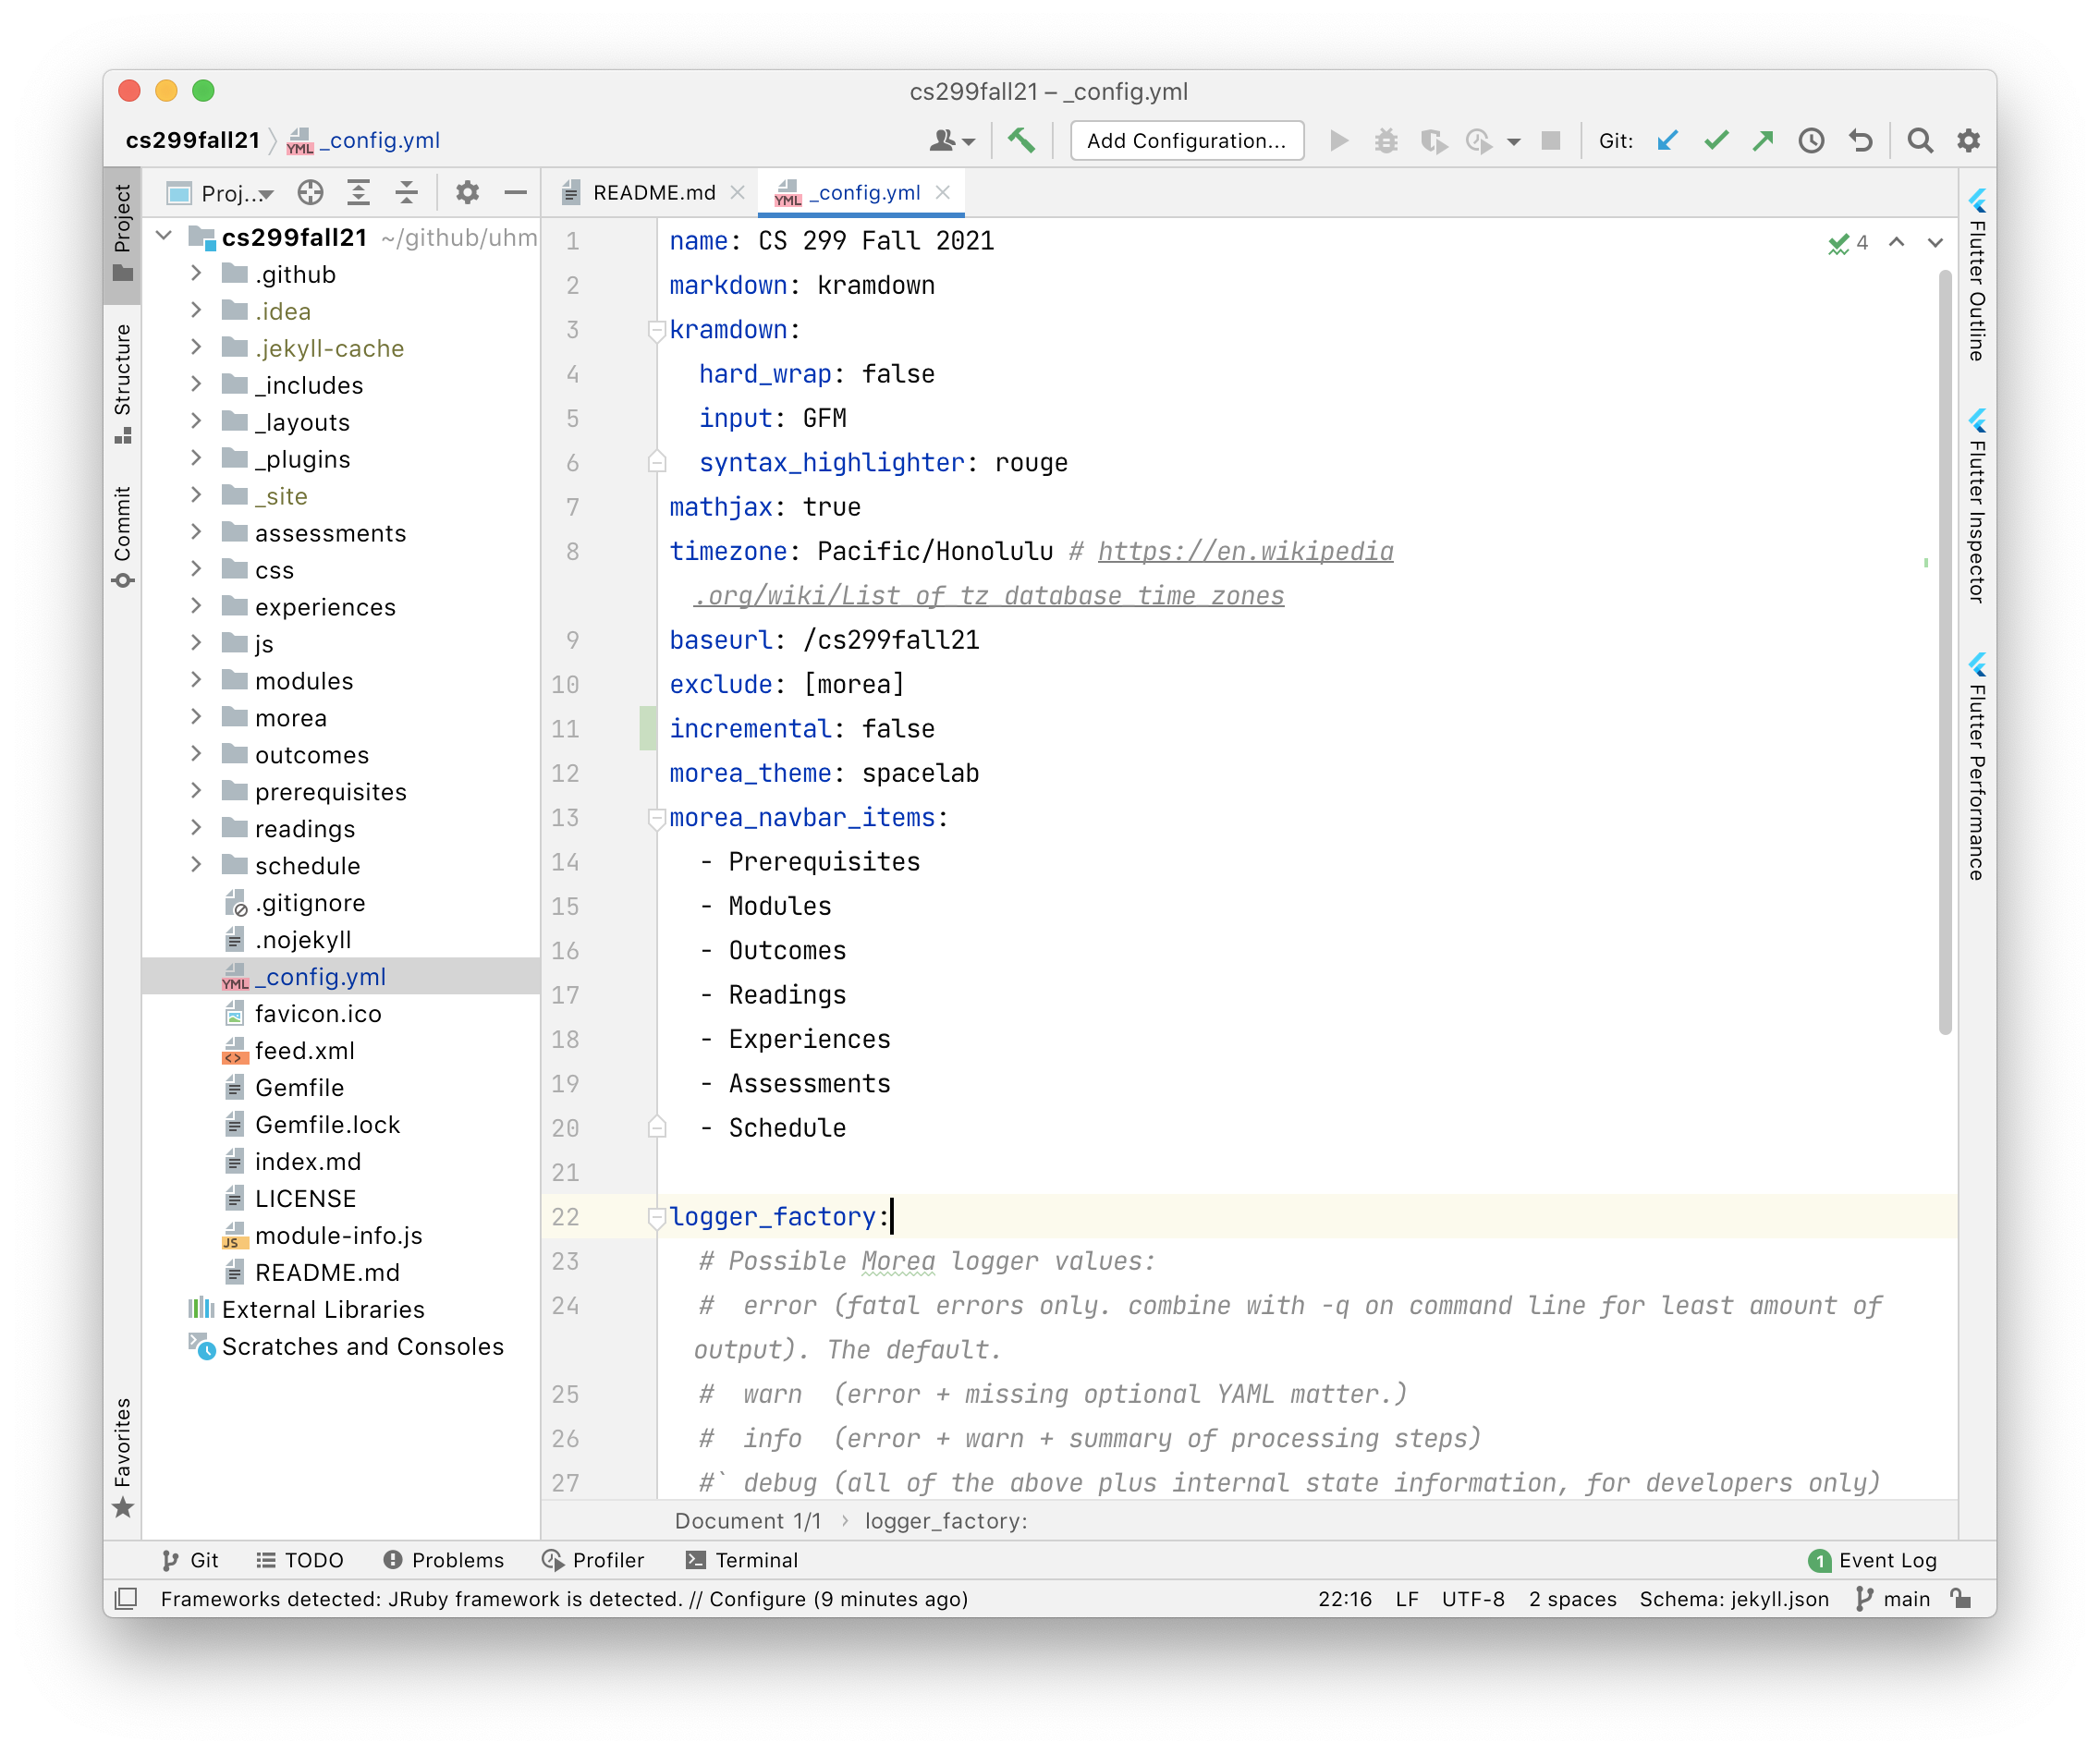
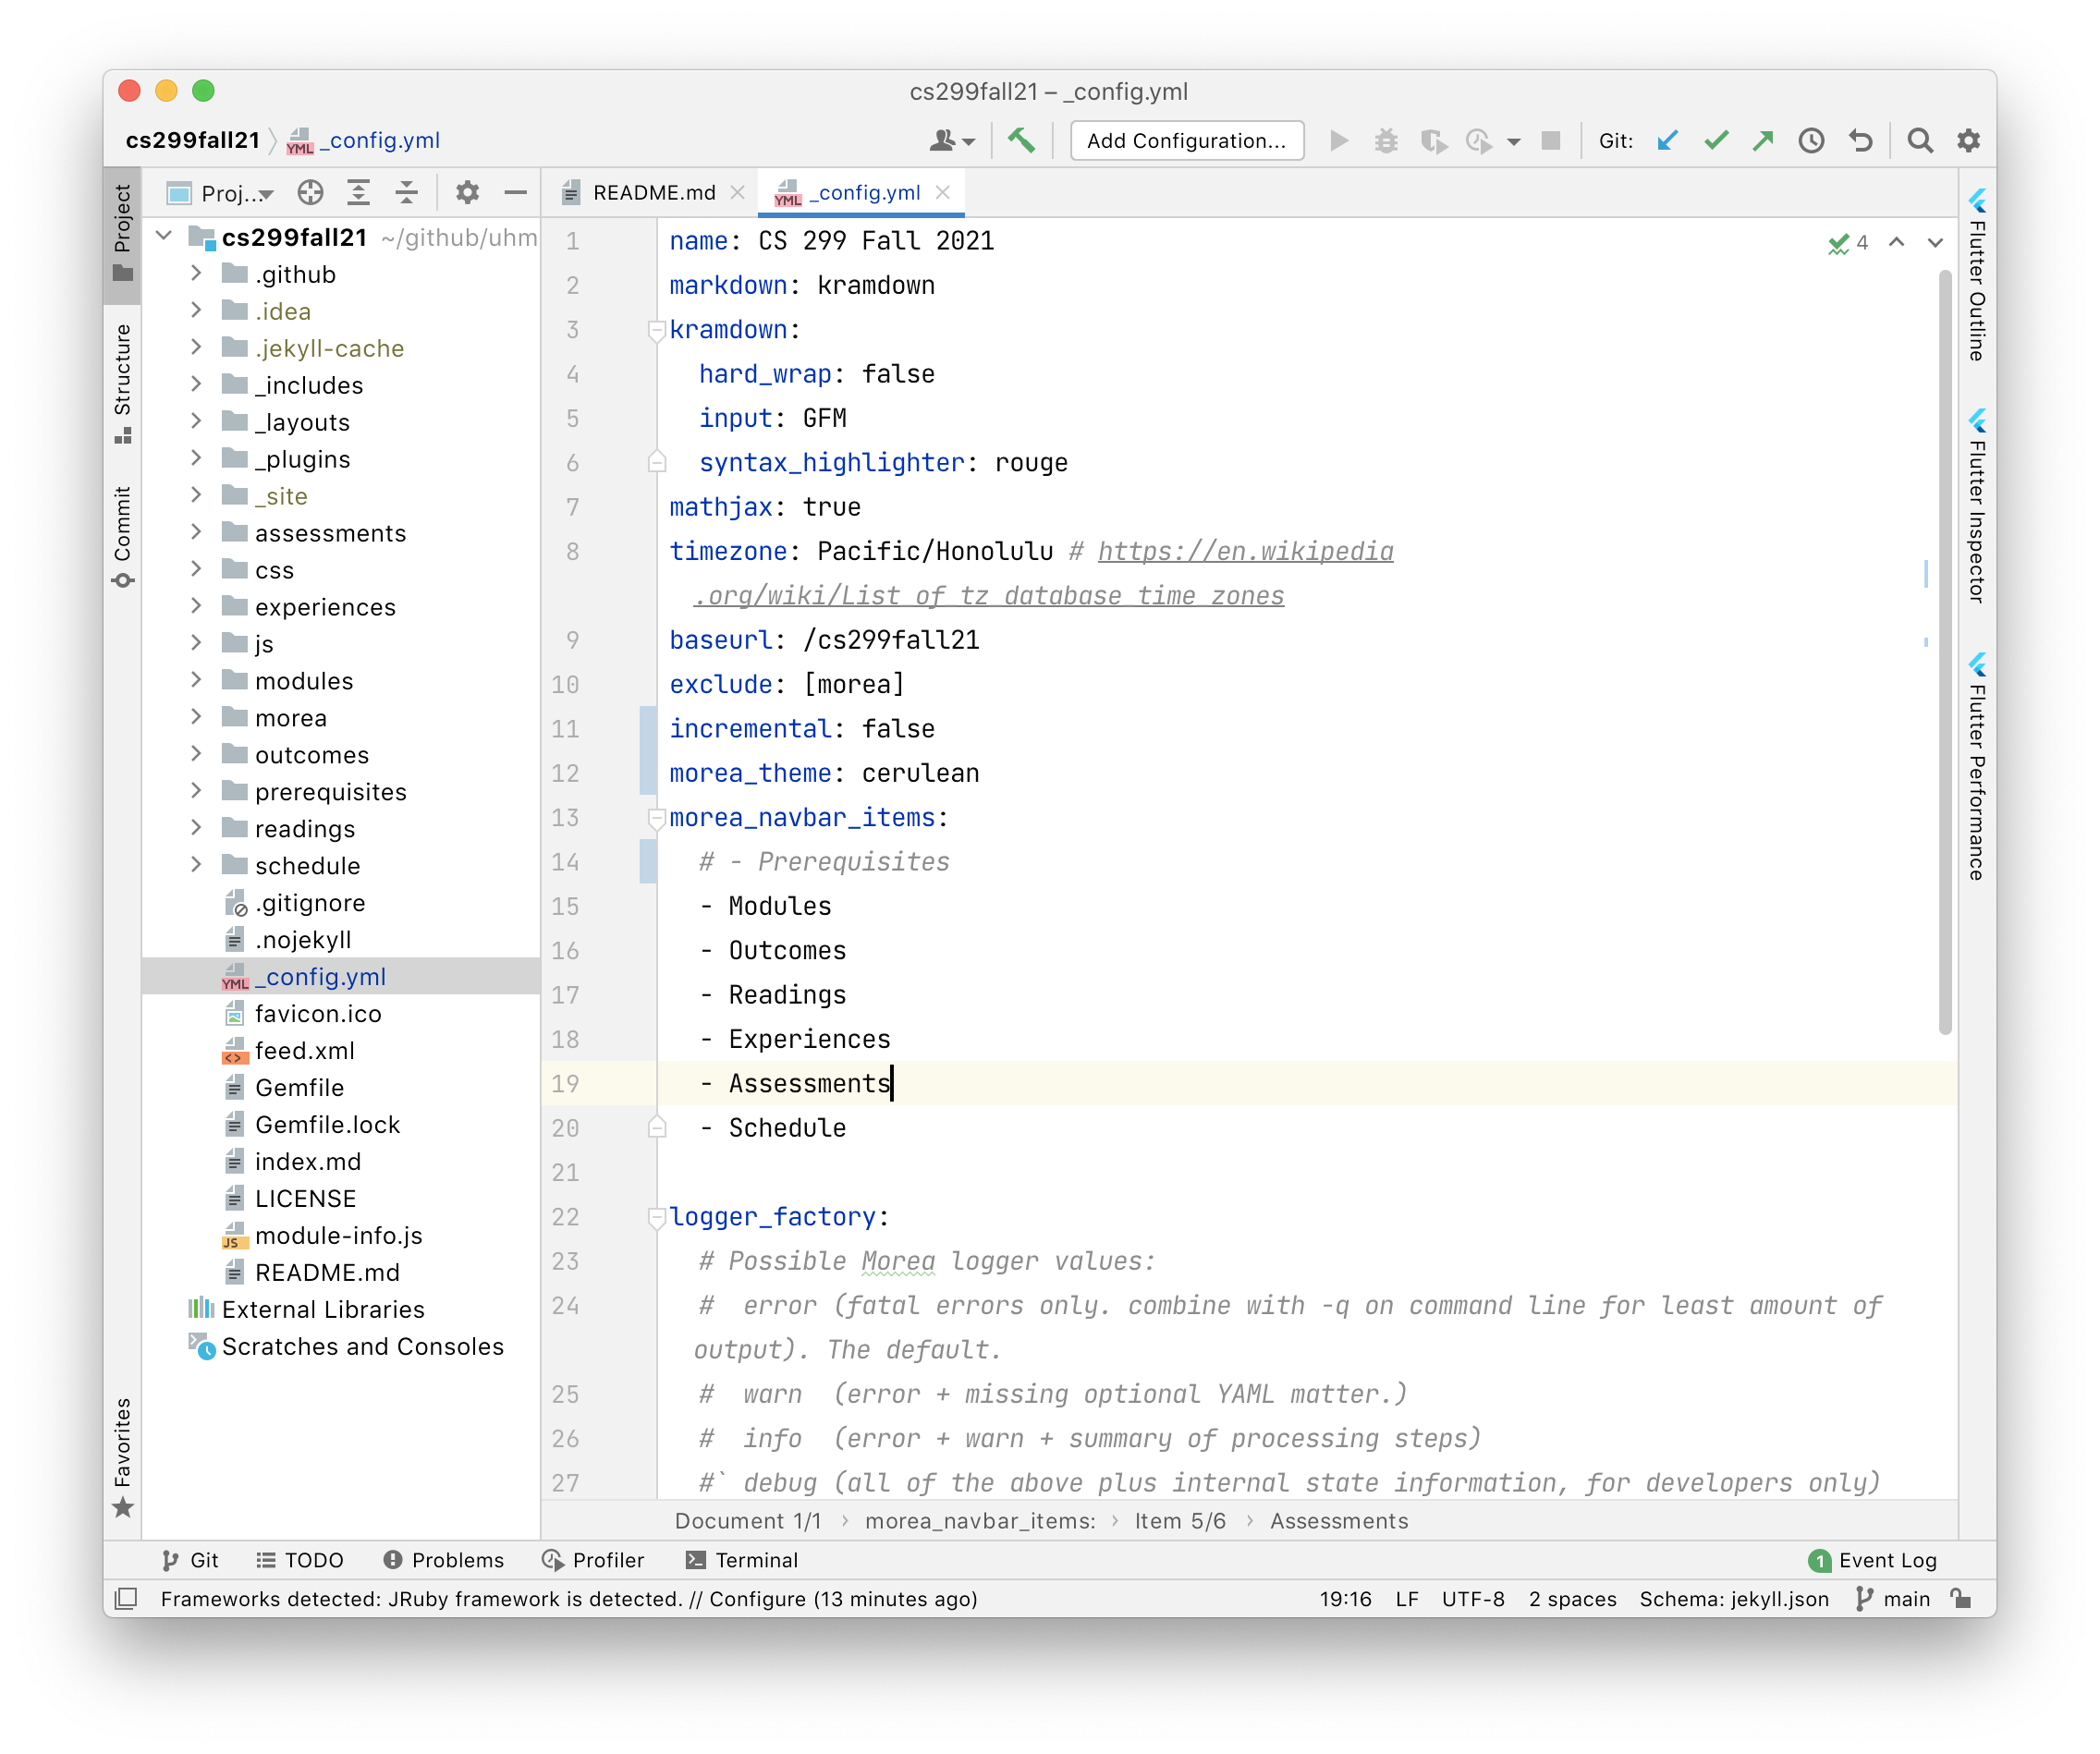
To begin, let's change the theme of the site from spacelab to cerulean, and get rid of the "Prerequisites" navbar menu item (because your course will not include any prerequisite modules). Change the morea_theme: to cerulean, and comment out the Prerequisites entry in morea_navbar_items:
Now go back to your terminal window, press control-c to terminate the Jekyll process, and bundle exec jekyll serve to restart. Refresh the browser window and it now should look like this:
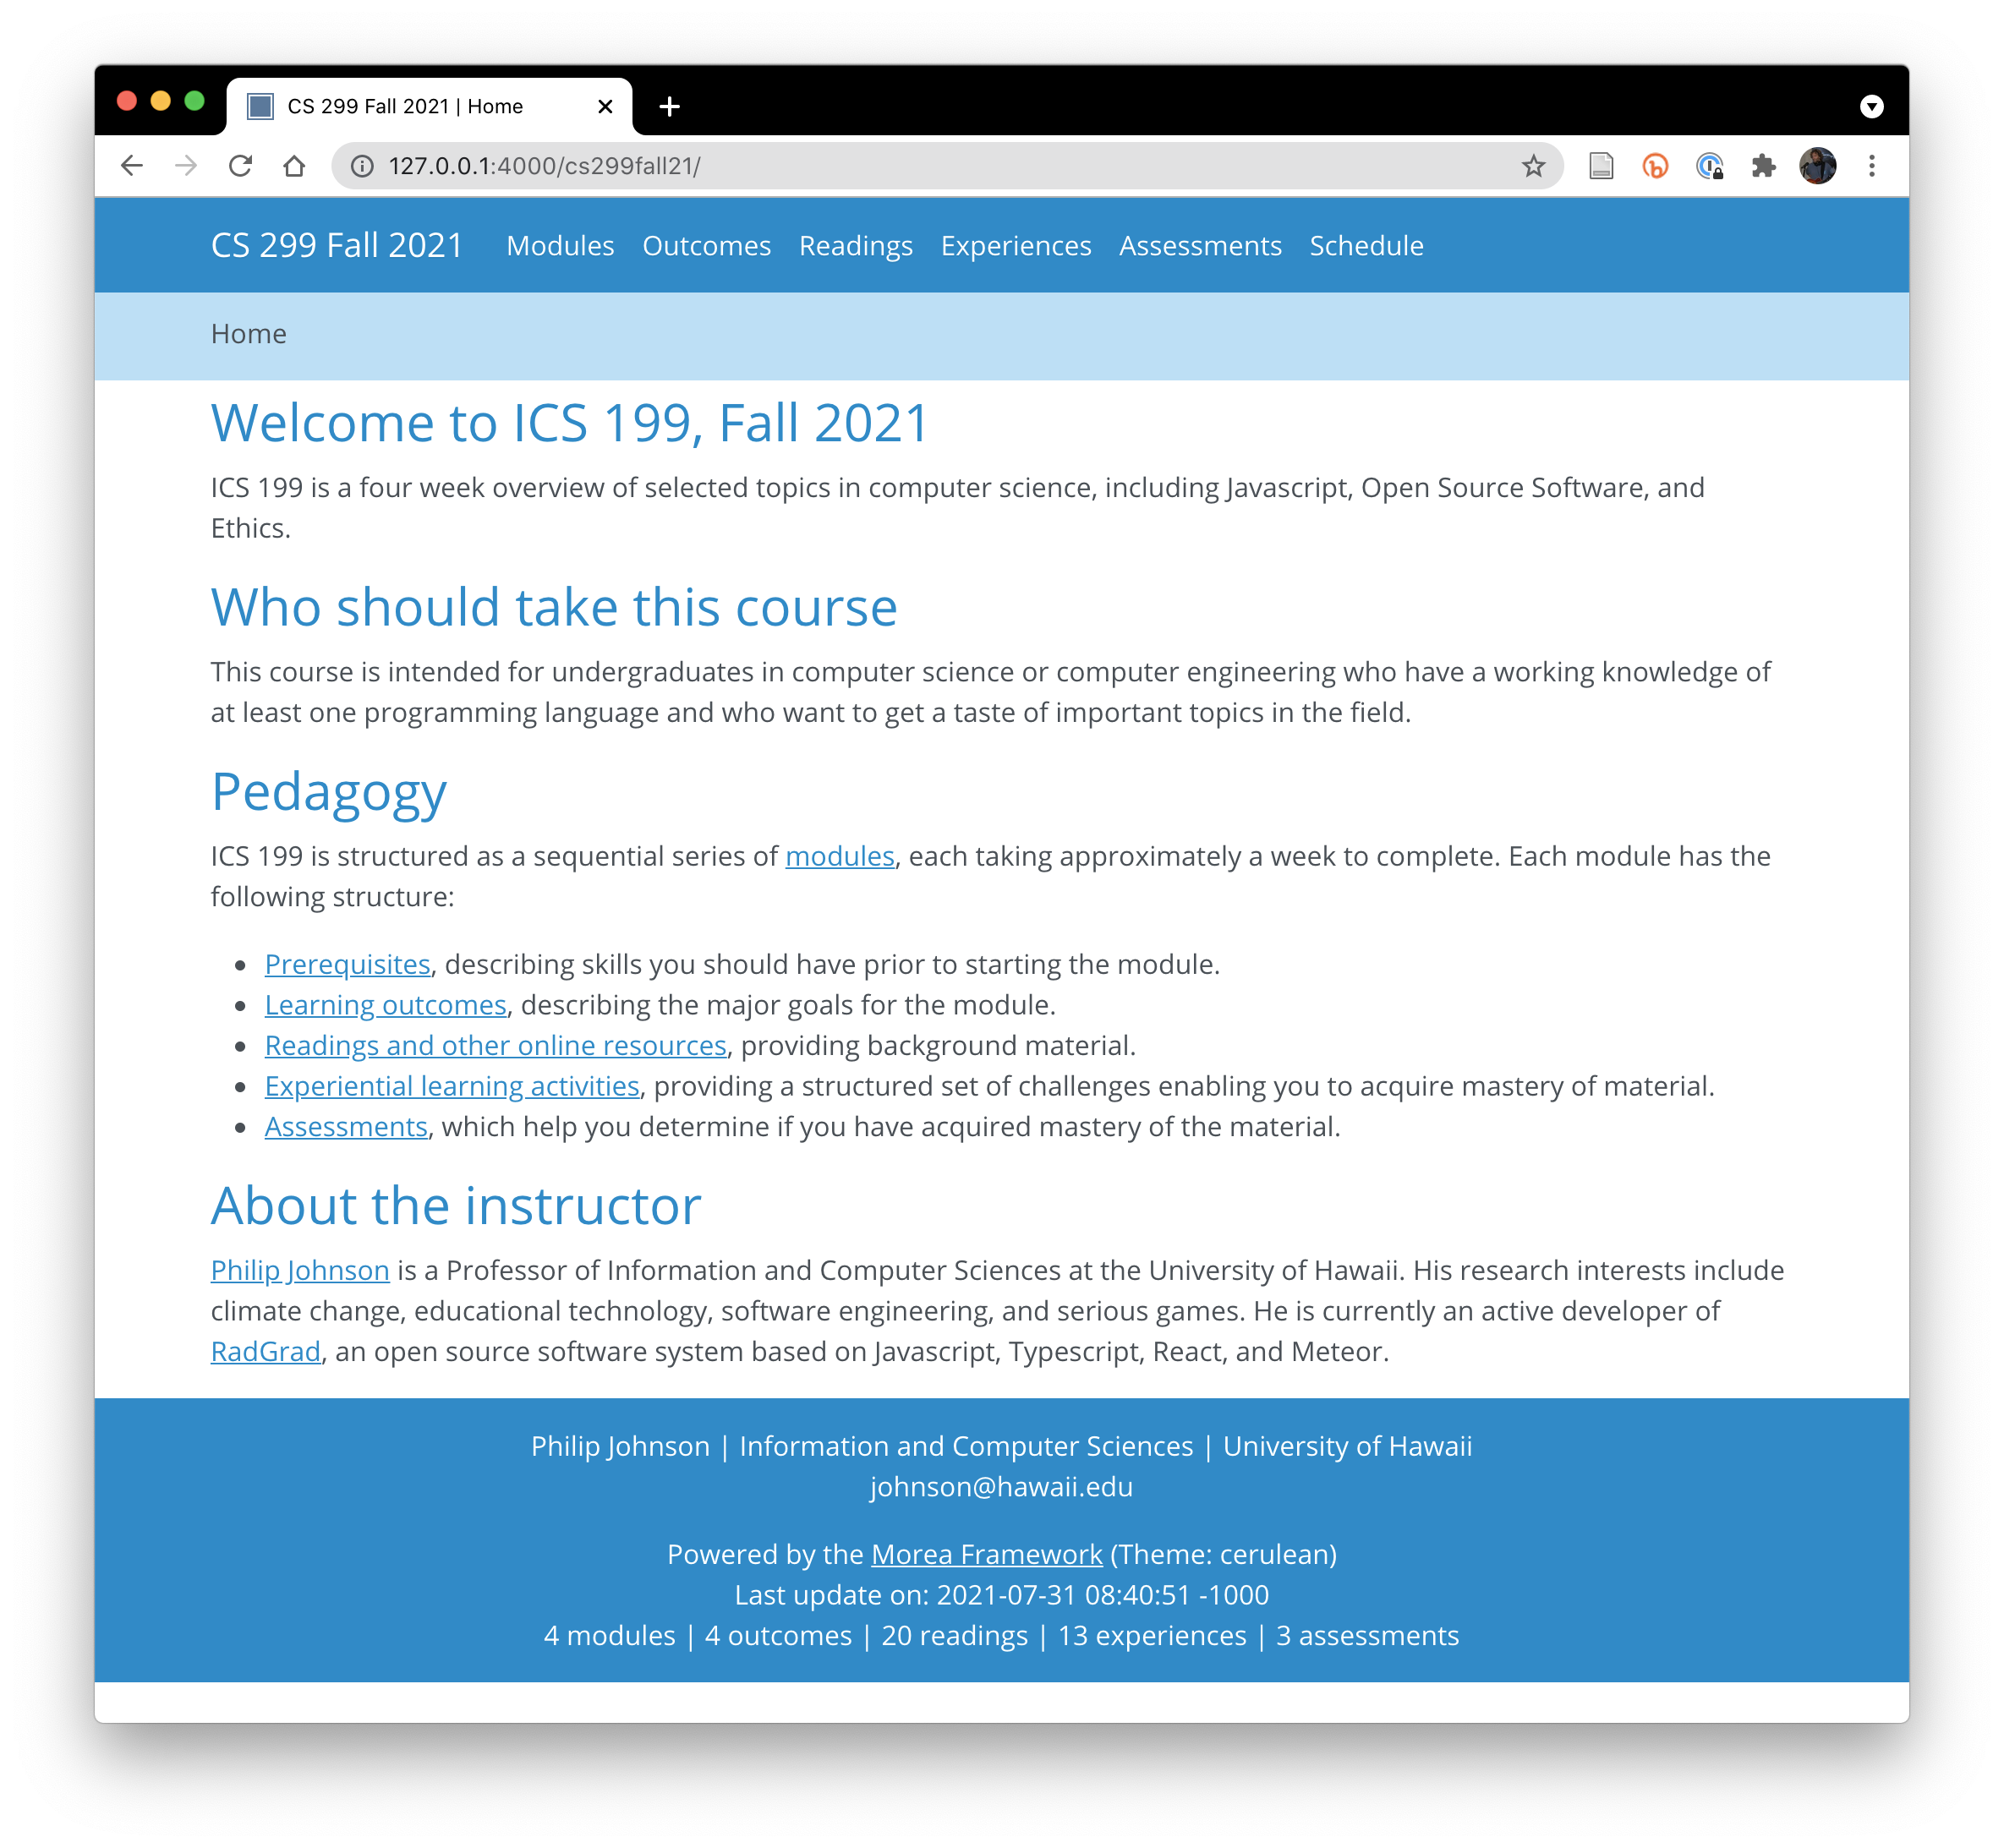
The Prerequisites menu item is gone, and the color theme is now blue.
Unpublish modules
The example modules provide useful guidance on the syntax of Morea, but you don't want them to be part of your actual site. The easiest way to do that is to unpublish them. To unpublish the Introduction module, go into morea/modules/example-introduction/module-introduction.md, and change the published: field to false:
Jekyll may report some errors in the terminal window after you save this change. You can ignore them. Just type control-c followed by bundle exec jekyll serve as before to restart Jekyll. The first thing you'll notice is that the Introduction module no longer appears on the Modules page:
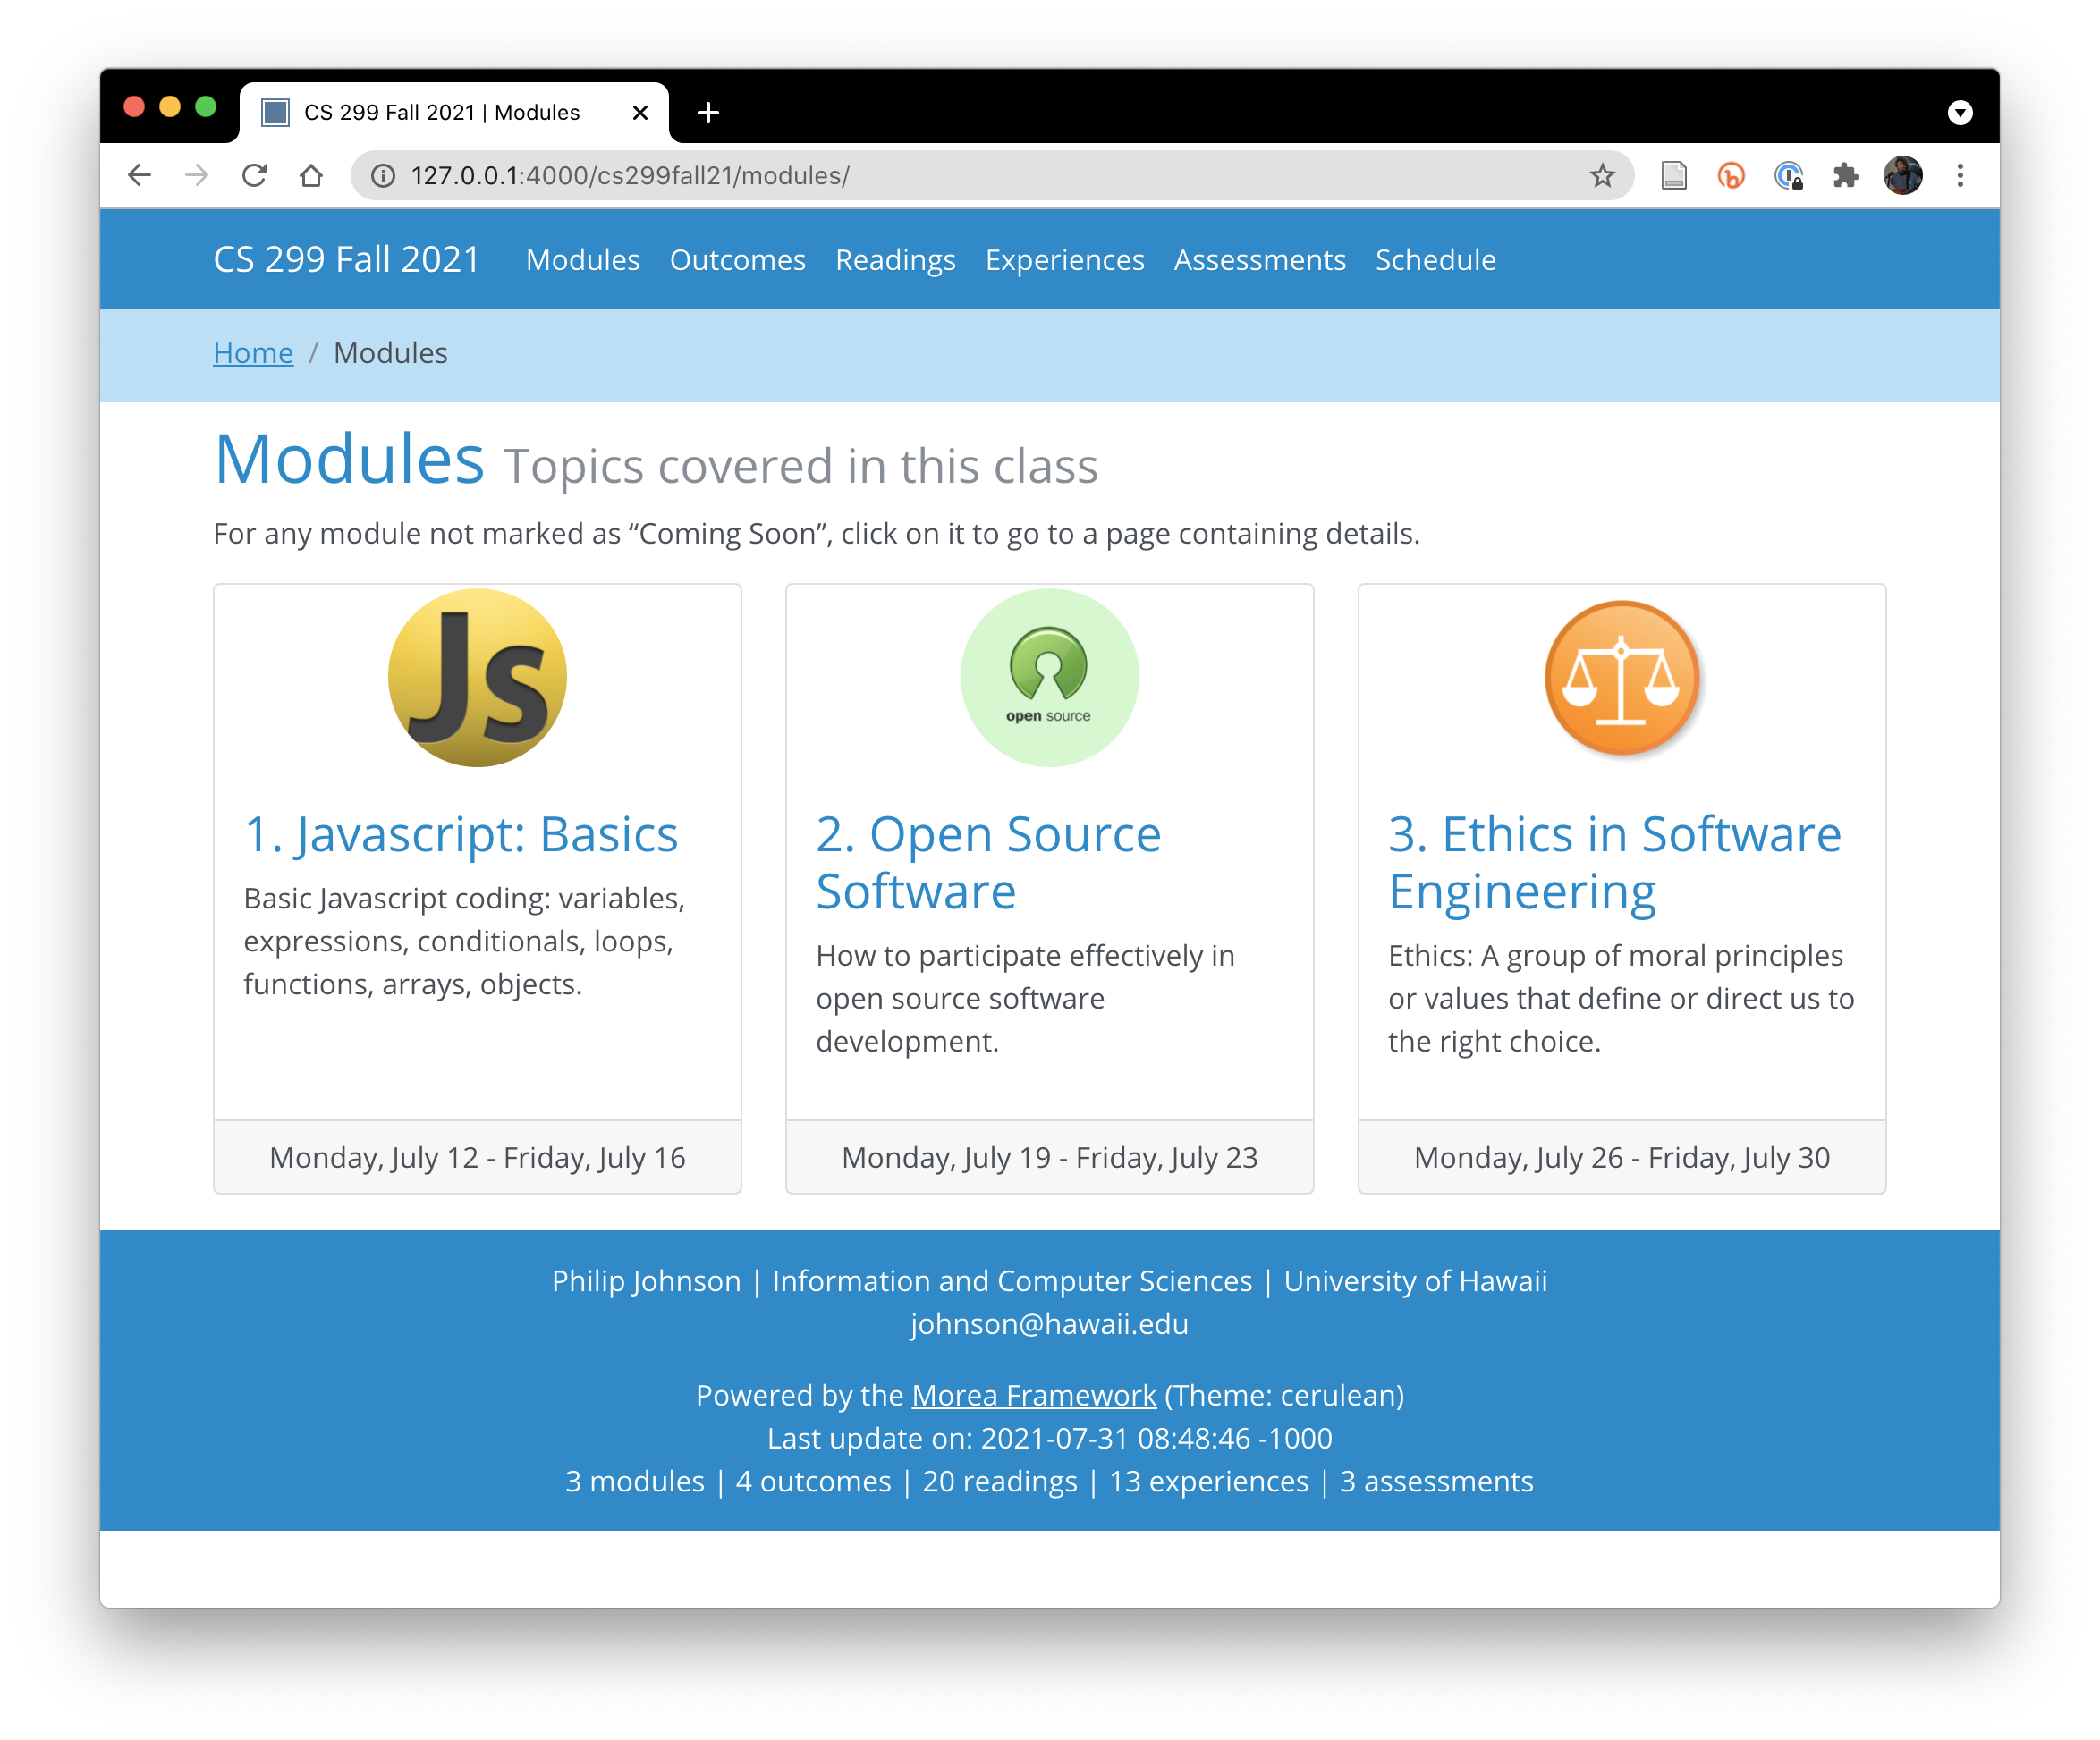
More significantly, the outcomes, readings, experiences, and assessments associated with that module have also disappeared.
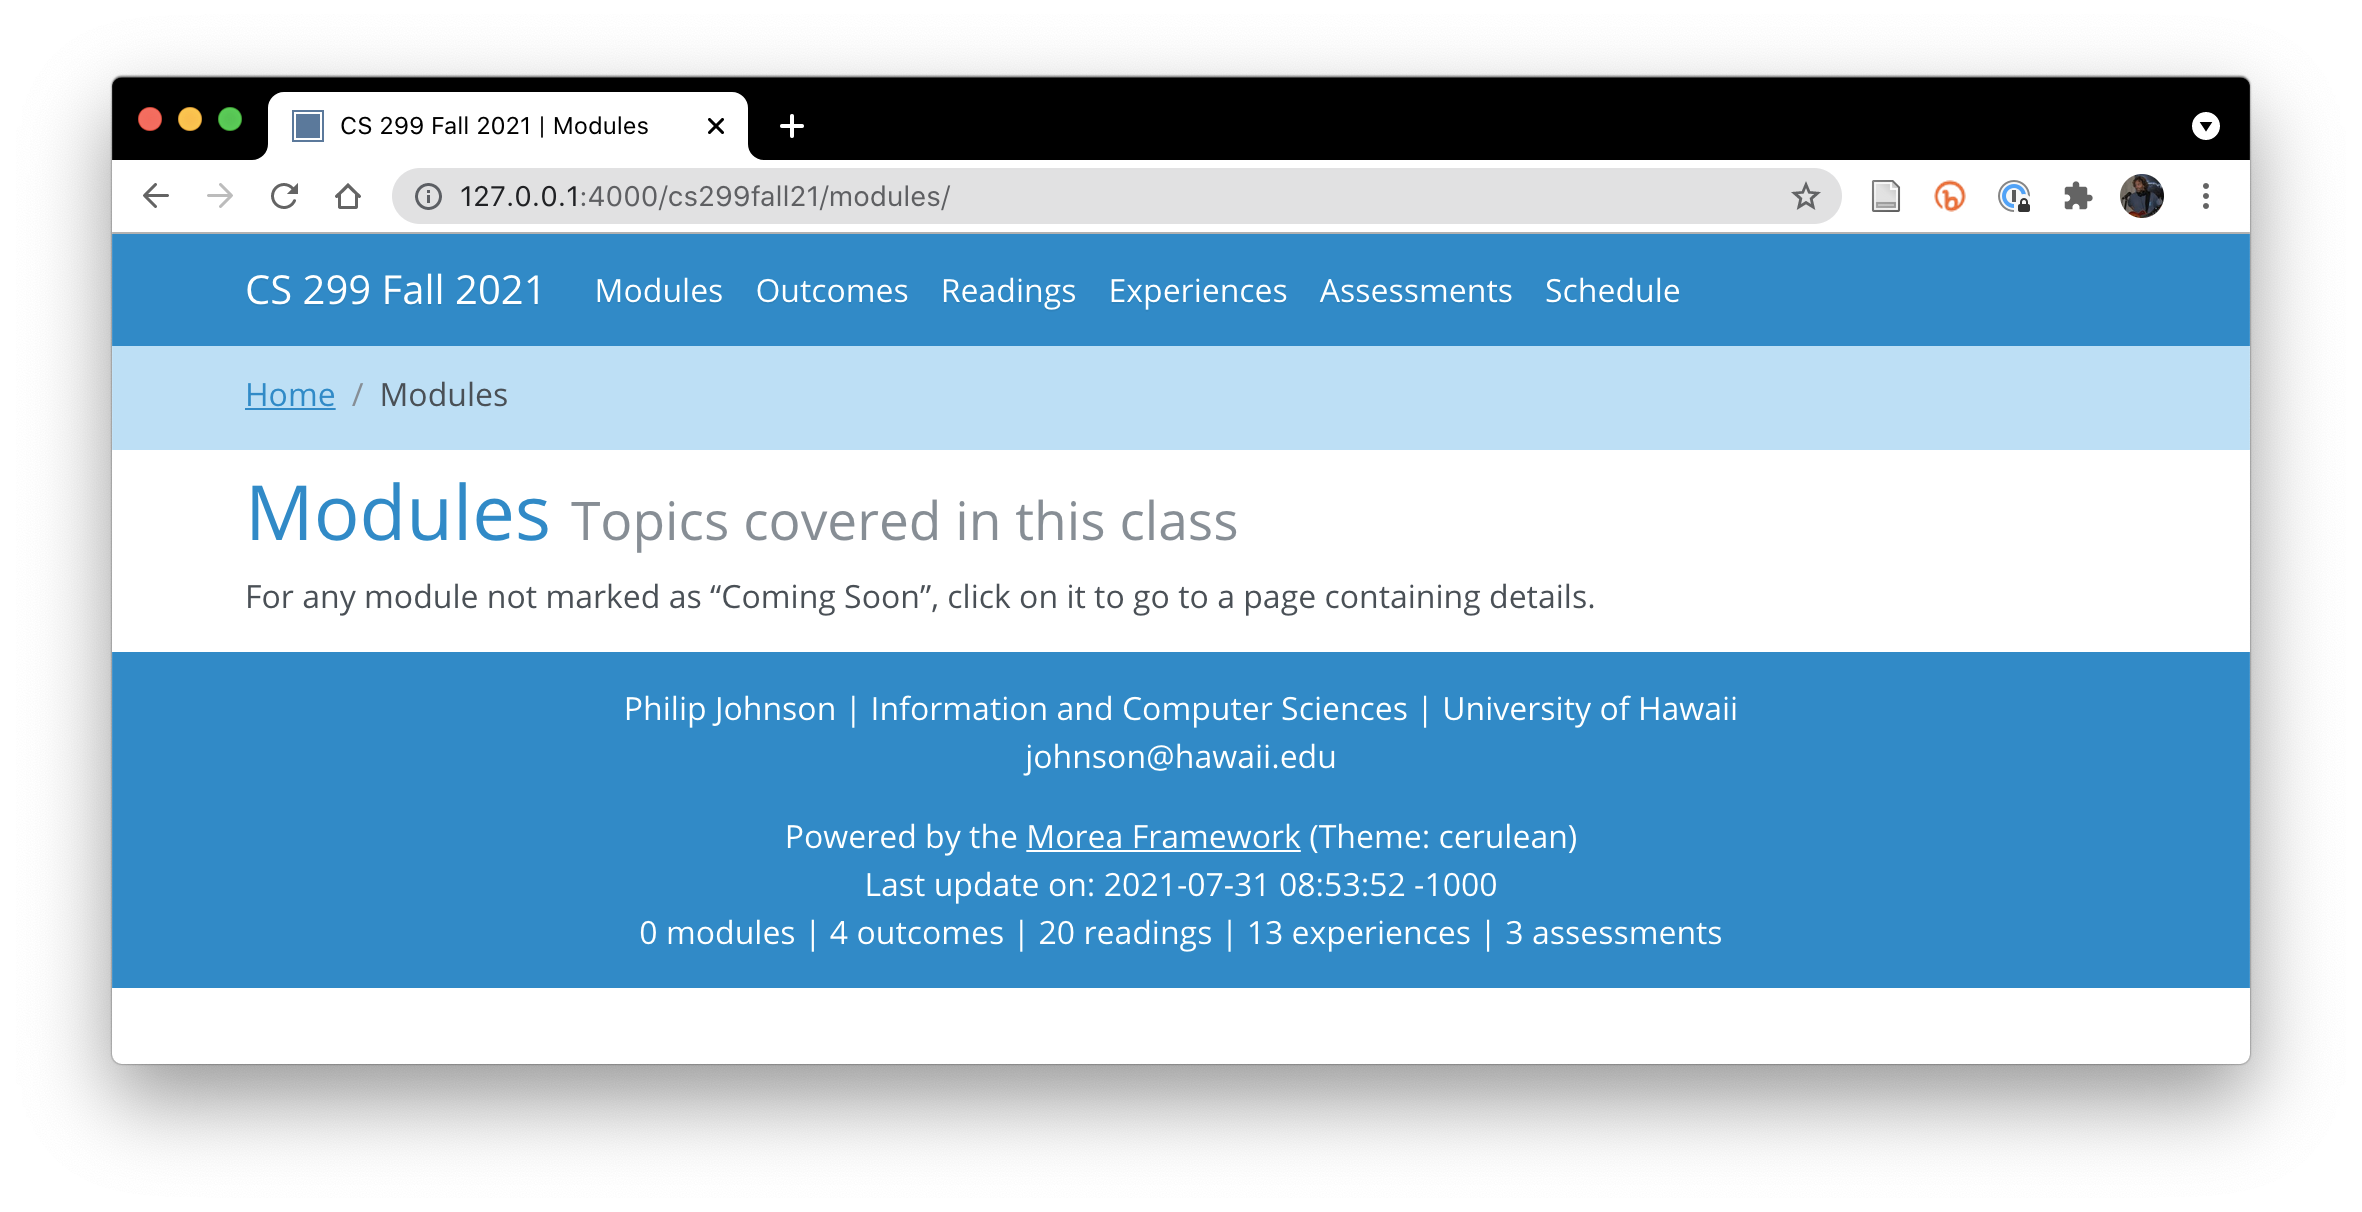
Now go ahead and unpublish the remaining three example modules in the same fashion. Restart Jekyll, and now there's no modules at all:
Create a new module
Let's start creating our own course content. Do the following:
- Make a copy of the example-introduction directory and call it introduction.
- Once you've made the copy, delete the example-introduction directory.
- In morea/introduction/module-introduction.md, edit the published: field from false to true.
- Edit the title: field to your course number.
- Edit the morea_id: field from example-introduction to introduction.
- Edit the morea_icon_url: field from /example-introduction/ to /introduction/.
- Delete all of the morea_readings: except for reading-syllabus.
- Delete all of the morea_experiences except for experience-introduce-yourself
- Edit the text following the front matter to refer to your course name.
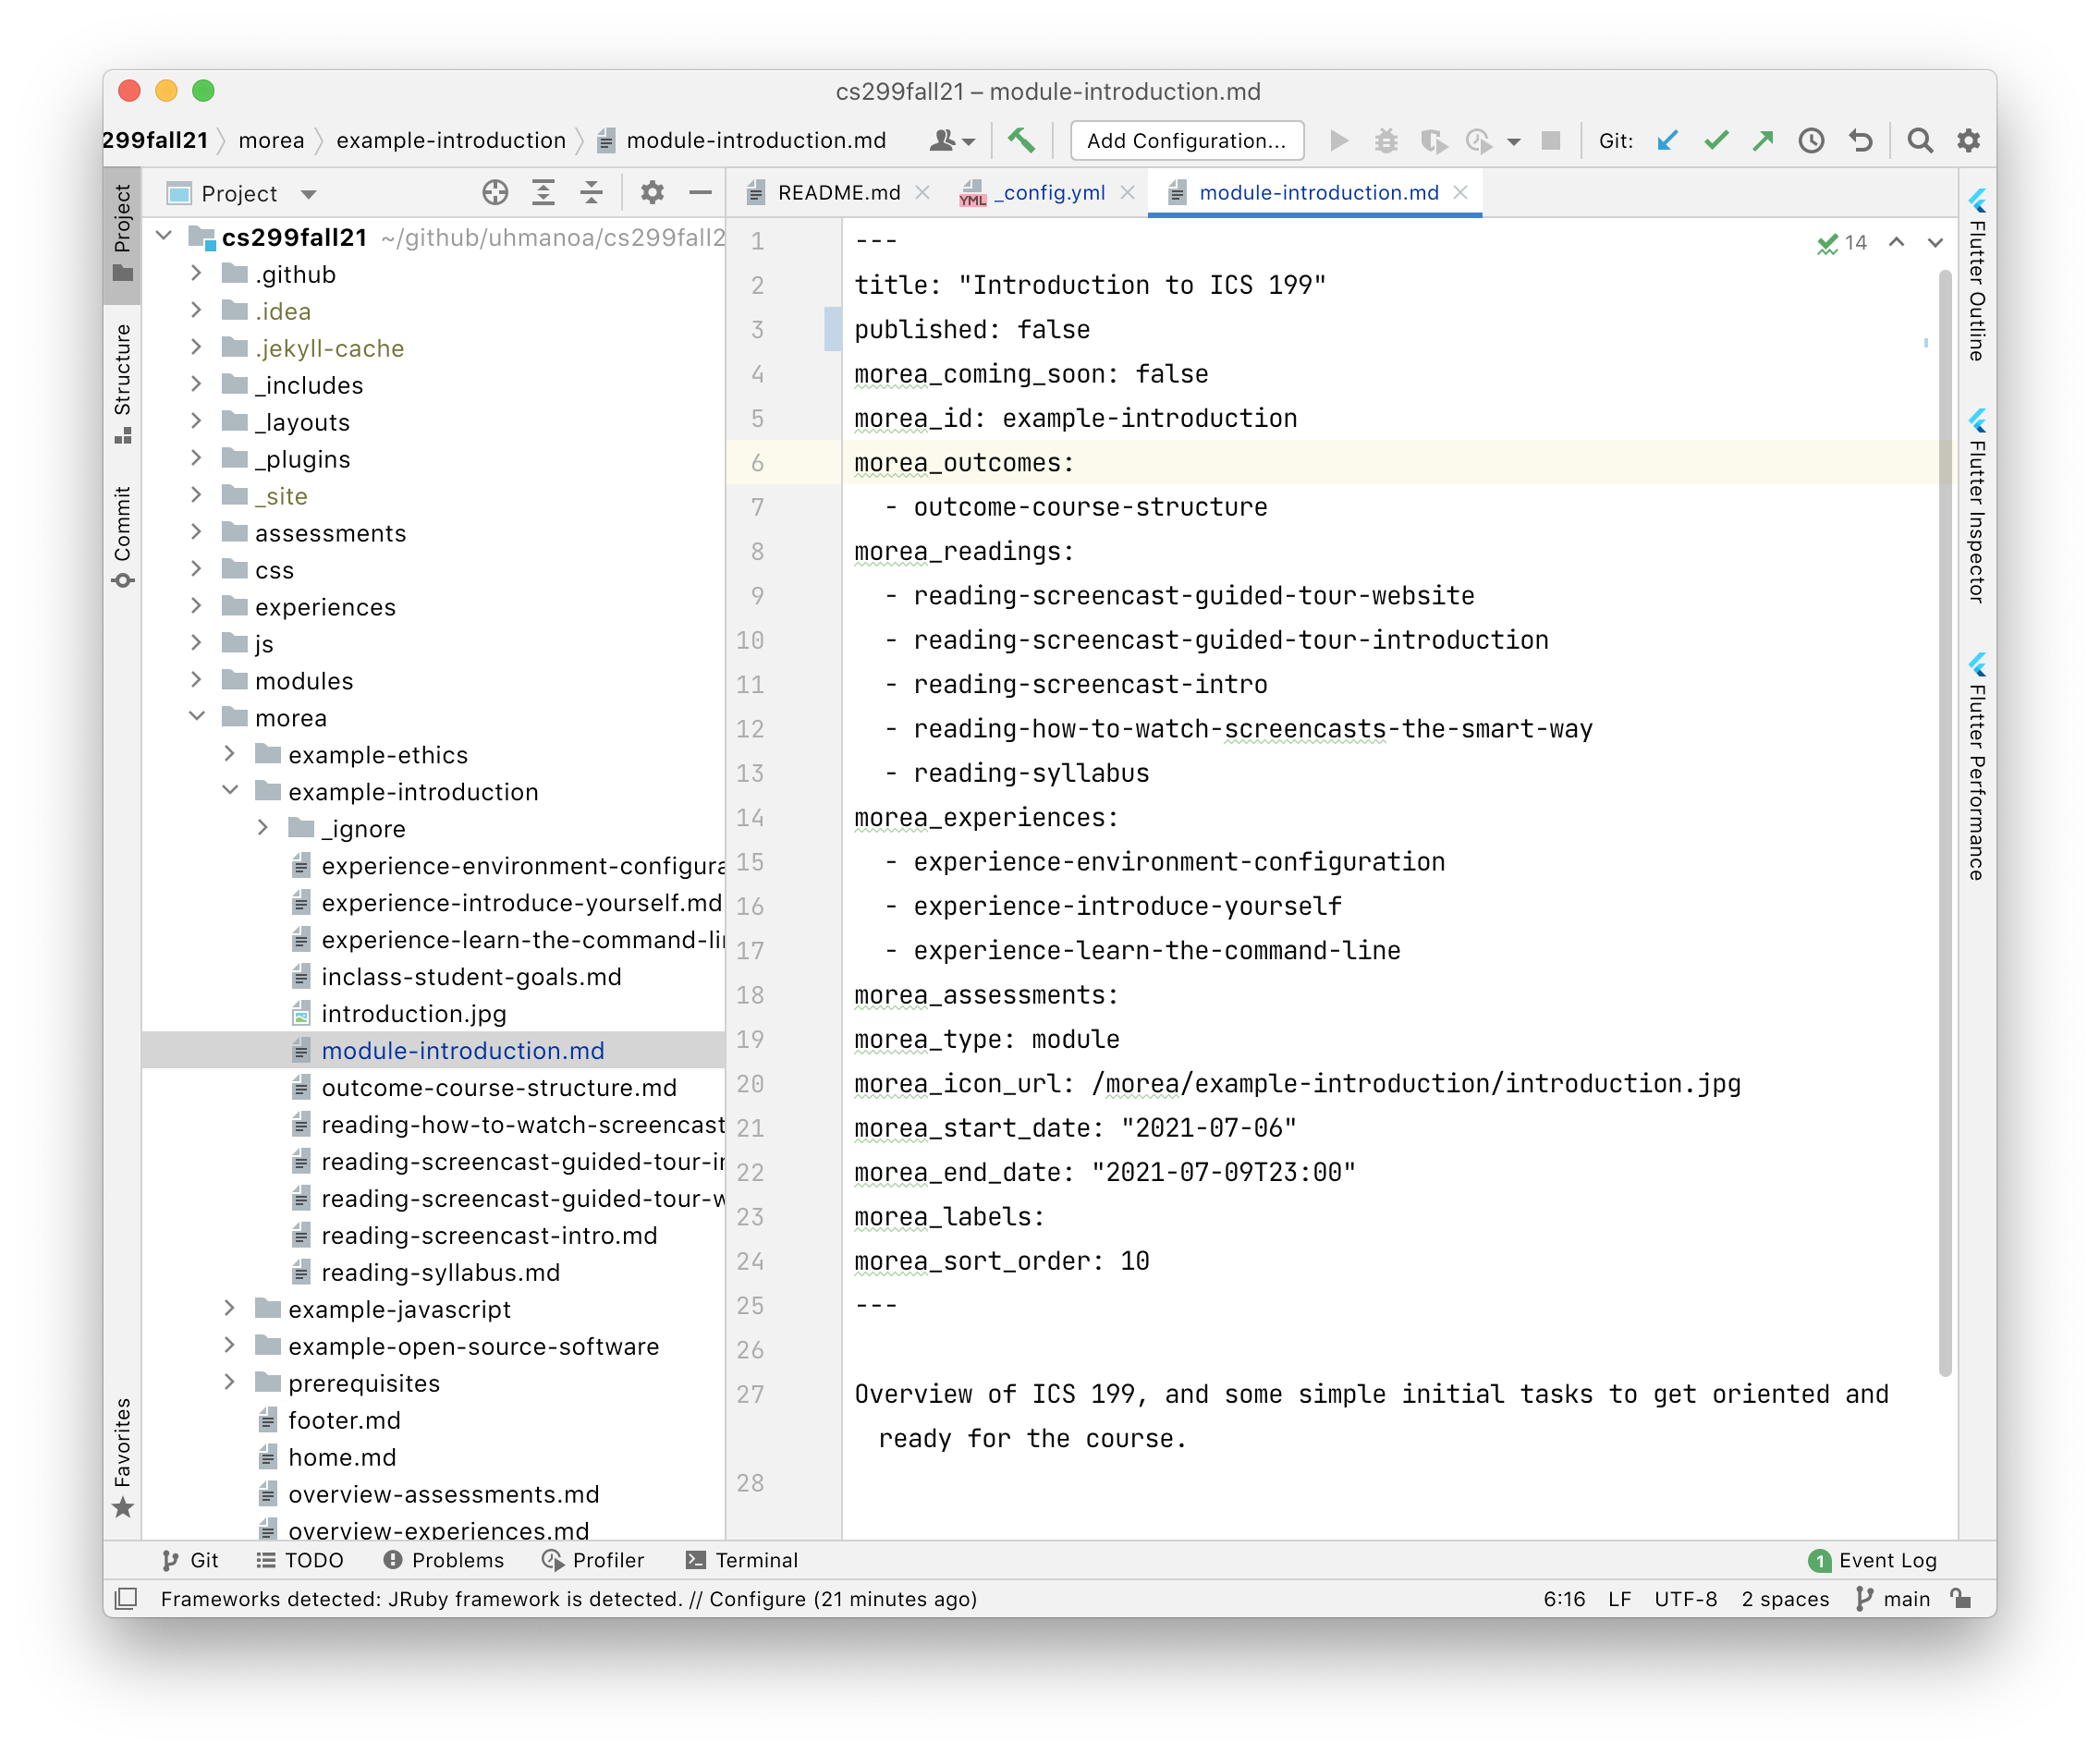
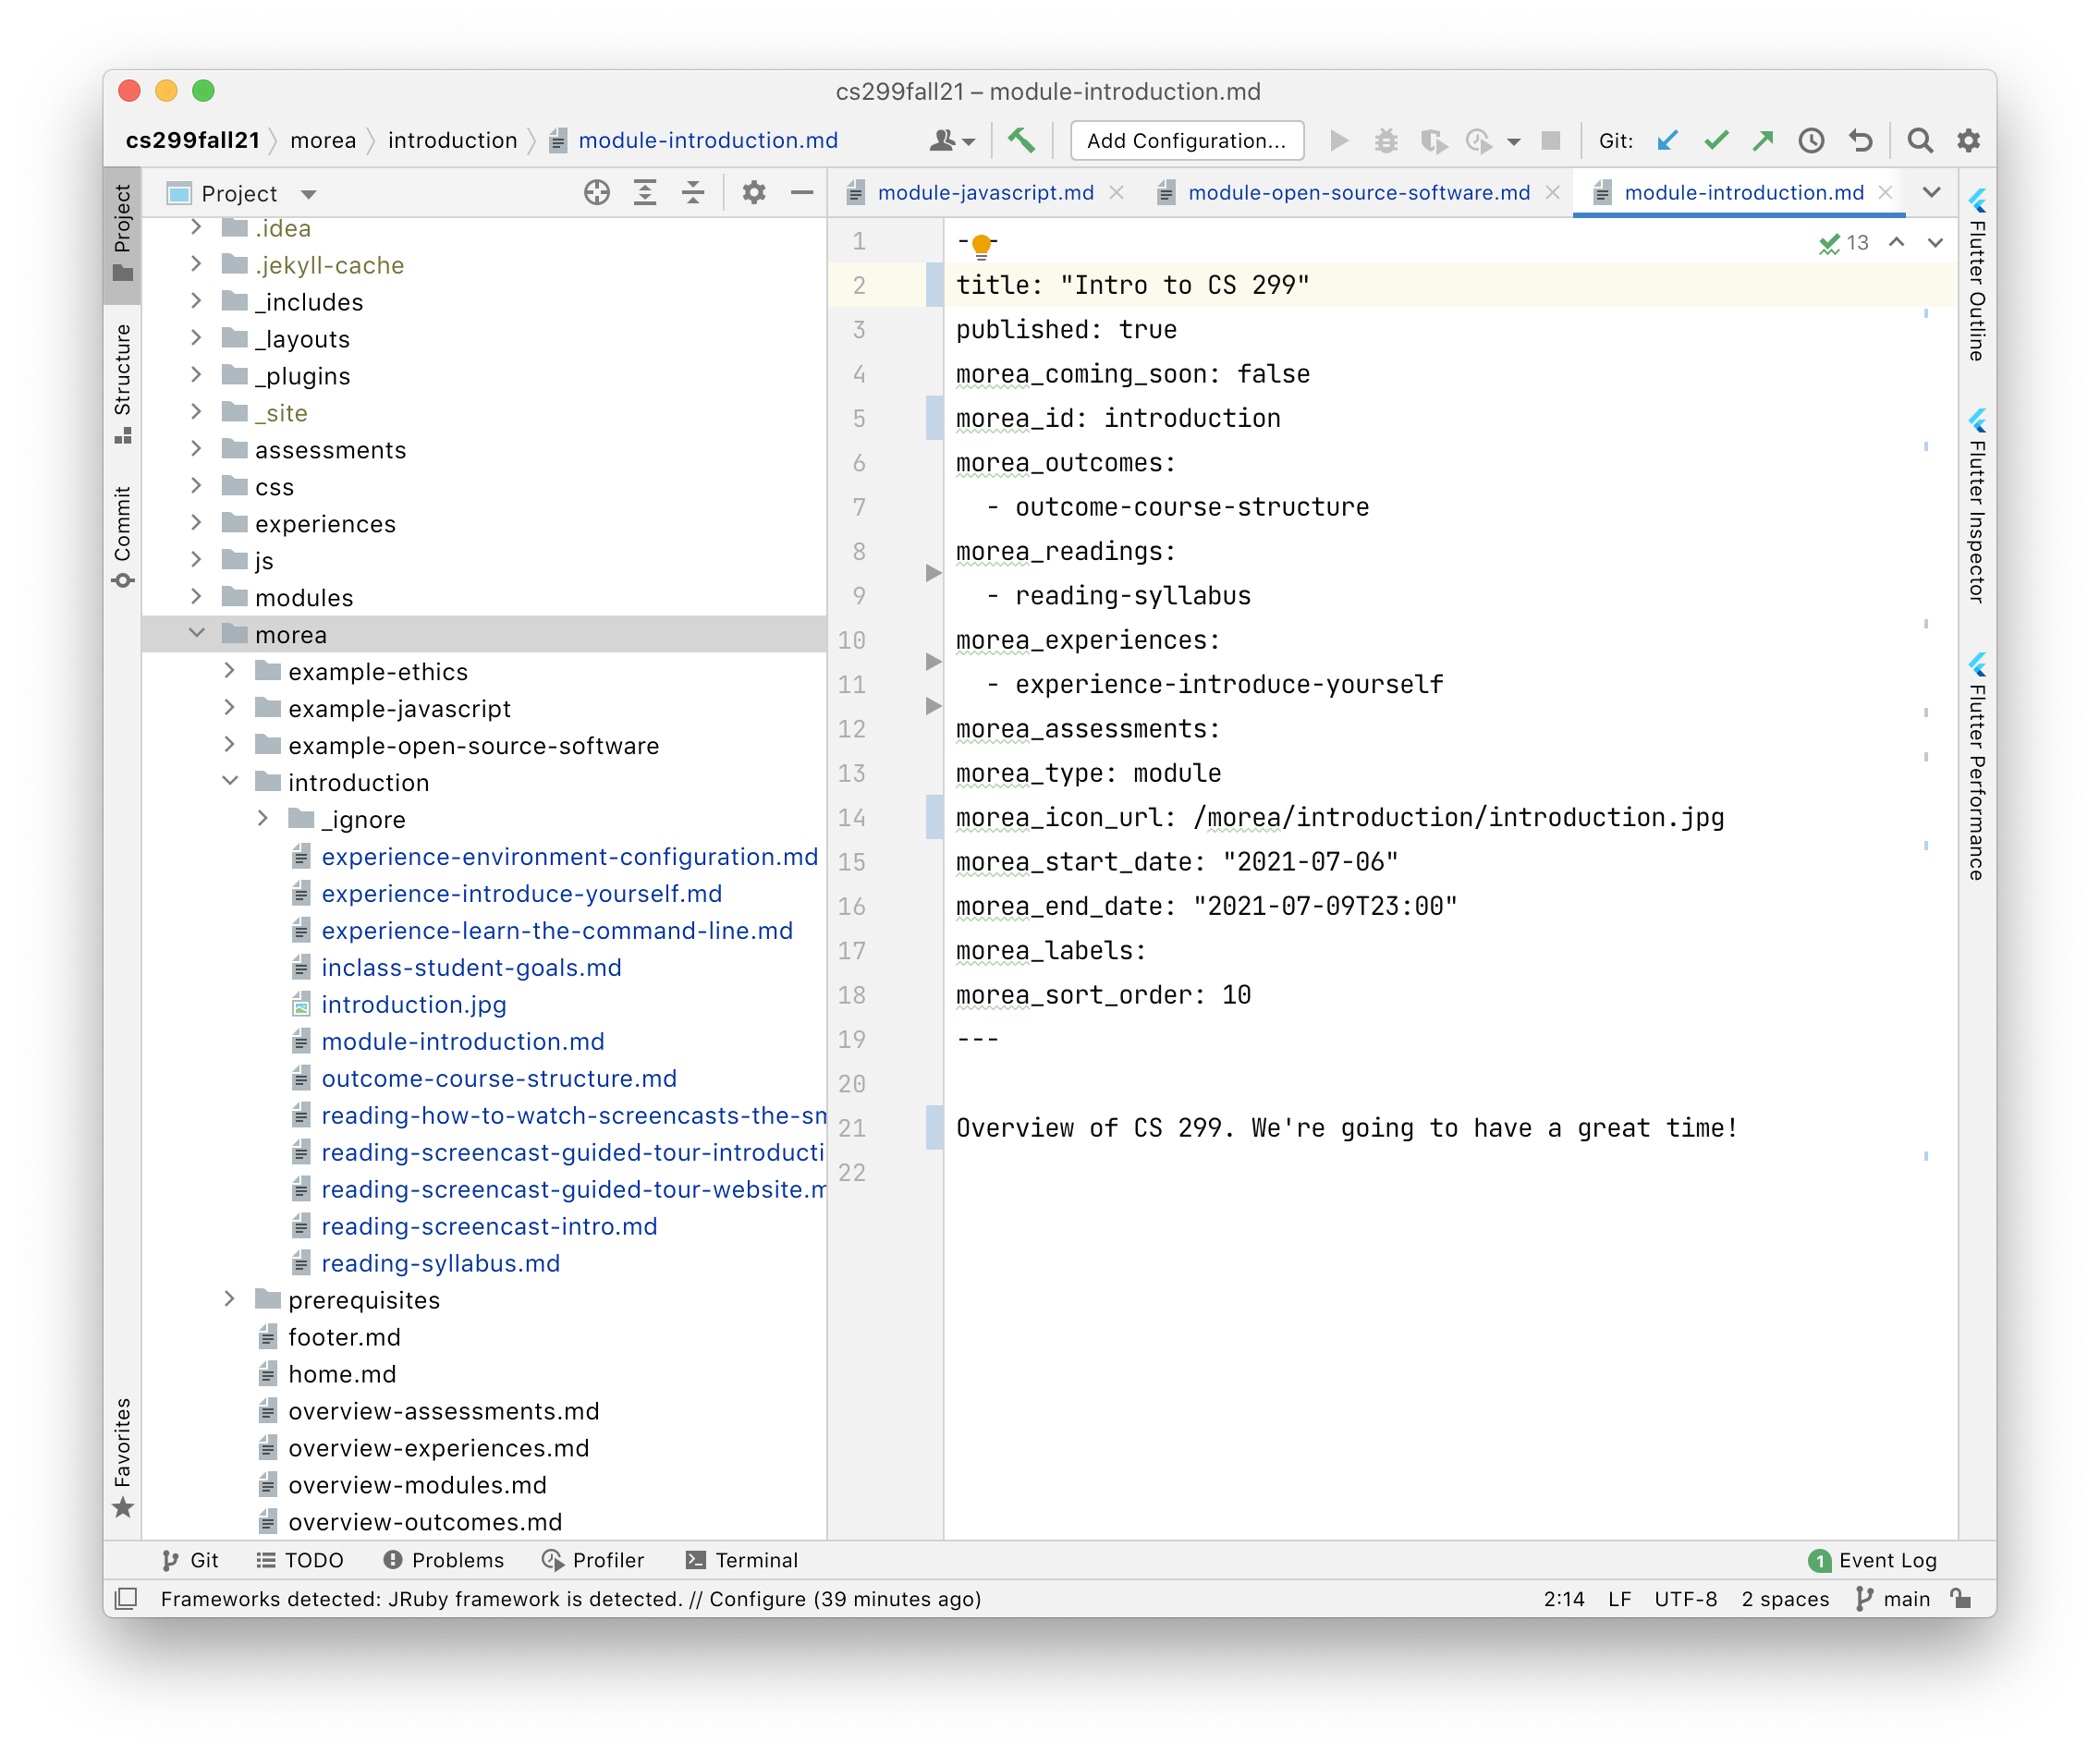
When you're done, module-introduction.md might look similar to this:
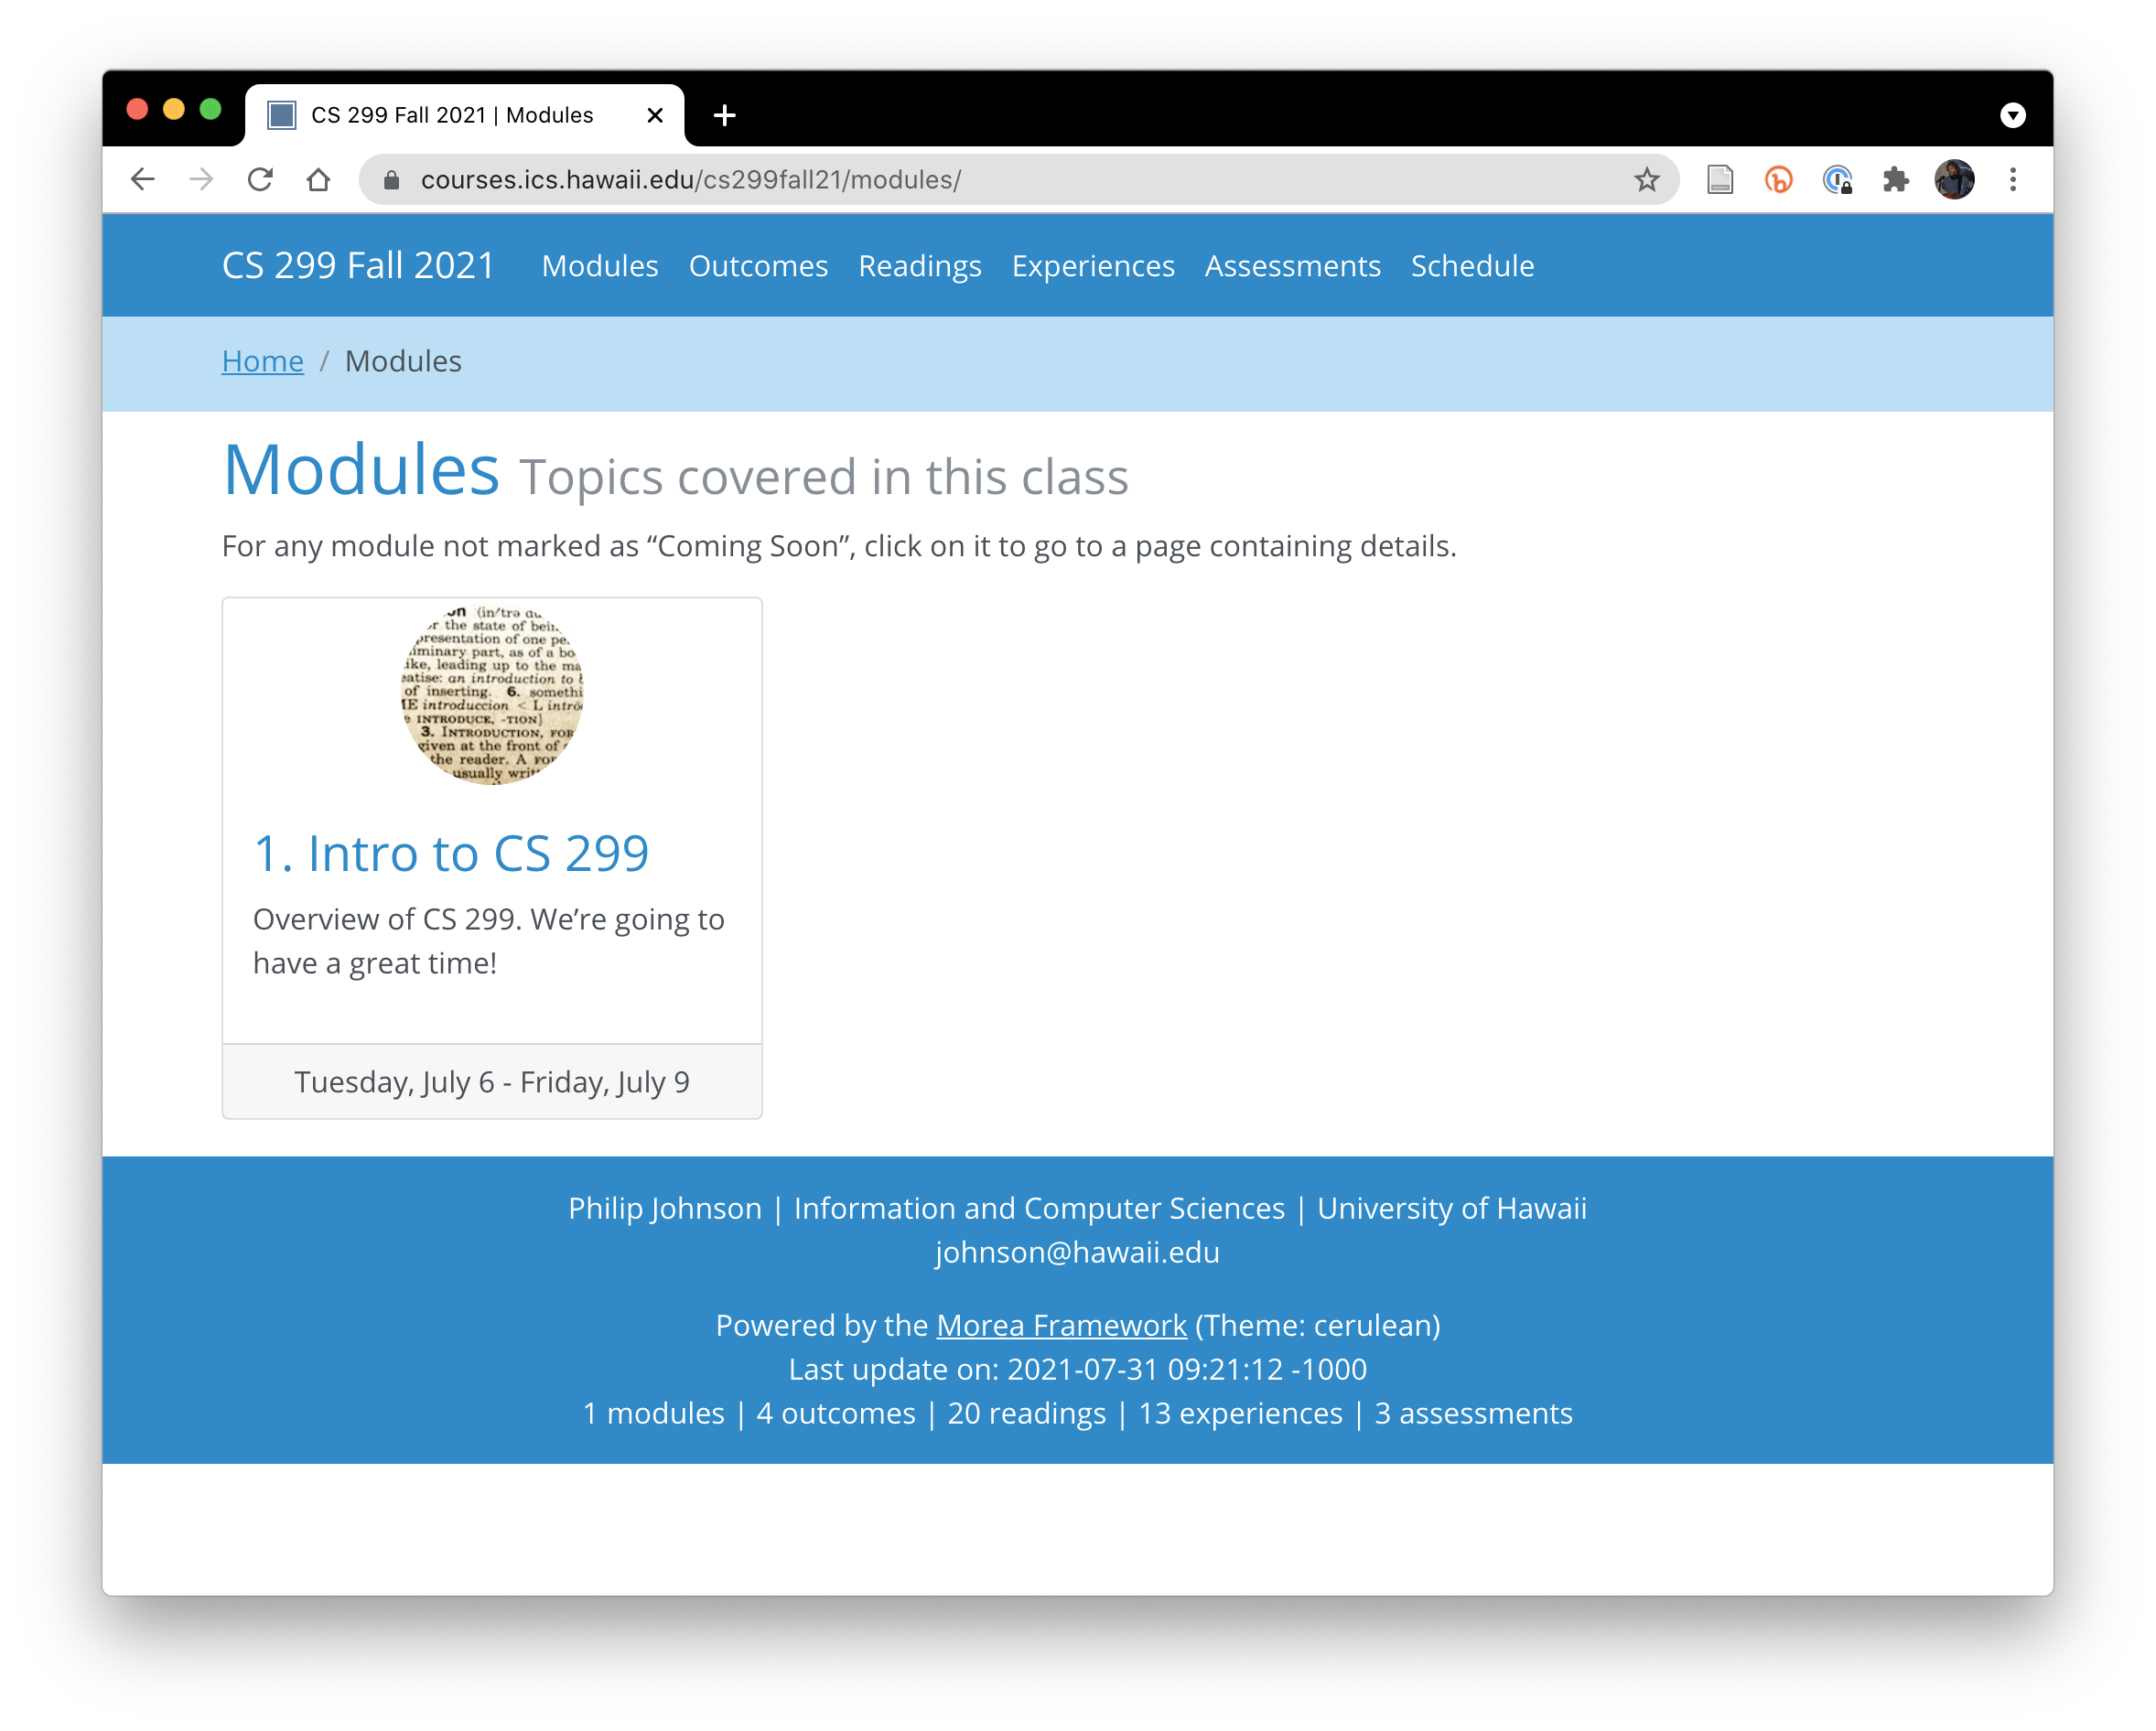
Restart Jekyll, and the modules page might look like this:

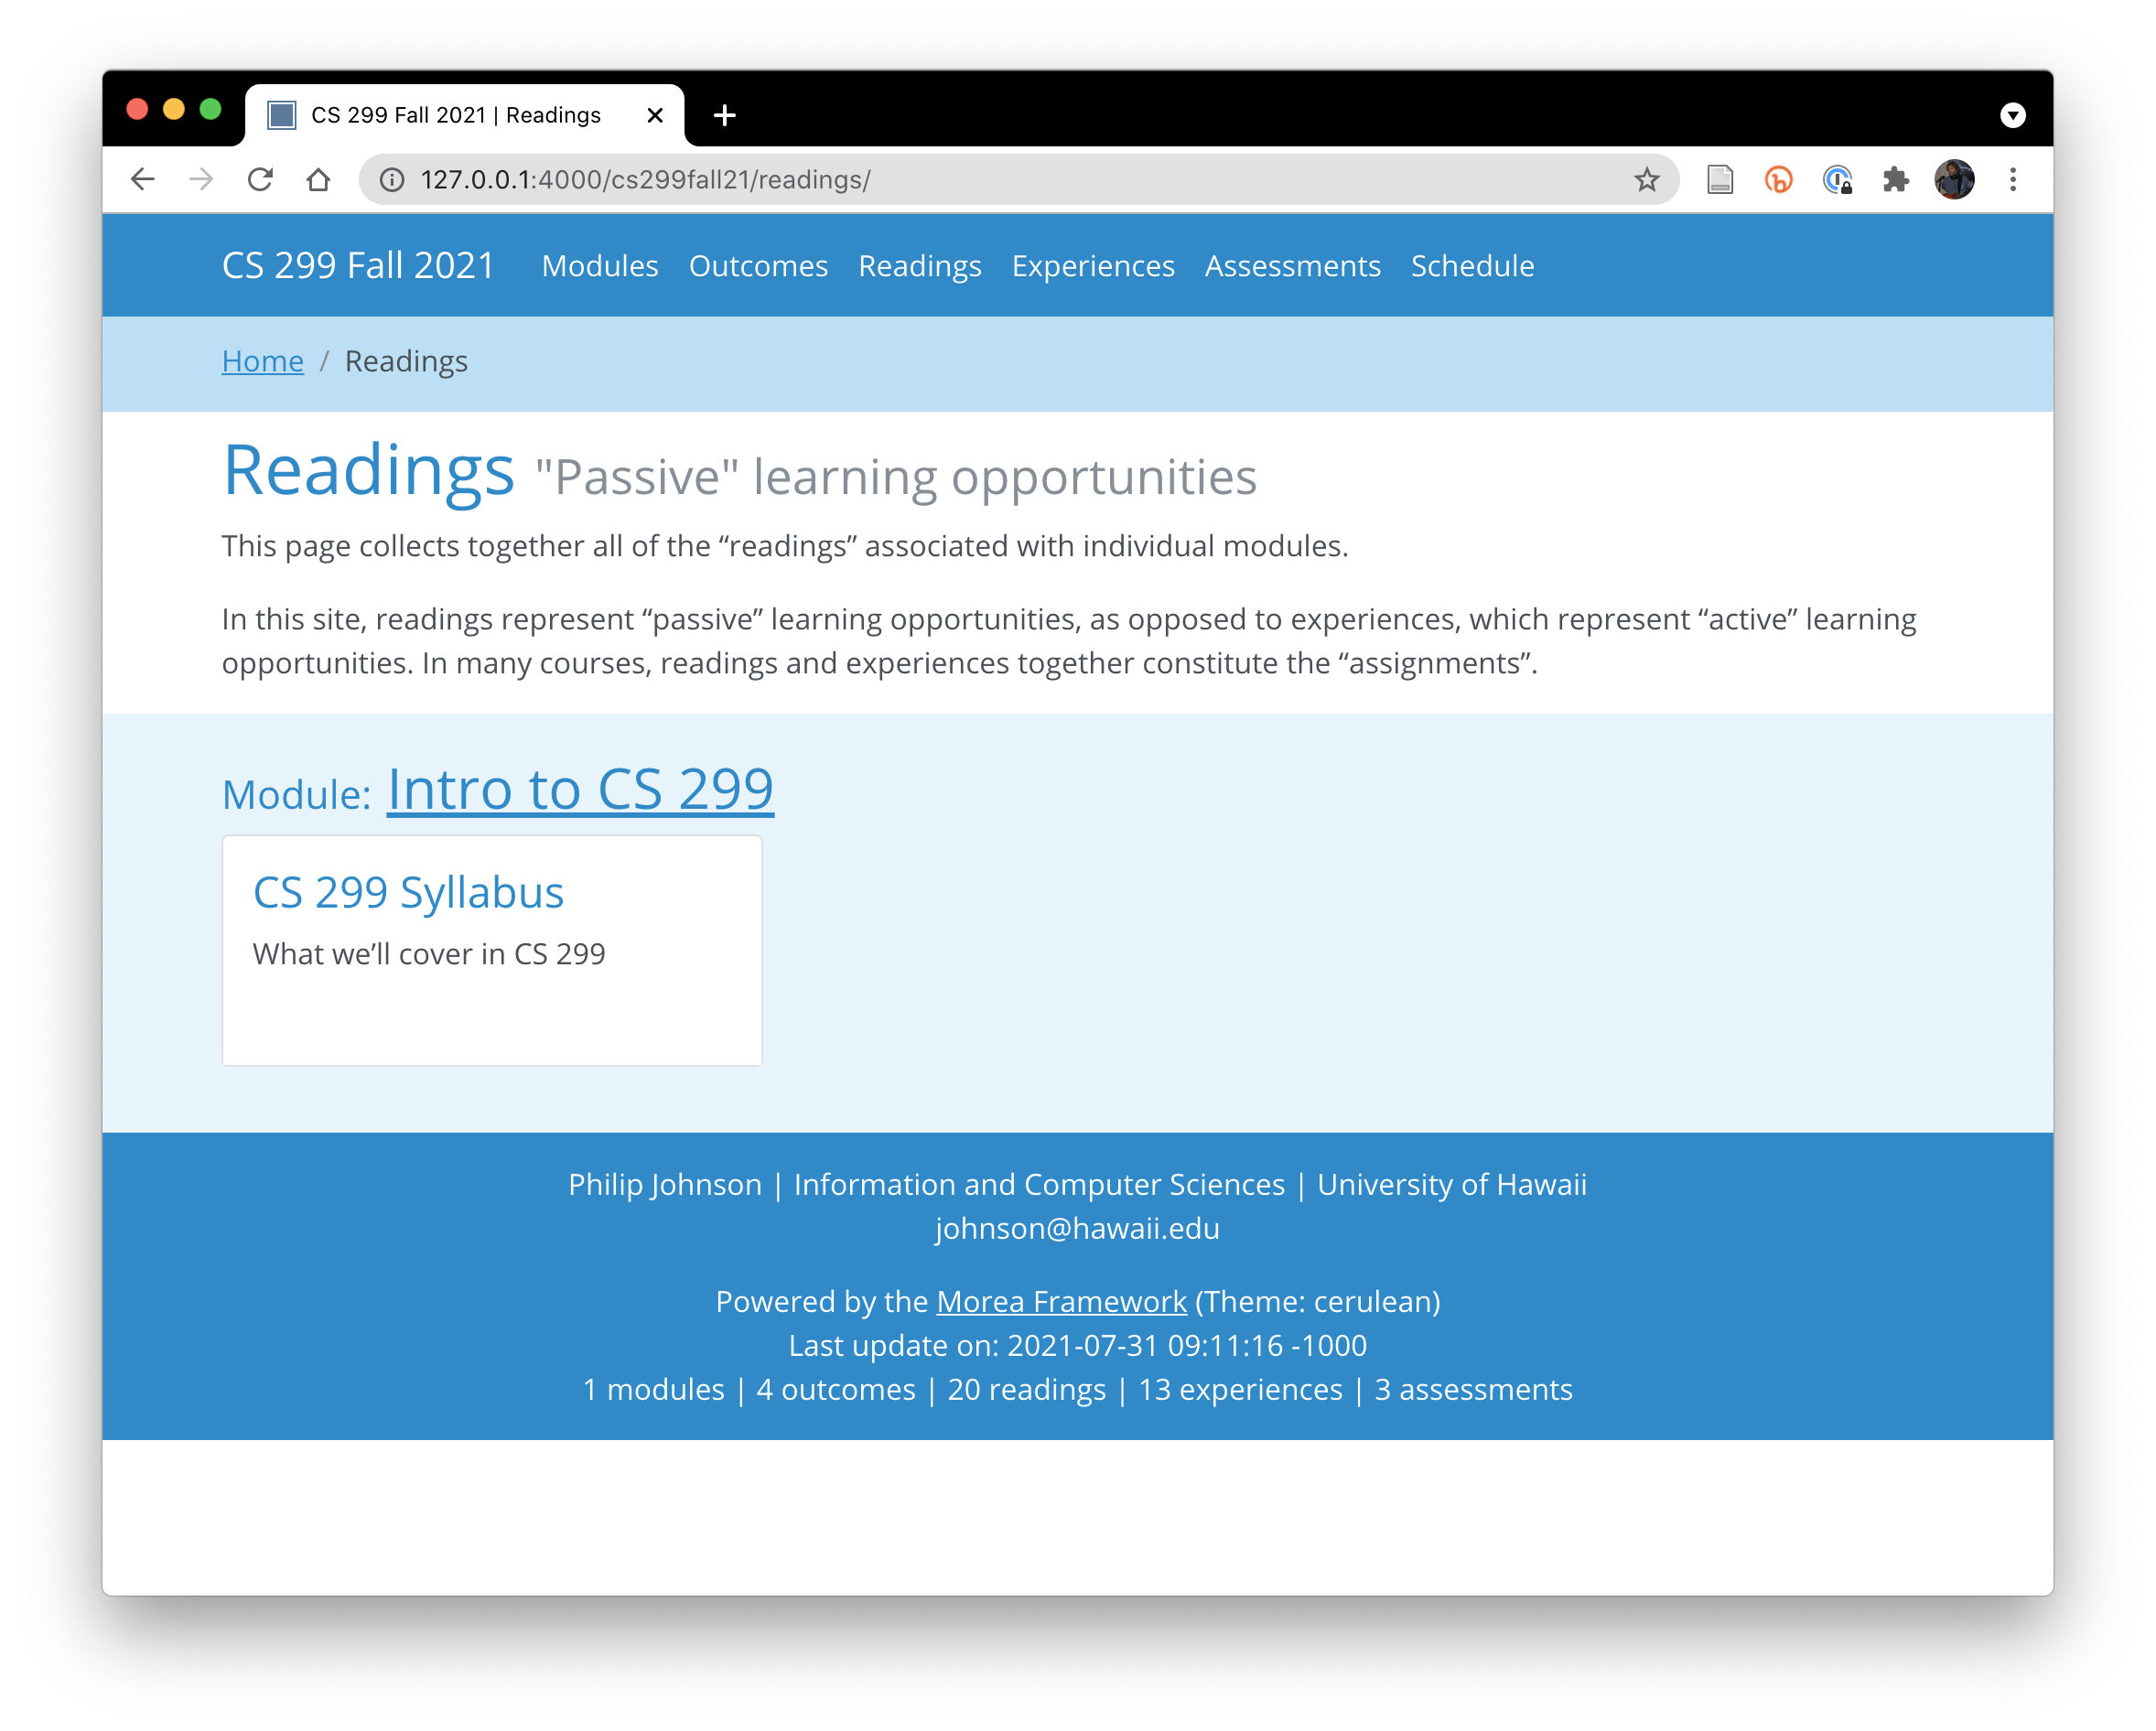
And the readings page might look like this:
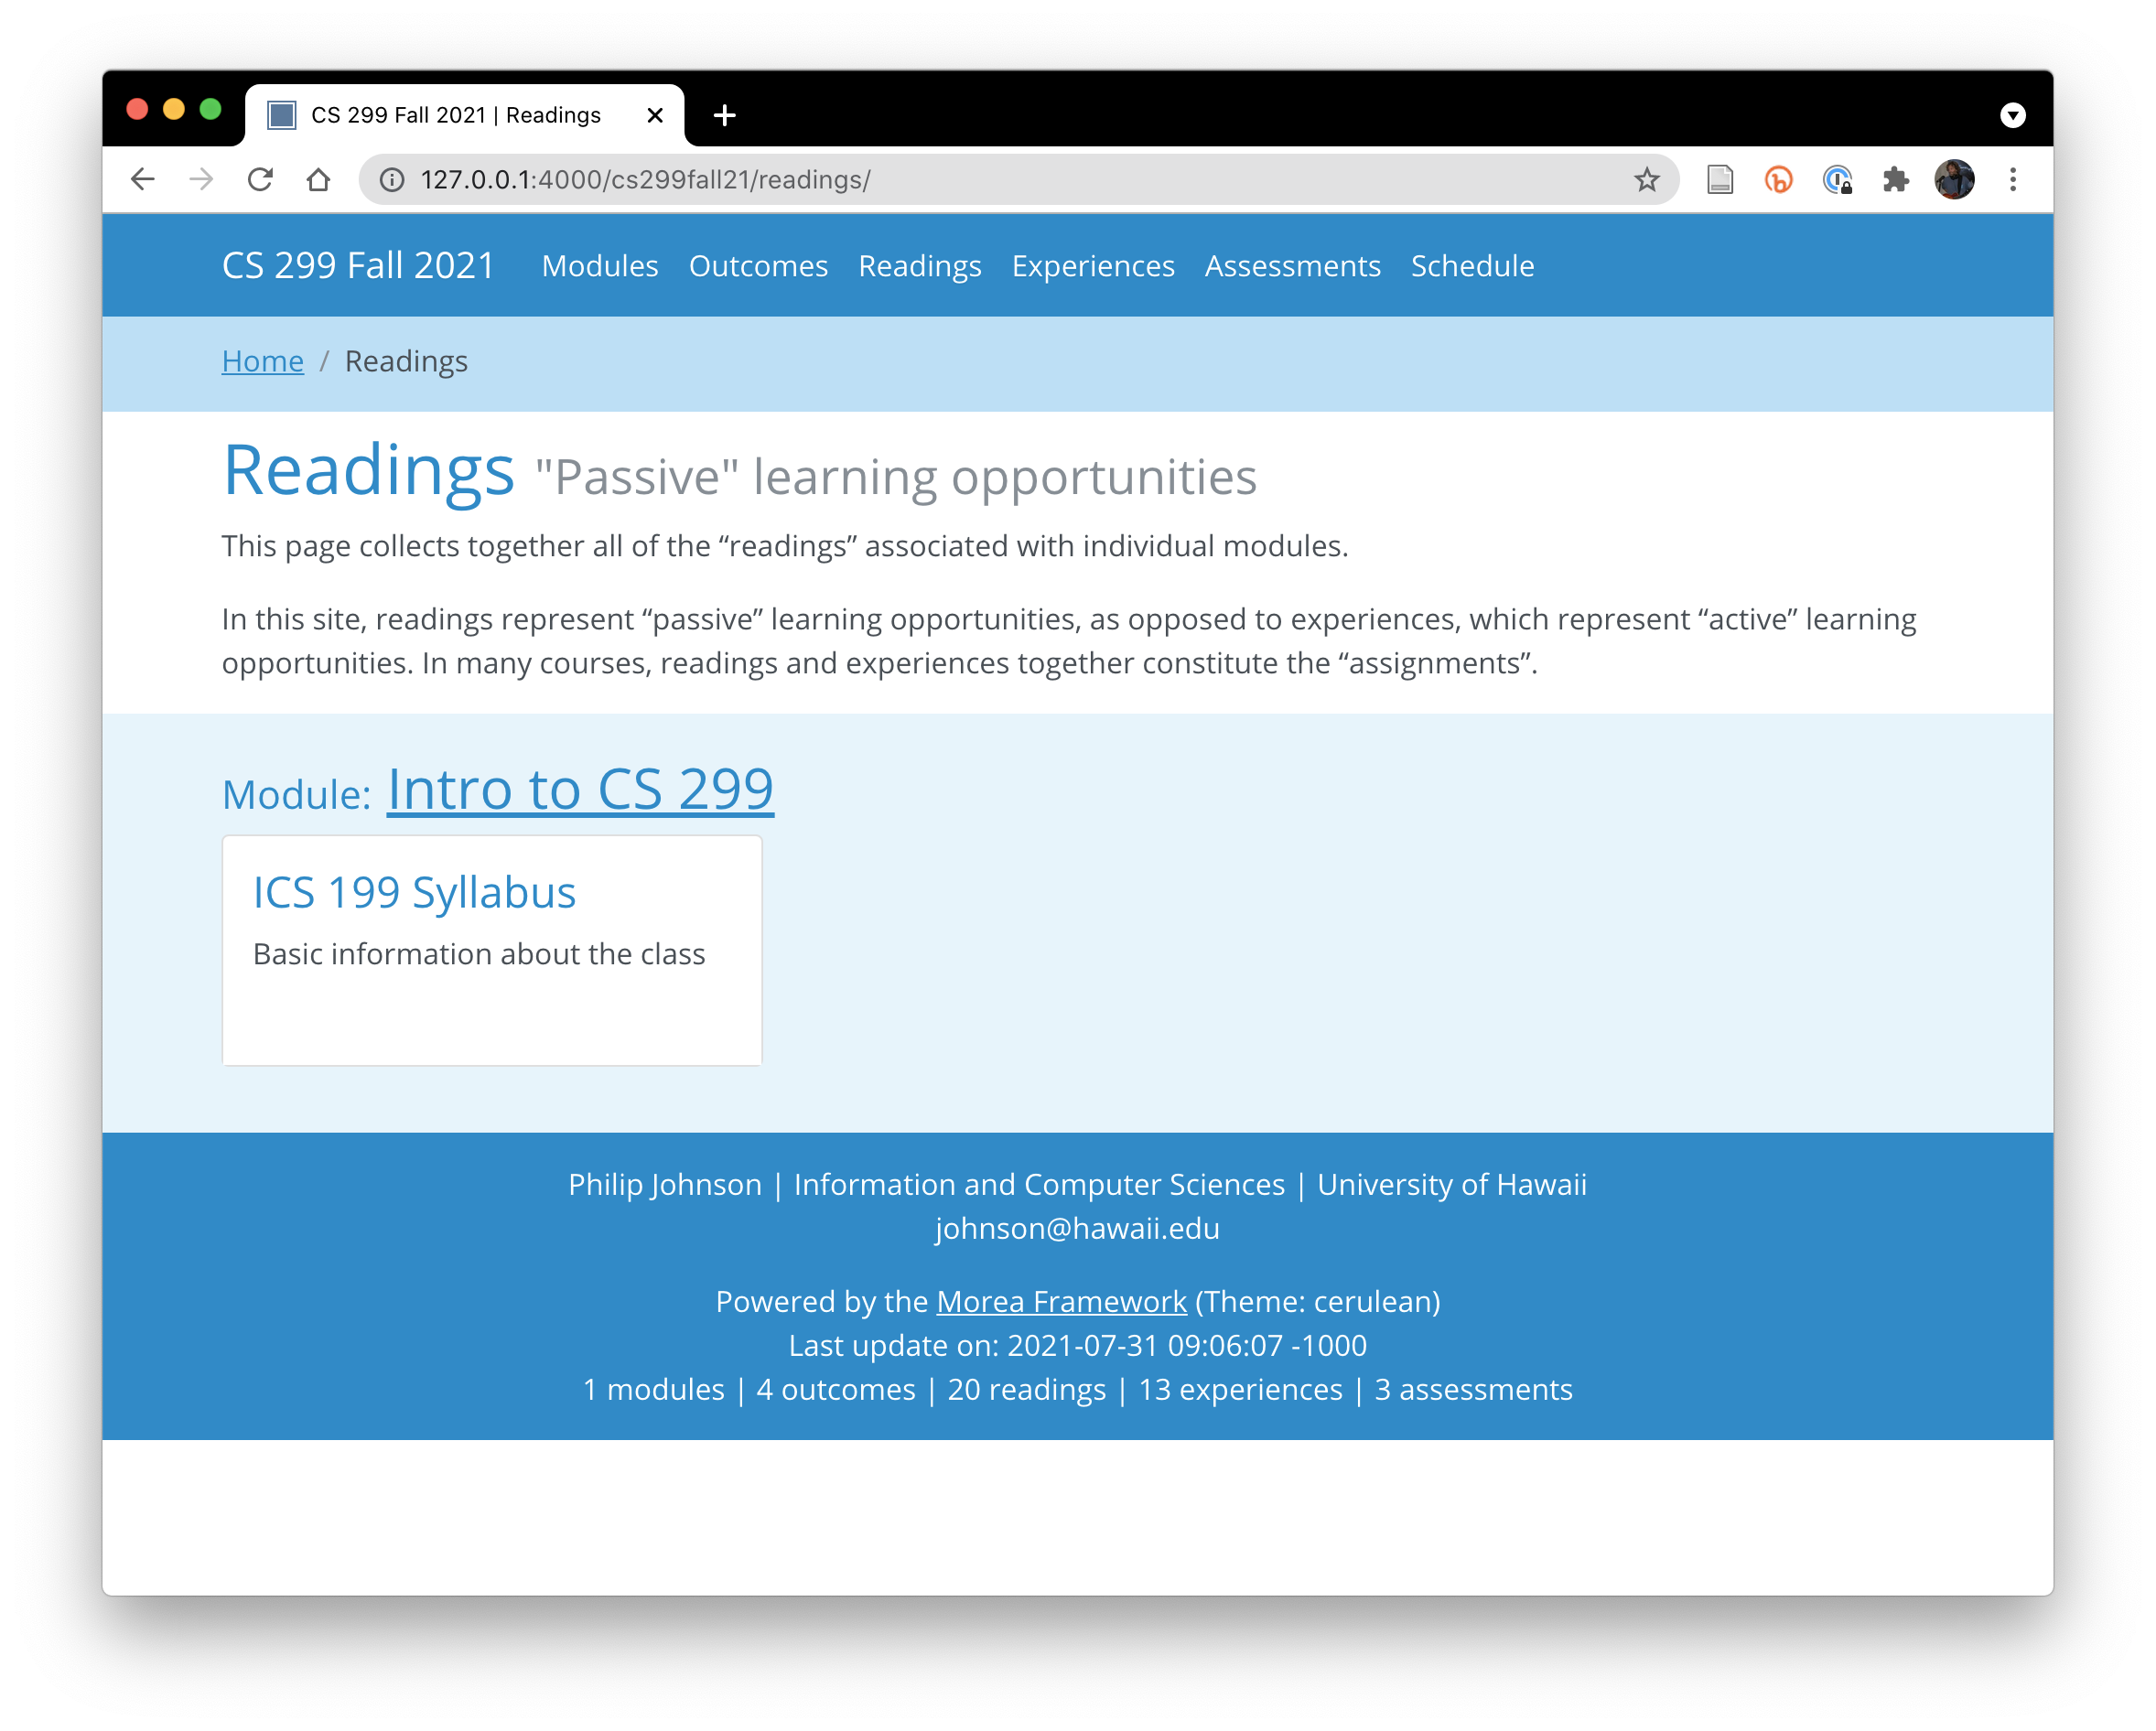
Whoops! The reading still refers to ICS 199! Go into the reading-syllabus.md file and edit the title: field (as well as any other content you want). Now restart Jekyll, and the readings page might look like this:
Publish your changes
Of course, there's lots more that needs to be done to this site, but let's now see how to publish these local modifications. Go to GitHub Desktop, which will look similar to this:
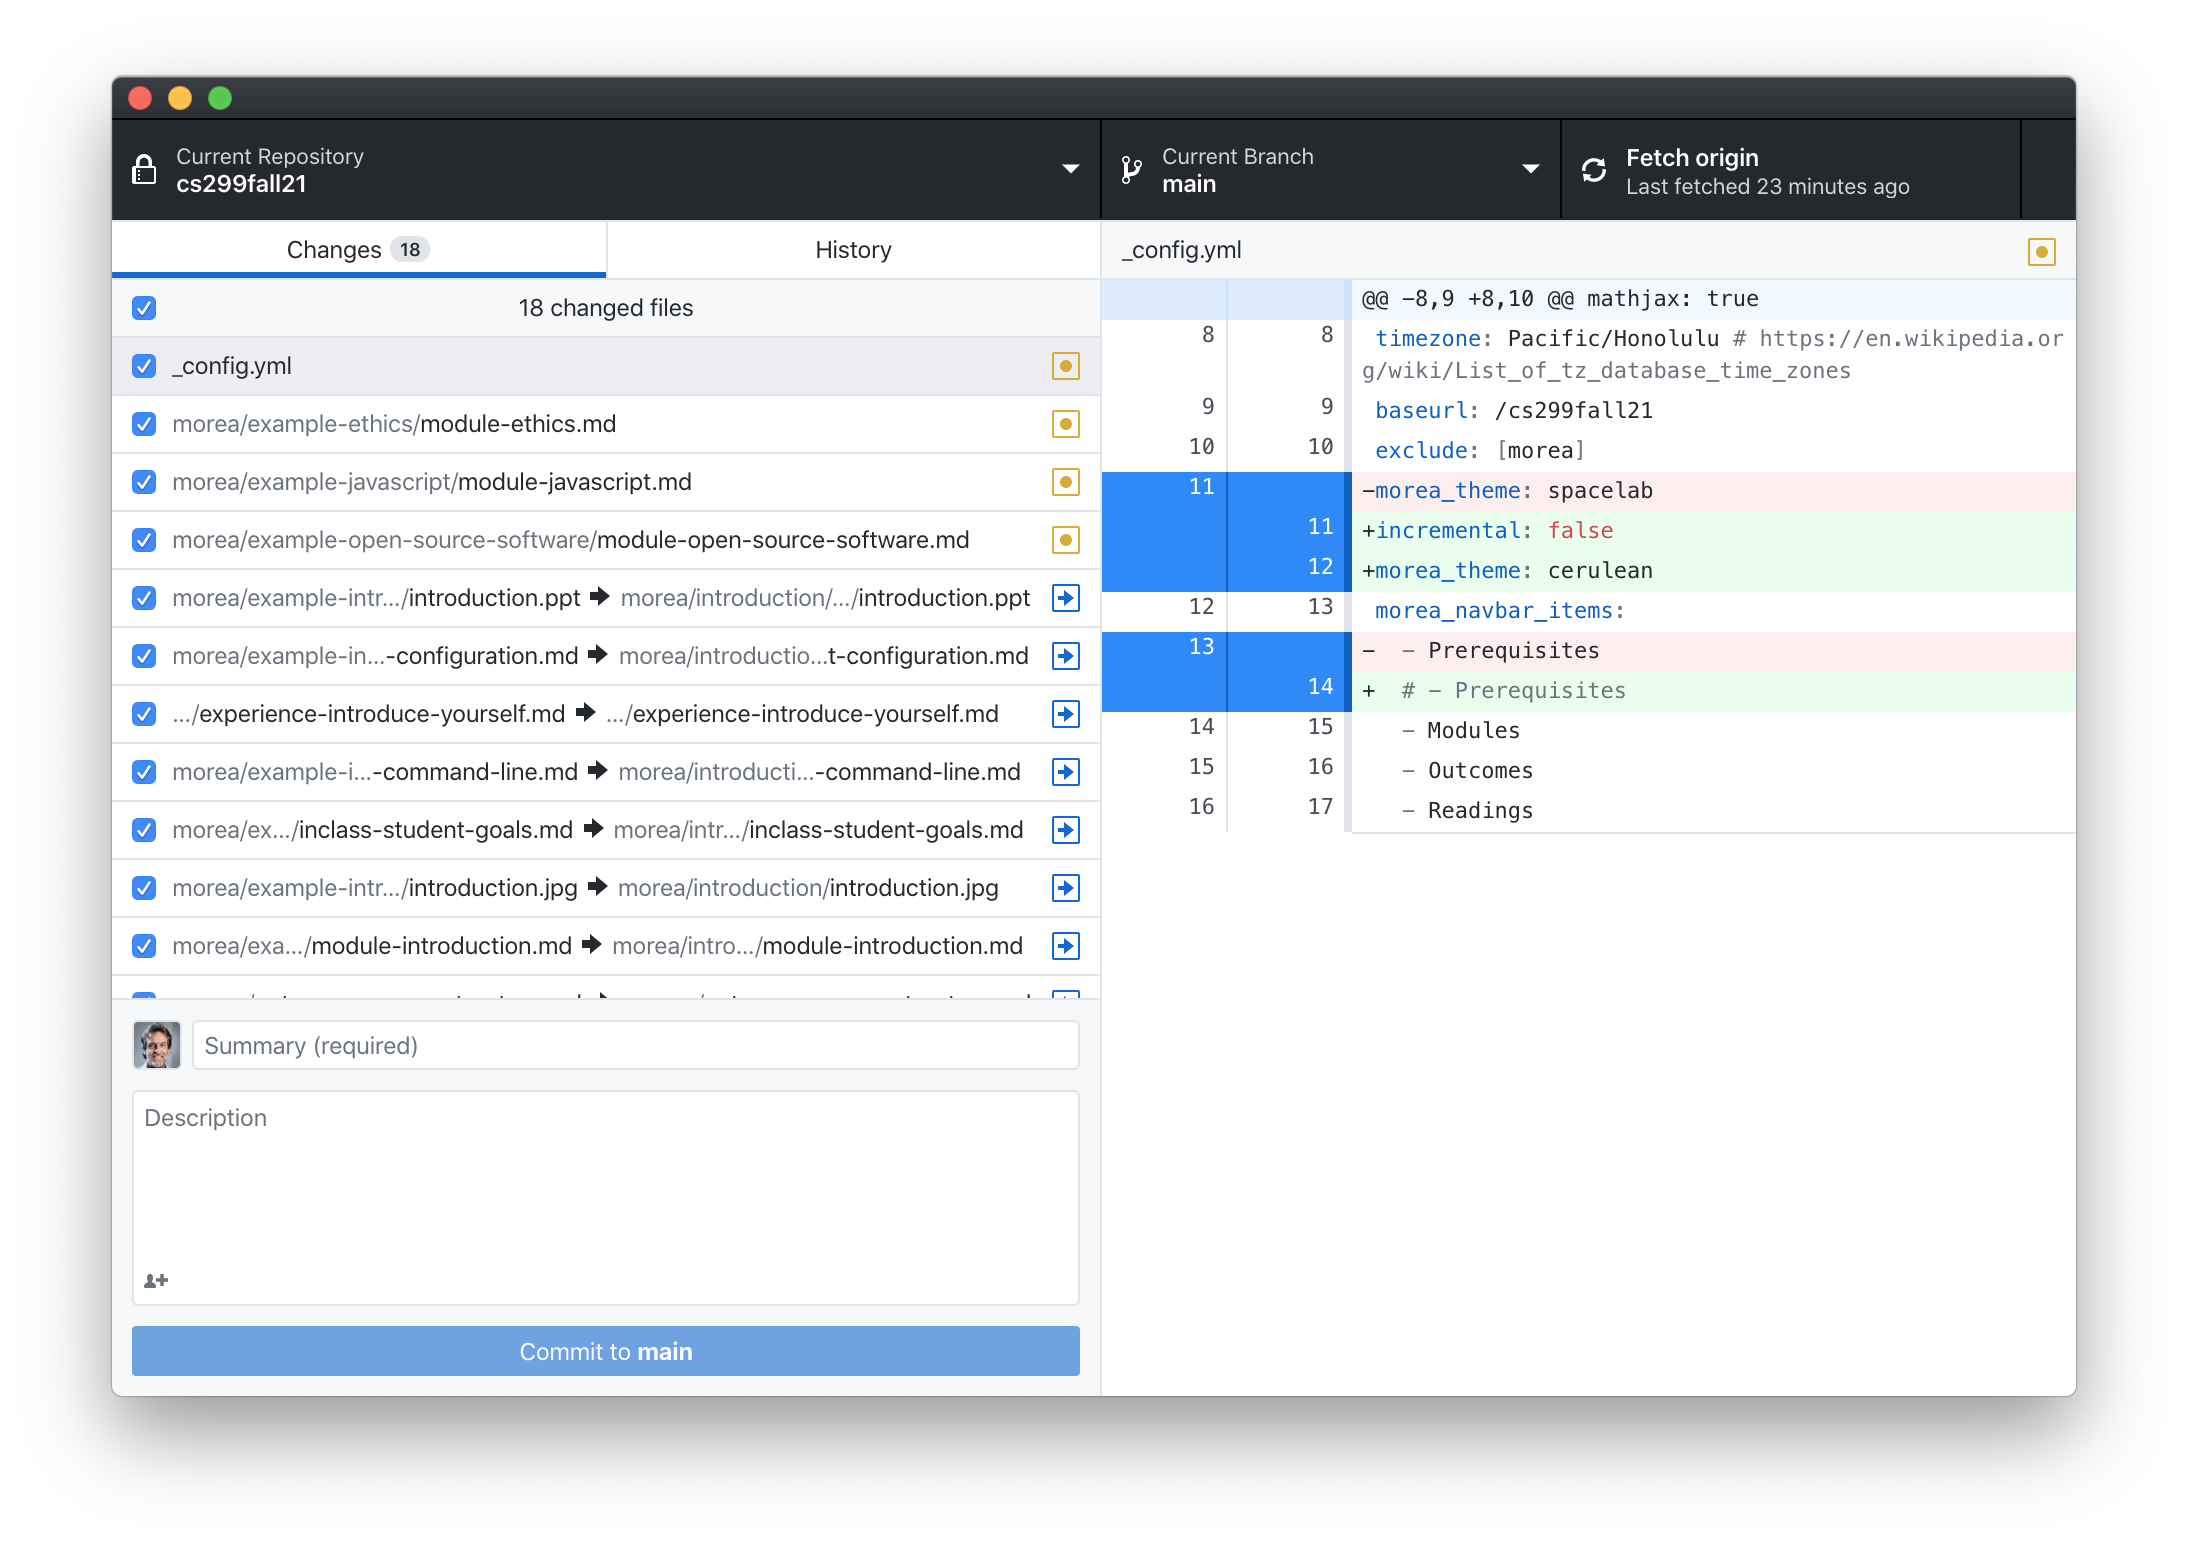
It shows all of the files which have been changed recently. Next, in the text field labeled "Summary (required)", type in a brief message, such as "Start work on Introduction module".
At that point, the "Commit to main" button should become active. Press it to commit your changes:

Now your changes have gone from being local changes in your laptop file system to part of the history of the local repository.
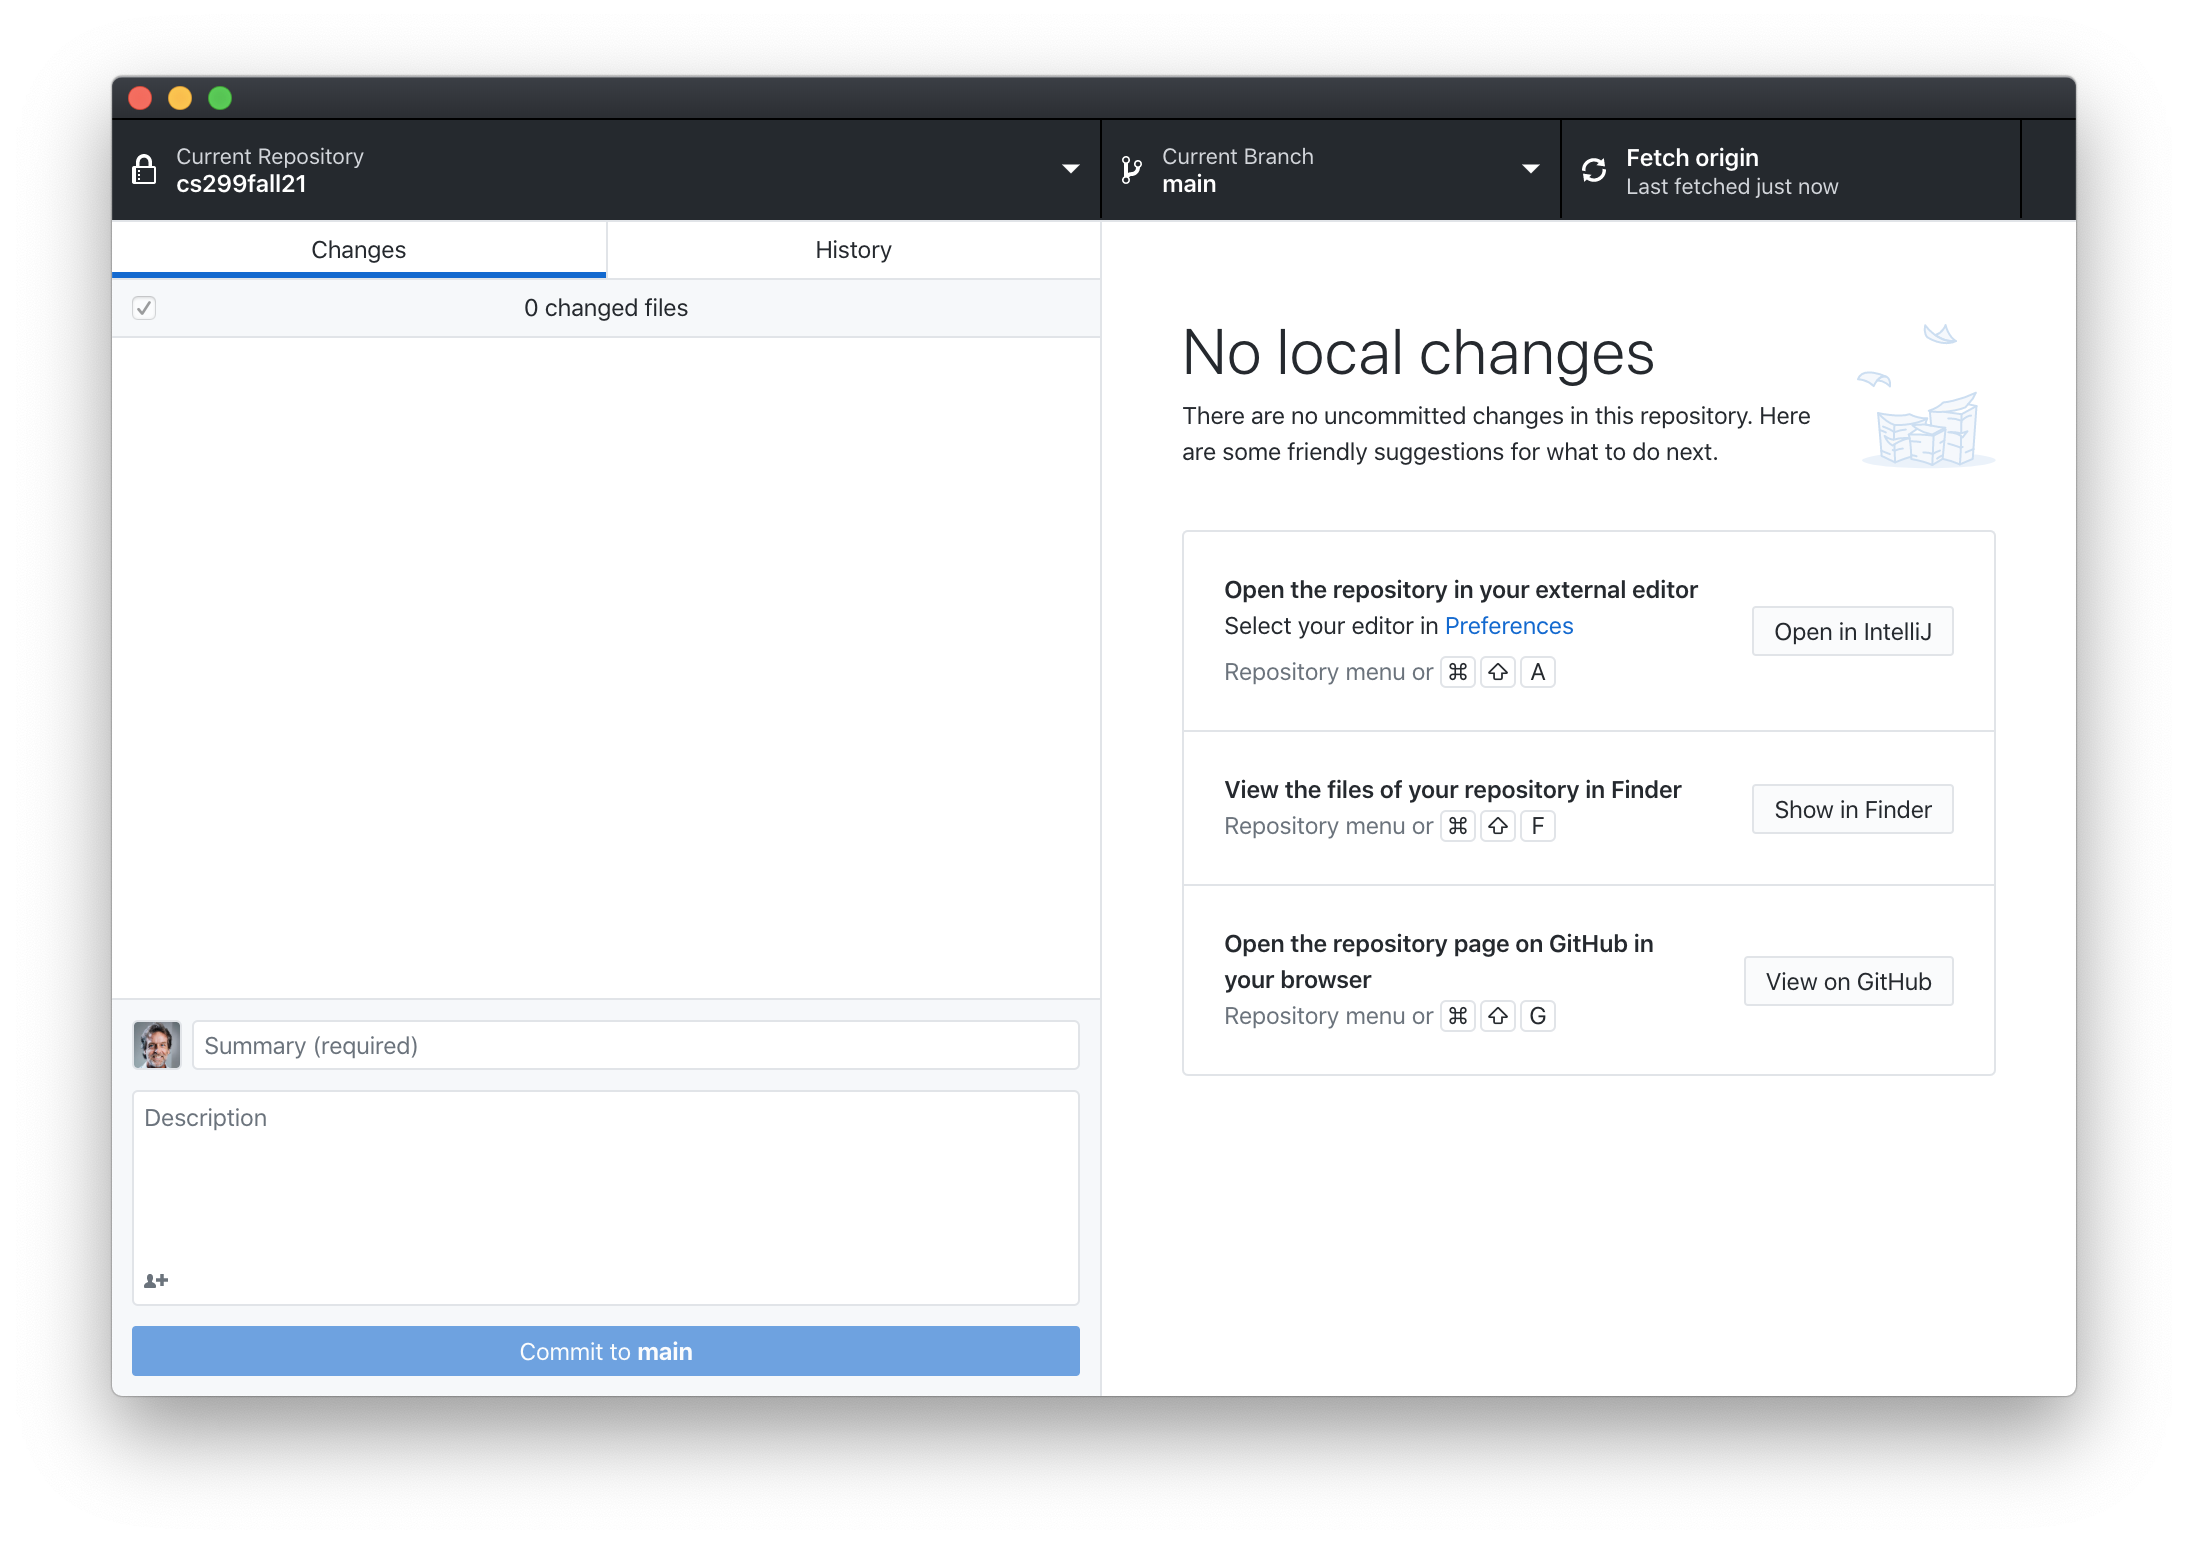
The final step is to "push" these changes in your local repository to your repository on GitHub. To do that, press the "Push origin" button in the top right corner. After pressing it, GitHub Desktop will look like this:
Morea is configured so that every time you push changes to GitHub, a GitHub Action is triggered to rebuild the site. In your browser, go back to your repository and click on "Actions". You should see something similar to this:
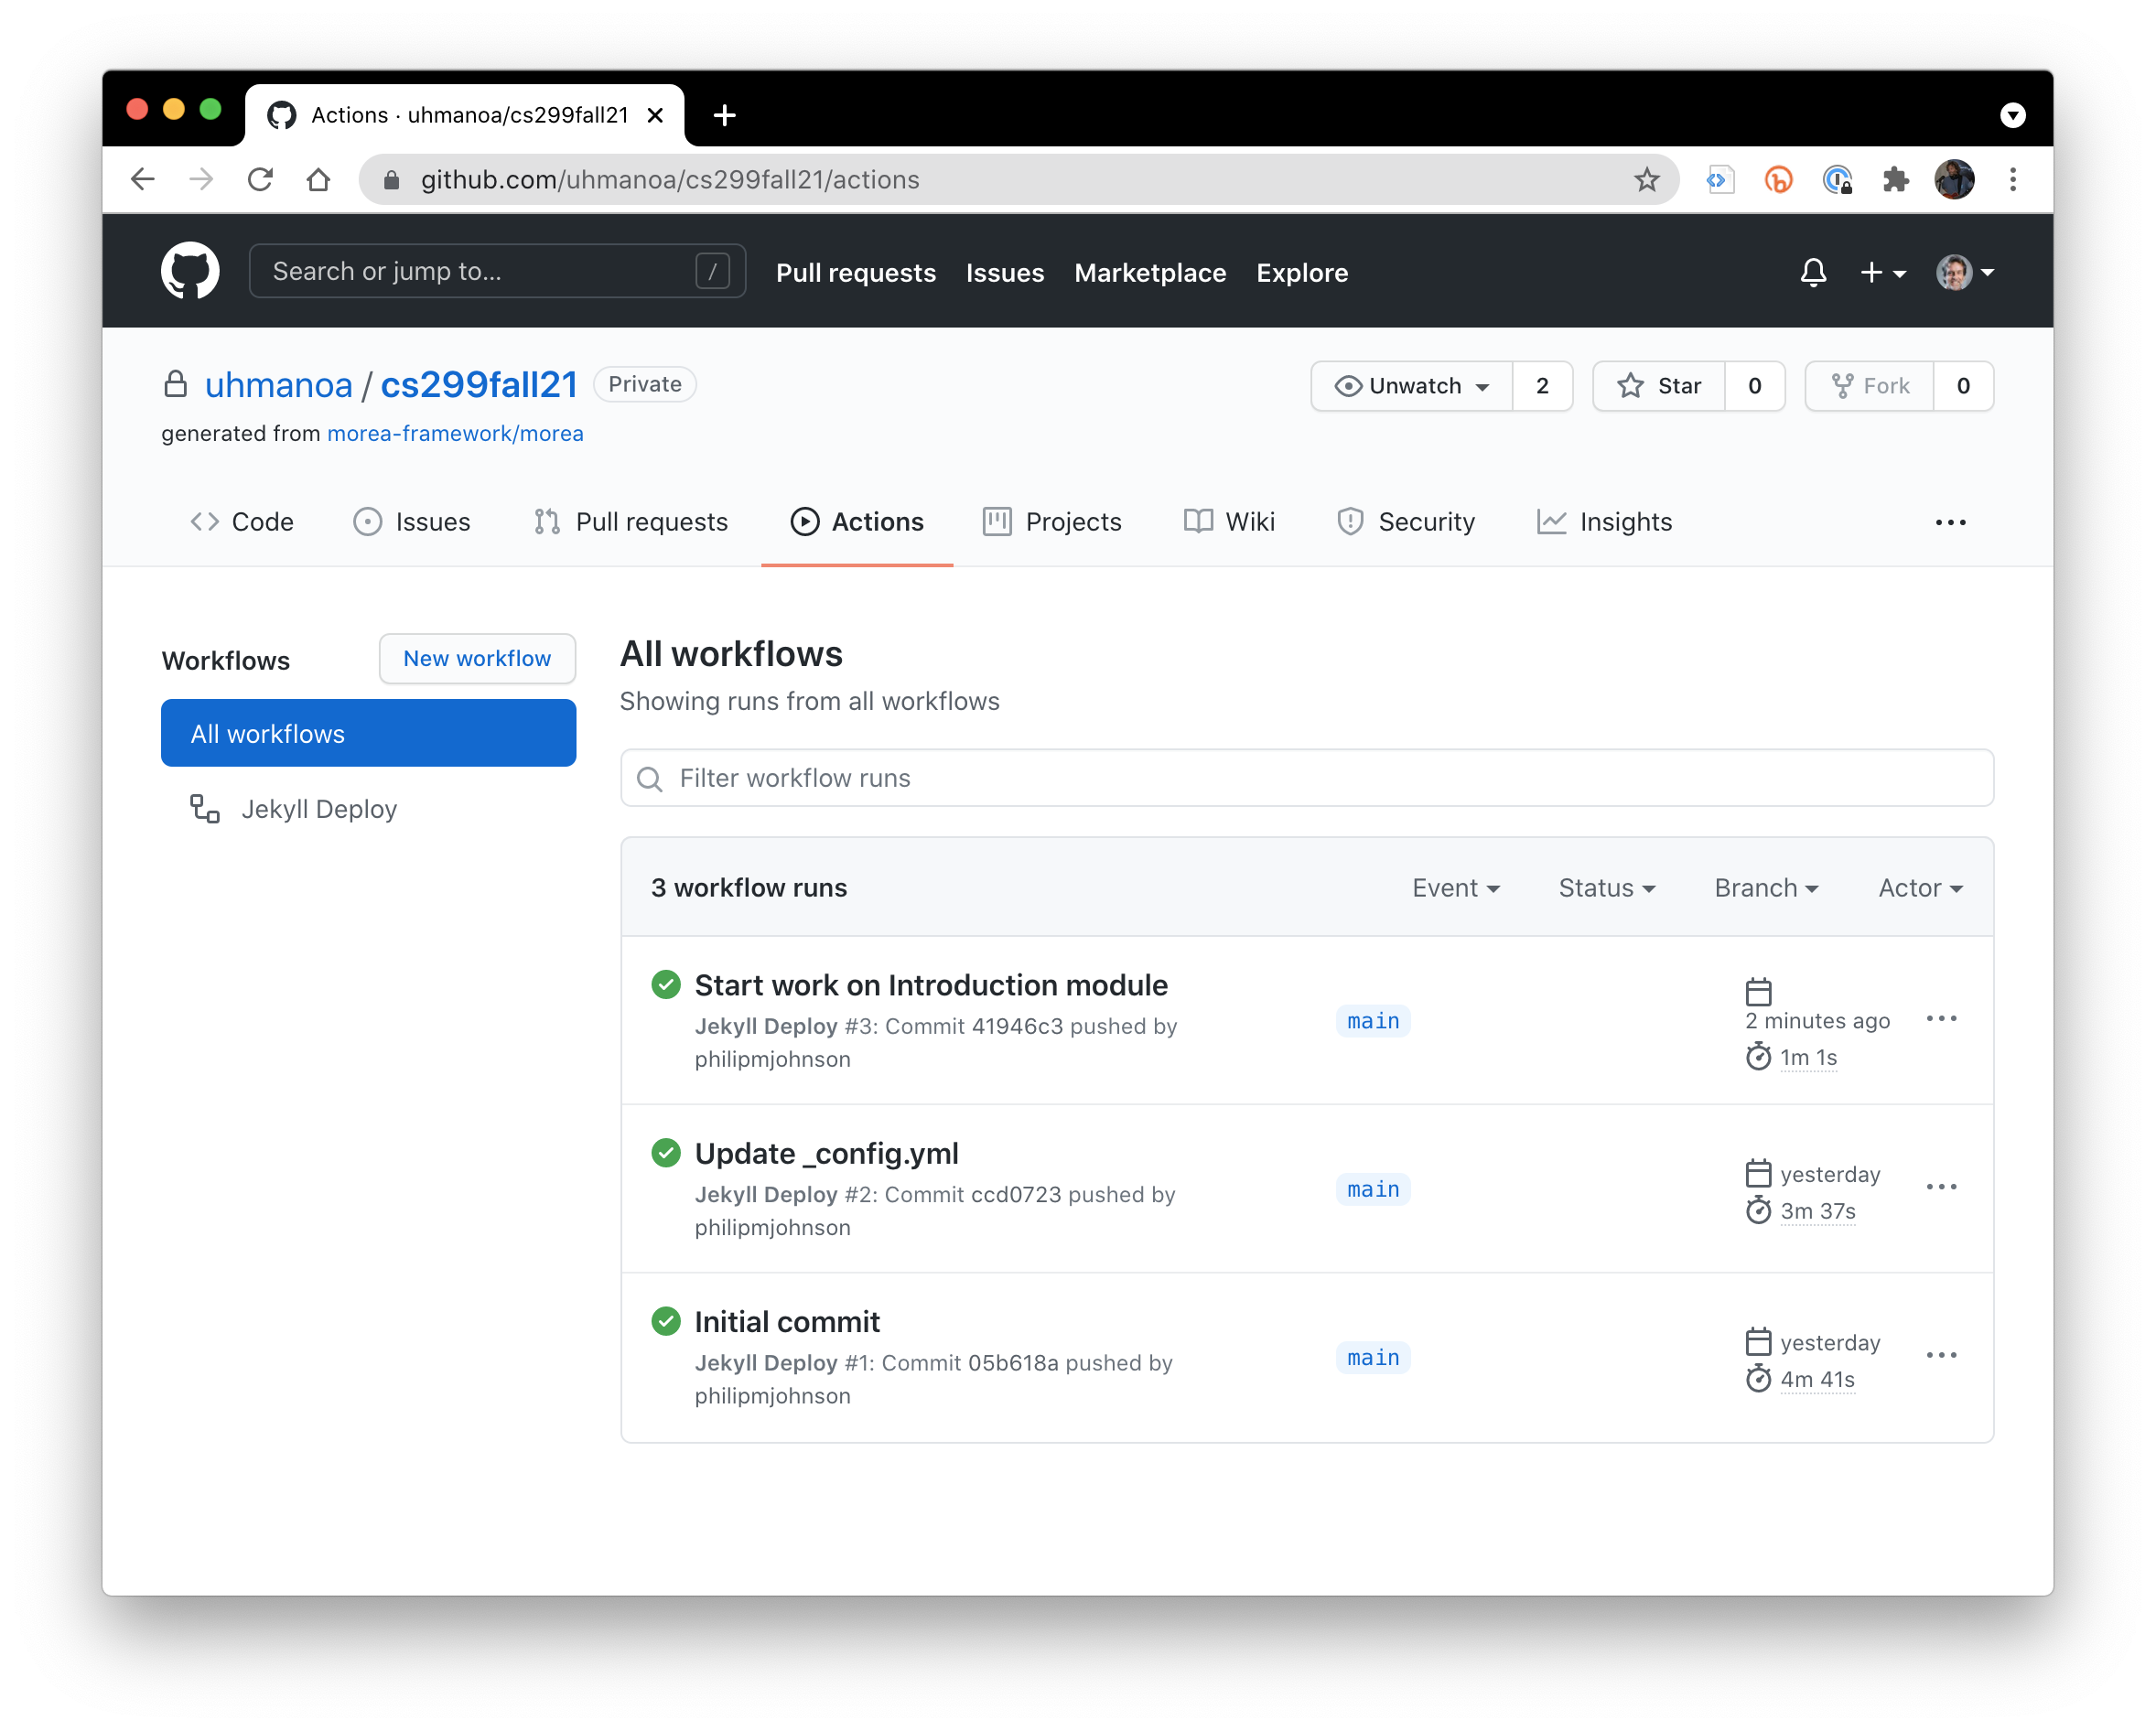
This page indicates that the commit "Start work on Introduction module" triggered a build, which took 1 minute and 1 second. It successfully completed (as indicated by the green checkmark).
Let's confirm that our local changes are published by retrieving the URL to our site:
Summary
This might seem complicated the very first time you do it, but with a little bit of practice, you'll find that content development with Morea is pretty pleasant.
To review, there are a couple of one-time setup actions:
- Download your newly created site to your computer via GitHub Desktop.
- Run
bundle installin your directory to install libraries.
Once that's done, develop your site by an iterative process of:
- Type
bundle exec jekyll serveto build your site and make it visible locally. - Edit source files and directories to change your course content.
- Type
control-cfollowed bybundle exec jekyll serveto rebuild and redisplay your site.
Finally, once you're ready to publish your changes, go into GitHub Desktop:
- Commit your changes to your local repository.
- Push your changes to your local repository to the GitHub version of your repository.
- Check to see that your changes are public (usually takes about one minute).
Next step: module design!
Now that you have a basic understanding of using Morea, let's get to the real reason you are here: to create actual modules for actual courses.