Advanced customization
As the name implies, "Morea" provides you with mechanisms to define modules, outcomes, readings, experiences, and assessments.
However, most course web sites need to also provide other kinds information to students. For example, many instructors want a top-level "Schedule" page containing a calendar showing due dates and other class events. Others may wish to have a "News" page containing announcements. Still others may wish to store exams and other course data files in their site. This chapter provides documentation on how to enhance your Morea site with all of these other kinds of information.
To effectively go "beyond Morea", you need to have a basic conceptual understanding of the organization of your repository and the locus of control for the three fundamental tools: GitHub, Jekyll, and Morea. This organization is illustrated by the following graphic, which shows the master branch of the basic-template repository:
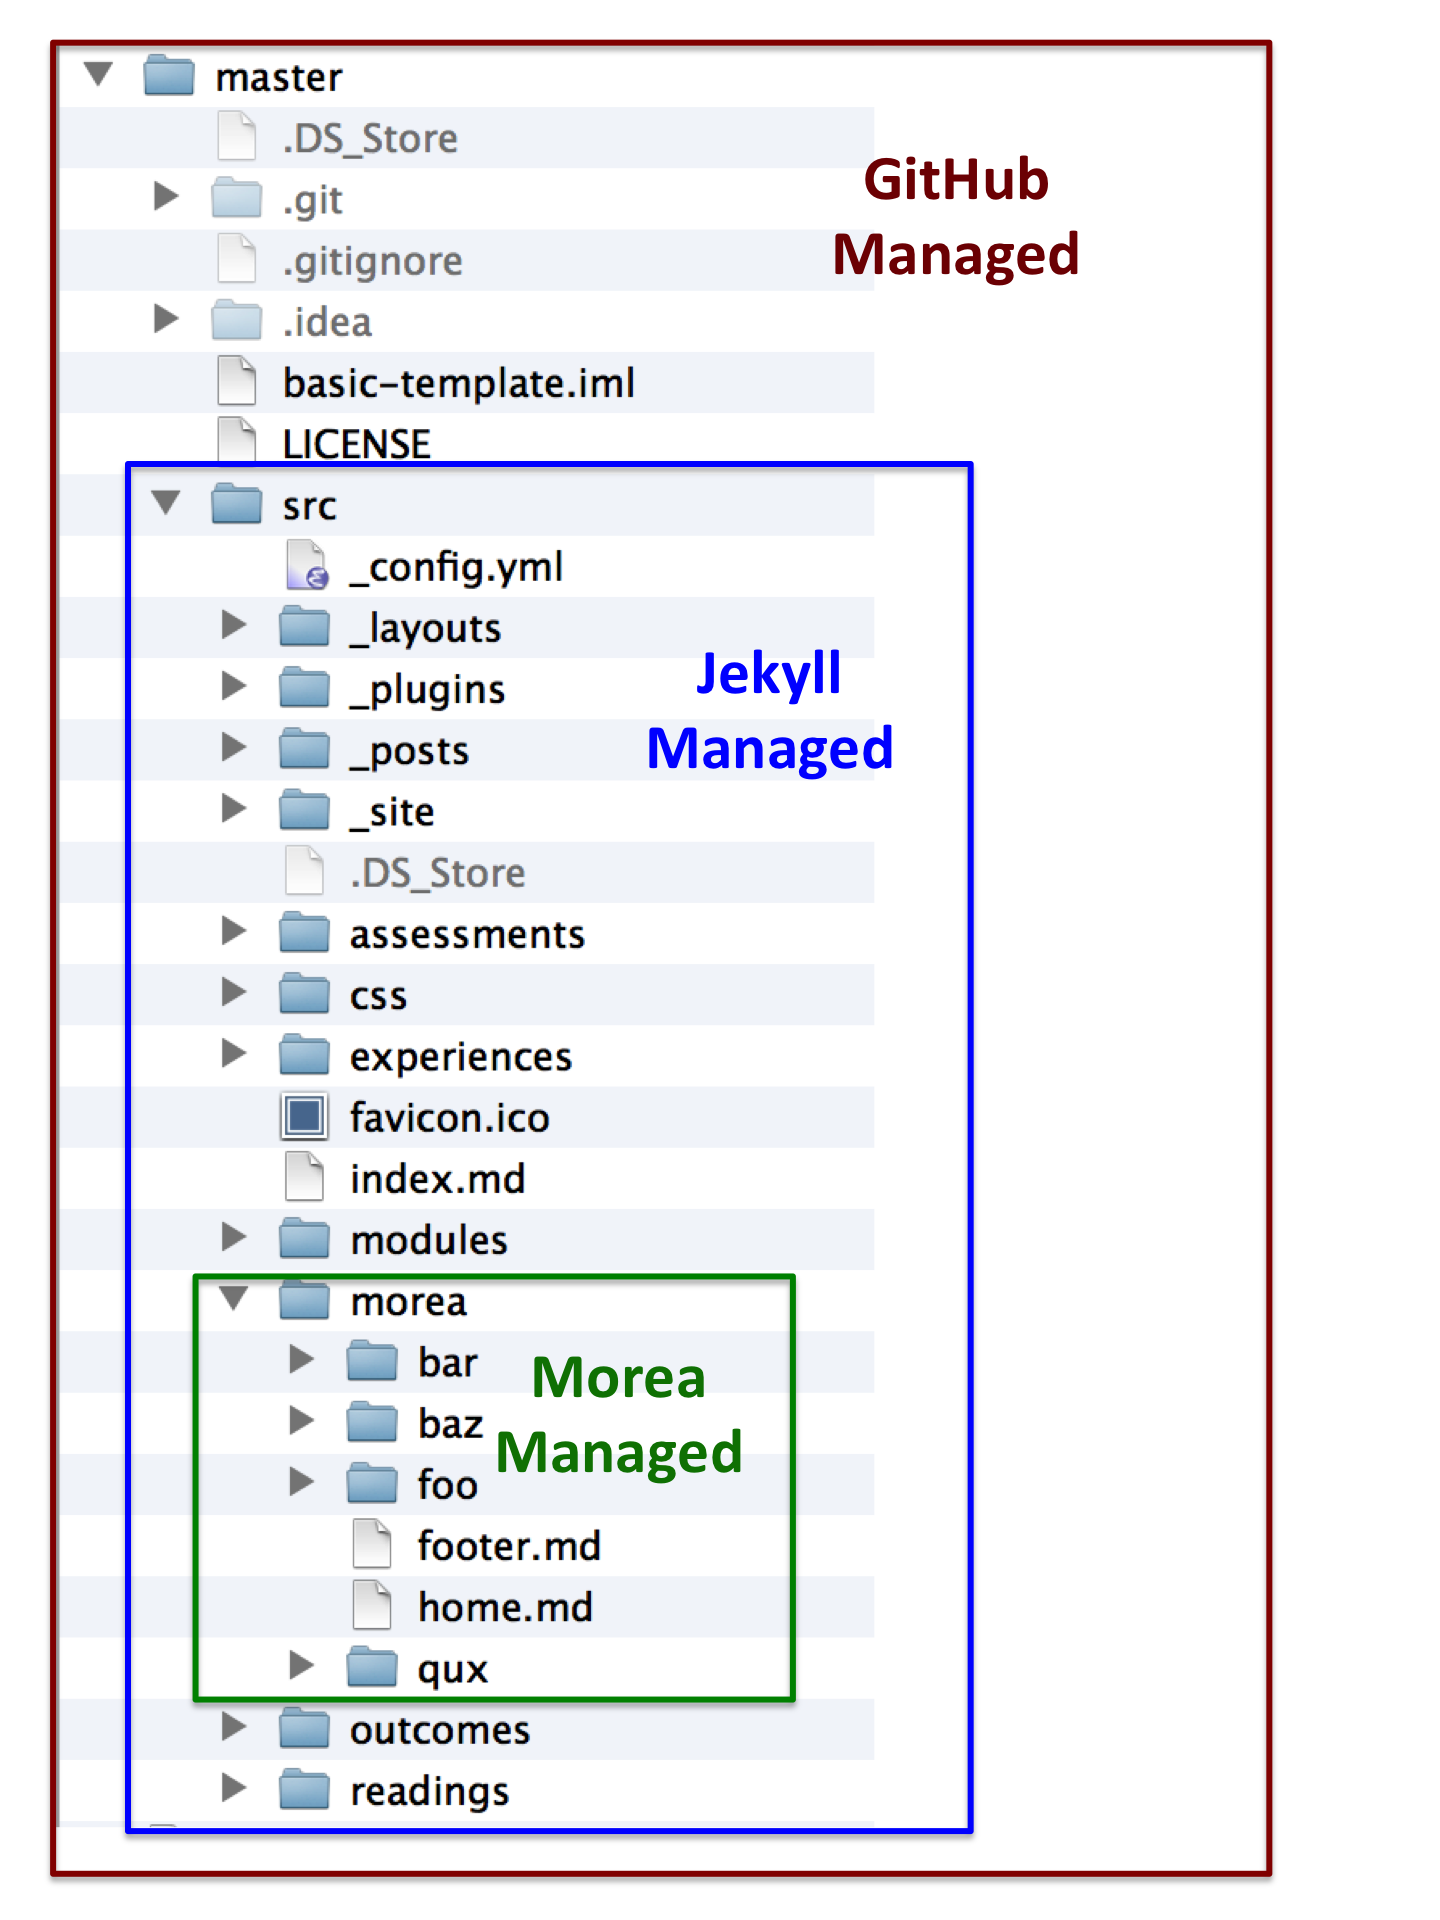
This graphic shows that a Morea site is organized like an onion with three layers, each "managed" by a different combination of tools.
Morea managed. In the center is the "Morea layer", which consists of all the files in the morea/ directory. It is here where you define the modules, outcomes, readings, experiences, and assessments for your course. There is a Morea plugin to Jekyll that looks for the contents of this directory and parses all the files inside to create the Modules, Outcomes, Readings, Experiences, and Assessments pages.
Jekyll managed. However, Morea is also just a Jekyll static website which builds a site based upon the contents of the src/ directory. As a result, you can customize your site by making any valid Jekyll enhancements in this directory.
GitHub managed. If we go up one more level of abstraction, your Morea site is just a GitHub-managed repository. The outermost level, above the src/ directory, contains files and directories that are not touched by Jekyll but are still part of your repository. You can put files or directories here that you do not want to be processed by Jekyll but that you wish to be associated with the course.
Up to now in this User Guide, we've focused almost exclusively on the contents of the morea/ directory. In this section, we'll now start making enhancements outside this directory in order to leverage additional capabilities of Jekyll and GitHub.
Add a menu item
One of the most simple enhancements you can make to a basic Morea site is to add a new link to the navbar. To accomplish this, simply edit the navbar definition code found in your _layouts/default.html file. For example, here is a simplified version of the navbar code within the core.html file:
    <div class="collapse navbar-collapse" id="navbarResponsive">
      <ul class="navbar-nav">
        <li class="nav-item"><a class="nav-link" href="{{ site.baseurl }}/prerequisites/">Prerequisites</a></li>
        <li class="nav-item"><a class="nav-link" href="{{ site.baseurl }}/modules/">Modules</a></li>
        <li class="nav-item"><a class="nav-link" href="{{ site.baseurl }}/outcomes/">Outcomes</a></li>
        <li class="nav-item"><a class="nav-link" href="{{ site.baseurl }}/readings/">Readings</a></li>
        <li class="nav-item"><a class="nav-link" href="{{ site.baseurl }}/experiences/">Experiences</a></li>
        <li class="nav-item"><a class="nav-link" href="{{ site.baseurl }}/assessments/">Assessments</a></li>
        <li class="nav-item"><a class="nav-link" href="{{ site.baseurl }}/schedule/">Schedule</a></li>
      </ul>
    </div>
  </div>
Essentially, you just add a new <li> tag containing your link.
An equally easy enhancement is a dropdown menu containing a list of links. Learn more about this syntax using the Bootstrap dropdown menu documentation.